Home » Articles posted by Anika Ayyar
Author Archives: Anika Ayyar
TechTips: Resampling and Changing Pixel Dimensions in Photoshop
 Changing an image’s dimensions affects its onscreen size and its printed image quality.
How can you change the dimensions of an image?
Follow the steps below to learn how to properly adjust the size of an image using Adobe Photoshop.
- Choose Image > Image Size.
- Select “Constrain Proportions” to maintain the ratio of pixel with do pixel height. Selecting this option will automatically update either the width or the height when the other is changed.
- Enter values for Width and Height under “Pixel Dimensions” (to enter values as percentages of the current dimensions, choose “Percent” as the unit of measurement. The new file size of the image will be at the top of the “Image Size” dialog box. The old file size will be in parentheses.
- Select the “Resample Image” option, and choose an interpolation method (read below). If the image has layers with styles applied to them, select “Scale Styles” to scale the effects in the resized image. You must select “Constrain Proportions” in order to use this option.
- Click “OK” when you finish setting the options.
What Resampling method should I use?
Resampling refers to the process of changing the amount of image data when you change either the pixel dimensions or the resolution of an image.
“Downsampling” means decreasing the number of pixels, or deleting information from the image. “Upsampling” means increasing the number of pixels, or adding pixels to the image.
In order to do this using Photoshop, you must first specify an “interpolation”, or method for determining how pixels are added or deleted.

Here are the various methods of interpolation:
A. Nearest Neighbor
- Fast, but not very precise
- Replicates pixels in an image.
- Preserves hard edges and produces a smaller file, but can produce jagged effects
TechTips: Using the Liquify Filter in Photoshop
One useful feature for editing images in Photoshop is the Liquify Filter, which can be used to move and distort pixels while maintaining original image quality. The liquify feature has many different tools, such as push, pull, rotate, reflect, pucker and bloat.
This post will cover five popular features of the Liquify Filter – Forward Warp, Twirl, Pucker and Bloat, Push, and Mirror.
In order to use the liquify filter on an image:
- Upload the desired image in Photoshop
- Access the liquify filter by clicking Filter->Liquify
- Familiarize yourself with the different aspects of the filter. On the left side of the screen, there will be a toolbar with all the tools, and on the right side of the screen, there will be an options panel, with different settings for each tool. You can specify the settings for the active tool using this panel.
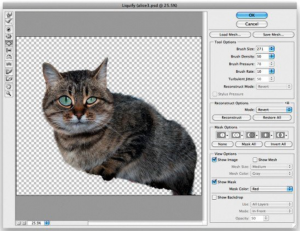
Tool 1: Forward Warp
- The forward warp tool allows you to pull pixels of an image forward as you drag your mouse. The amount of pixels that are dragged can be controlled using the brush size option in the right panel.

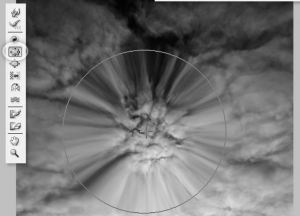
Tool 2: Twirl
- The twirl tool allows you to rotate pixels clockwise as you click or drag. If you want to move counterclockwise, press the Option (Alt) key while you are clicking. To control how quickly the twirling occurs, change the brush rate setting in the right panel.

Tool 3: Pucker and Bloat
- The pucker tool allows you to pull pixels towards the center of the brush area when you click. This tool is useful for creating an inflated effect.
- The bloat tool allows you to pull pixels away from the center of the brush area when you click. This tool is useful for creating a deflated effect.

Tool 4: Push
- The push tool allows you to move pixels left or right, when you drag the mouse up or down respectively.

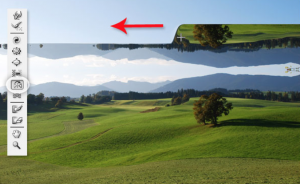
Tool 5: Mirror
- The mirror tool allows you to add a mirror effect to an image by duplicating pixels perpendicular to the direction of the stroke. To create a vertical mirror reflection, drag the mouse from left to right (or right to left). To create a horizontal mirror reflection, drag the mouse from top to bottom (or bottom to top).
—
Learn more about Duke’s Enterprise Term License Agreement with Adobe: http://sites.duke.edu/software/2015/11/06/adobe-creative-cloud-and-acrobat-pro-dc-licensing-now-available/
Adobe software can also be accessed in the Multimedia Project Studio (006 Bostock Library).
TechTips: How students can download Adobe Creative Cloud for free
Duke Software Licensing recently announced that Duke has entered into an Enterprise Term License Agreement with Adobe, Inc. Read full details here. As part of this agreement, students can access Adobe software free of cost! Learn how by following the step-by-step directions below.
1. Go to Adobe.com.
2. Click the sign in button (top right hand corner of the site) and an Adobe ID Sign in page will open.
3. Select “Sign In with an Enterprise ID,” as shown below.

4. Once you are redirected to the Enterprise ID Sign in page, enter duke.edu into the “email address or domain name” box. Then, hit enter. Do not type in any password at this point.
5. Click “Sign In” to be directed to the Duke Web Authentication page. Enter your Duke NetID and password, and click “enter”. This will redirect you to your Adobe Account.

6. In order to download various Creative Cloud apps to your desktop, click on “Desktop Apps” in the left middle of the black box on the screen, and you will be redirected to the page below.
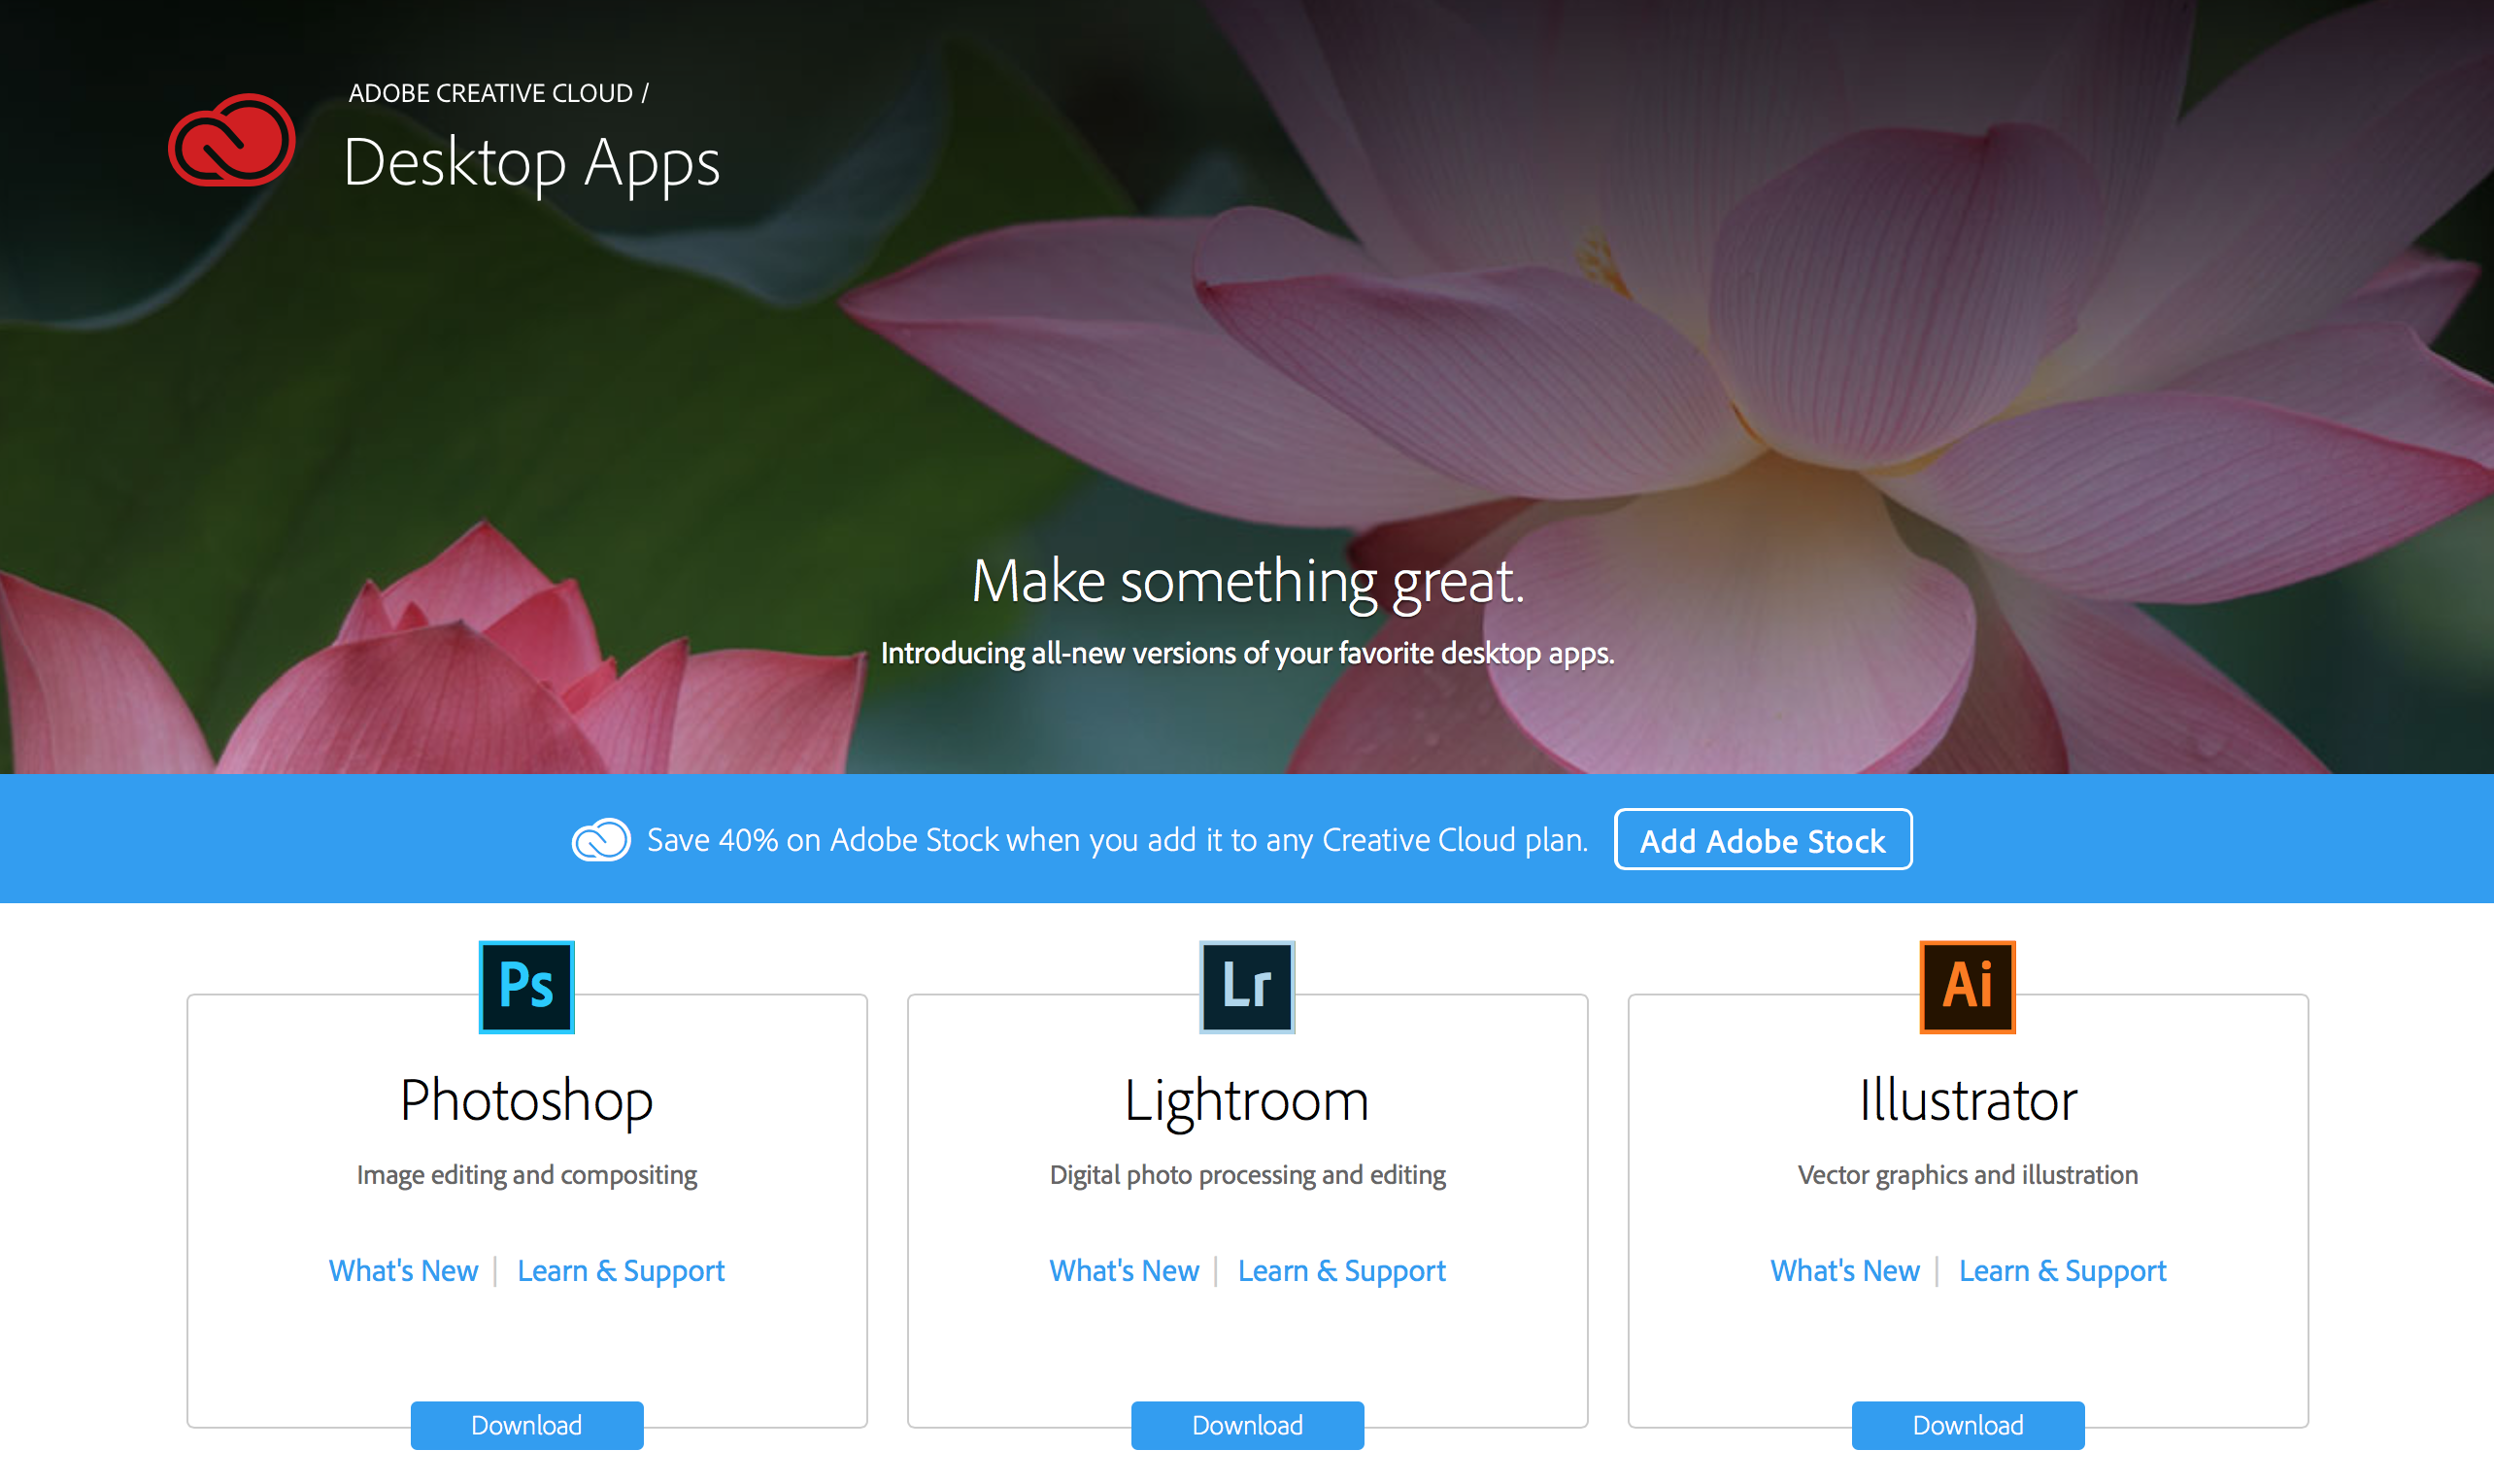
7, To download any of the available Creative Cloud desktop apps, click on the blue “download” button at the bottom of the specific app you want. The desktop download will begin, and you will be notified when your app is ready to use.
Need help? Contact the OIT Service Desk.
—-
TechTips: Print on the go with ePrint Mobile
Duke OIT recently launched a new feature that allows the Duke Community to print to Duke’s public printers by sending an email from your mobile device. Follow the directions below or go to https://oit.duke.edu/comp-print/printing/ePrintMobile.php to get started. This is great for times when you need to print on the go!
To Send a Print Job via Email:
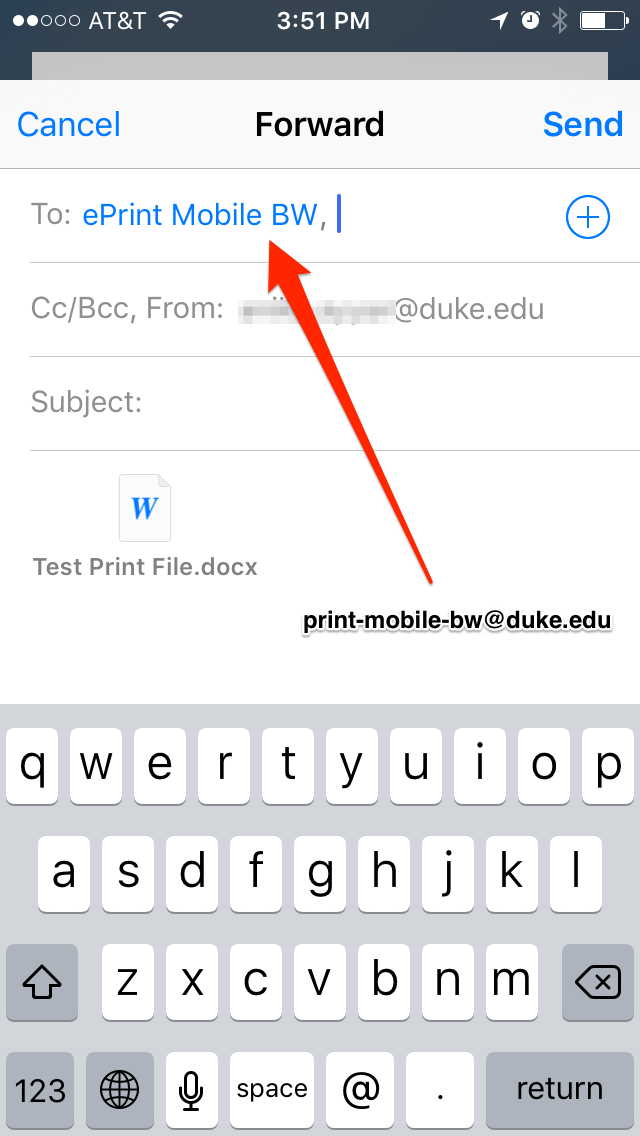
1. Compose a new email with the file you need to print included as an attachment. You will also have the option to print the body of the email if you choose. NOTE: The maximum size of each attachment is 10MB, each message is limited to 10 attachments, and each user can send a maximum of 100 emails per day.
2. Send your email to print-mobile-bw@duke.edu for BLACK AND WHITE jobs, or to print-mobile-clr@duke.edu for COLOR jobs.
3. You will receive an email confirmation once your job is ready to be printed.
TechTips: lynda.com View Offline Feature
lynda.com recently announced a new feature that allows individuals to download videos onto their computer or mobile devices (both Android and iOS) to allow you to view tutorials when you are not connected to the Internet. This ‘View Offline’ feature is available for Duke users through Duke’s lynda.com account and is especially useful for those who may have long commutes or times where you have poor or no internet connection (e.g. in the airport or traveling). Now you can really use lynda.com anywhere, anytime!
Follow the steps below or visit http://www.lynda.com/downloadfallback to learn how.
To access the View Offline feature:
- Download the lynda Desktop App (http://www.lynda.com/apps/desktop-app) NOTE: You will need Administrative access to your computer or device to install this app.
- Launch the App and log in, while still connected to the internet. NOTE: Duke Users need to sign in via Duke Shibboleth to have full access to the library.


Once you have the App installed:
- Locate a course you want to download in the Duke lynda.com online training library, click the View Offline button.
- The video will begin downloading and will be ready to watch at any time (more…)