
AutoFilling Large Numbering Series (without manually dragging the AutoFill handle)
You may well be aware of an excellent feature and technique in Excel called AutoFill (covered in the Excel Level 1 course). The traditional method is that you type the first number in the series, then use the AutoFill handle to drag down to whatever ending number you desire. While this method is okay for a small series, what happens if you need to number several rows? The manual dragging method is a cumbersome and quite tedious.
Fortunately, Excel provides an easier method for such a task. You can use the Fill Series dialog box to enter the sequential number series (aka Linear series), and let Excel fill the row numbers. The example below illustrates only 20 numbers, but it can easily perform a larger series like in the hundreds or thousands of rows.
NOTE: Steps 1-5 in the illustration are to be performed. Step 6 is the final result.
Steps to Perform:
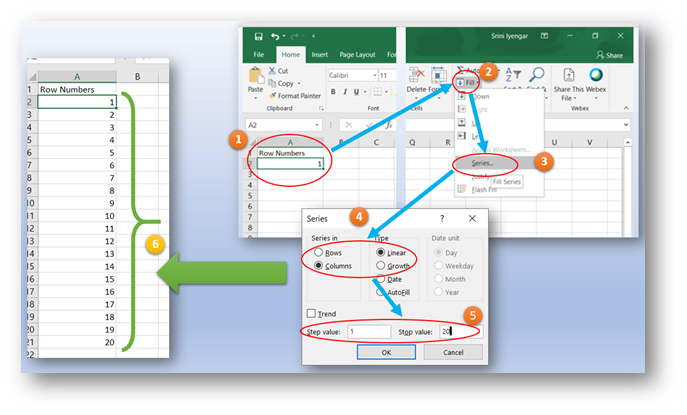
- Enter a header for the column, like Row Number (cell A1 in the illustration)
- Enter the first number and press Enter, but Select the cell again (cell A2 in the illustration)
- In the Editing group on the Ribbon, click on the Fill drop down
- Select the Series option from the Fill drop down menu
- In the Series dialog box, select Columns radio button for series in, and leave the selection as Linear
- Enter the Ending number in the sequence for the AutoFill (the illustration shows 20 as the ending number, but you can enter a higher ending number)
- Click OK (Excel now has entered all the row numbers from 1 to the Ending Number).
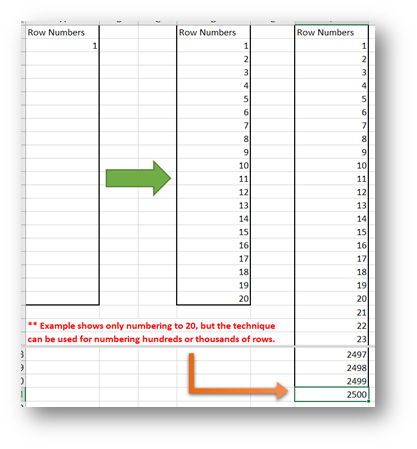
NOTE: The illustration shows AutoFilling for 2500 rows.
Leave a Reply