
Checking if Git is Installed
First, you will need to download git on your local machine or whatever device your using. Some operating systems come pre-packaged with git already installed due to it’s widespread use. To check if you already have git installed, you will need to open a terminal window.
On Linux this is generally straightforward, but if you’re struggling to find how to open the terminal on MacOS open your finder and got to “Applications” and find a folder called “Utilities”. Within that folder should be an app called “Terminal”.
Once you have the terminal open, type this at the prompt:
which git
If you already have git installed, you will get an output like the following:
/usr/bin/git
In which case, you can skip the next step. If the command returns nothing, this means you don’t have git installed on your device.
Installing Git
How you install git will depend on your operating system. You can look at the installation instructions for your OS on this page.
For MacOS, you will need to install git through Xcode. Downloading Xcode from the App Store should automatically install git for you. On Linux, you can install git easily using the advanced package tool:
sudo apt-get updatesudo apt-get install git
Once git is installed, you can move on to setting up your Github account.
Setting up Github
Go to Github’s offical website and hit “Sign up” to create your account. Once you’ve done that, you will want to setup SSH on your account so you can safely upload and clone your projects from the cloud.
The following steps are based of f of Github’s official documentation on how to setup SSH. To setup SSH, you will first need to check if you already have an ssh key on your device. To do this, open the termial and type the following into the command prompt:
ls -al ~/.ssh
You will be checking for a public ssh file such as:
id_rsa.pubid_ecdsa.pubid_ed25519.pub
If you don’t have a file that looks like this, that means you don’t have a public ssh key generated on your device. If you do have one, then skip the ssh key generating step move straight to adding your existing key to Github.
To generate a new ssh key type the following into the terminal:
ssh-keygen -t ed25519 -C "your_email@example.com"
and replace the “your_email@example.com” with the email you used to setup your Github account. You will be prompted to enter a file location for the key and a password for accessing it. Hitting enter for both of these will save the file in the default location (~/.ssh) without a password. You can verify the key was generated by running the same command from before.
ls -al ~/.ssh
Now you can add the key to Github. To do that you will need to copy the contents of the public key file you just generated:
pbcopy < ~/.ssh/id_ed25519.pub
This command will copy the contents to your clipboard. You will then need to go to your Github account and navigate to the SSH settings.
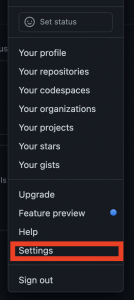
From settings, you will need to navigate to “SSH and GPG keys”
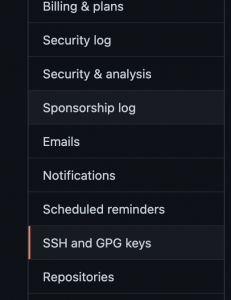
From here, click on the “New SSH key” in the top right corner. Then give a name to your key in the name text box and paste the contents you copied earlier into the larger content box. Hit “Add SSH key” to add the key to your account. You are now ready to start using git on your projects!