
StoreBOT, also known as LeArm, is the robot that we will use for this project. Previous work on this robot can be found here.
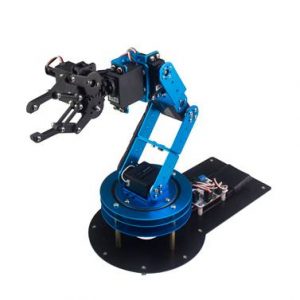
storeBOT(LeArm)
You can learn how to assemble the robot by watching the video below. This robot is excellent for this project because it has a 6DOF giving it a wide range of movement. Most importantly, there is movement in the wrist, which allows for the robot to adjust the pitch and angle of the end effector. We need this angle to be adjustable to determine the forces at different insertion angles.
This section will focus on learning the basics of controlling the robot through the Bluetooth app as well as the PC control center. This information can be found here.
The 3D printer being used for this project is called an Ender 3 3D printer. This is a simple fused deposition modeling printer that is easy to set up and use. This printer is able to use PLA, PETG, and ABS filament. For more information about this printer click here.
In order to create a utilize the wrist mobility of the storeBOT, we must detach the two motors from the top of the robot so that it will look like this:
-

- Modified storeBOT
In this space between the two prongs and the base, we can add a small linear actuator for the insertion mechanism. But, we must also design a unit for the needle to sit in and attach it to the actuator so it moves parallel to the linear movement. Here is the design:
-

- Ultimaker Cura rendering
-

- 3D printed model
-

- Needle and sensor inside the holder
The needle will rest in the middle of this unit with a force sensor connected to the back so that as the needle pushes back, it will press against the sensor and give feedback.
Note: a syringe needle was used instead of a traditional IV catheter for a more secure placement inside of the holder.