Project Overview
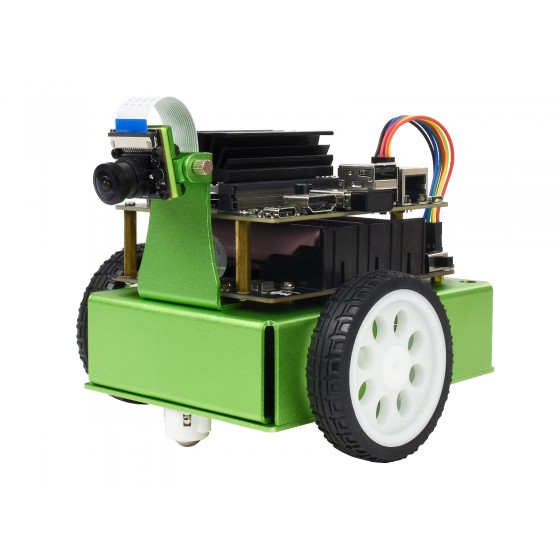
This subproject tends to use JetBot 2GB AI Kit to implement automatic collision avoidance using only computer vision.
Automatic Collision Avoidance
For anyone who wants to do collision avoidance with jetson nano robot using computer vision can follow the detailed instructions below.
You need to have the Waveshare JetBot 2GB AI Kit AI Robot Based on Jetson Nano 2GB Developer Kit, you can find all the hardwares you need above.
Here is the instruction of assembly video.
The Jetbot in this video uses a different WiFi connection hardware, which he uses WIFI antenna but we will be using WiFi Dongle instead.
Step 1 – Flash JetBot image onto SD card
- Download the the expandable JetBot SD card image jetbot-043_nano-2gb-jp45.zip.
- Connect the SD card to the PC via card reader.
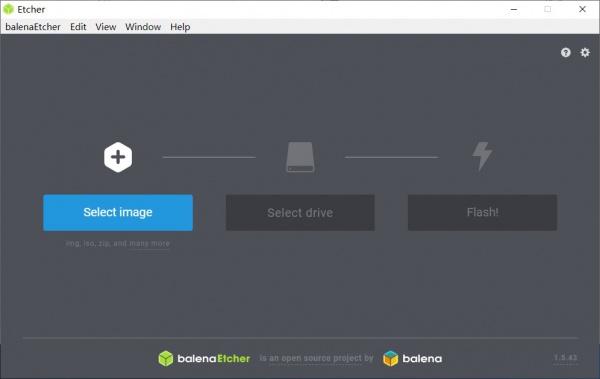
- Using Etcher, select the jetbot-043_nano-2gb-jp45.zip image and flash it onto the SD card.

Step 2 – Boot Jetson Nano
Insert the SD card into your Jetson Nano (the micro SD card slot is located under the module).
- Connect the monitor, keyboard, and mouse to the Nano.
- Power on the Jetson Nano by connecting the micro USB charger to the micro USB port.
STEP 3 – Connect Jetbot to WIFI
- Log in using the user: jetbot and password: jetbot.
- Connect to a WiFi network using the Ubuntu desktop GUI.
- In order to reduce memory, the new version of the image has disabled the graphical interface, you need to use the command line to connect to WiFi.
sudo nmcli device wifi connect <SSID> password <PASSWORD>
sTEP 4 – Access JetBot via Web
- Shut down JetBot by the command line.
sudo shutdown now
- Start Jetson nano again. After booting, Ubuntu will automatically connect WIFI, the IP address is also displayed on OLED.
- Navigate to http://<jetbot_ip_address>:8888 from your desktop’s web browser.
- Sign in using the password: jetbot.

When you are able to access jetbot using your own laptop through WiFi, download the code for data collection here. And upload the code by click the button in the red box shown in the figure blow.

The annotation in the code will tell you how to do the data collection.
HINTS
When you collect the data, please try to make the number of images in each classe is around the same, because if you do not, the prediction accuracy will be low due to unbanlanced data.
Do not over collect the data, less than 300 images for each class is enough. Otherwise, you will recieve runtime error when you train your model.
After you finished collecting the data and have your data zip file, download the code for training your deep learning model here.
Follow the annotation and you could be able to train your model.
HINTS
If you already have your data_cones folder exist, then do not run this line of code.

If you have runtime error when you are training your model, you can decrease the number of epochs of training the model. This is because the 2 GB Jetson Nano we use here has a very low memory.

After you have your model trained, you can download the code for moving the Jetbot here.
Follow the annotation, you will be able to move your Jetbot.
HINTS
Try adjusting parameters starting with low values, say forward speed start with 0.1 and Kp starts with 0.1. And then you can try to increase the forward speed and corresponding PID parameter settings.

Demonstration
The outcome demo of automatic collision avoidance in three different scenarios is shown below.
Note that all three videos are accelerated three times their original speed. This is because the moving speed of the robot is too low. Increasing the forward speed of the robot will decrease the probability of finding a perfect PID parameter settings.
Necessary Skill Sets
These are the skill sets that you need to obtain in order to accomplish the project.
- Linear algebra and probability theory for Machine Learning.
- Ubuntu and Jeston Nano setup.
- Python programming.
- Understanding of PID control.
- PID control application on Jetbot.
- Understanding of CNN for deep learning
- CNN implementation by Python using PyTorch.
- Using model of Alexnet.
- Integration with Utrasonic sensor
- Intergration with line tracking.
- Intergration with radar.
