Printer Assembly and Calibration
The following video gives a detailed demonstration in setting up your Creality Ender 3. (Files for print bed calibration are included in the video description).
Preparing the CAD File
Most CAD slicing software require the input file to be of STL format and converting your CAD file to STL from SolidWorks is simple. As shown in the screenshot below, save the file you wish to print using the drop-down button next to the save icon. Choose the save as option and save the file as an STL.
Once you hit the save button on the file explorer, the following window should appear:
Click yes to confirm saving of the STL file.
If the same procedure is done on an assembly file, then all of the contained components would be converted and saved. If you wish to only print one component from the assembly, open it in a separate window.
Slicing & Support
The slicing software used in this project is UltiMaker Cura. Details in setting up Cura for your printer platform can be explored here.
Once you finish setting up Cura, simply drag the saved STL file onto the Cura:
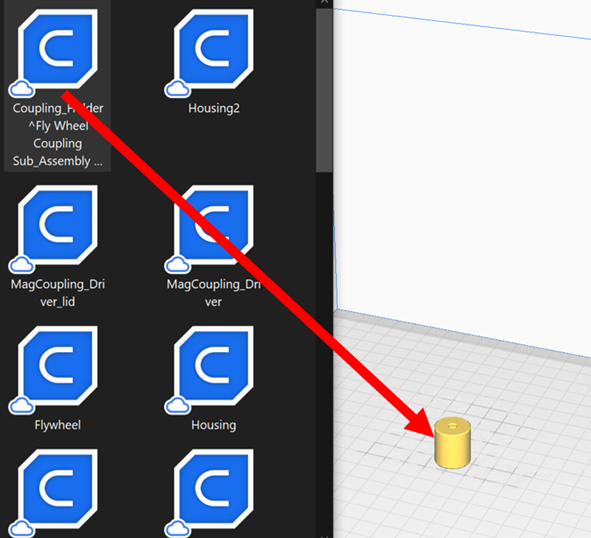
You can then hit the slice button to slice your model. When Cura finishes preparing your print, it will provide an estimated print time. Be mindful that the way your file is placed Cura would resemble its placement in the physical world while printing. Well thought placement can increase print robustness, efficiency, and save material.
A quick example can be shown below:
The two pictures shown are of the same print with the same infill/support setting. However, there is a two-hour difference in print time and 15g additional material needed for the second print orientation. This is a result of the additional support needed for the second orientation caused by the uneven bottom surface.
Infill Density and Patterns
For this project, most of the printed moving components used a infill density of 25%-30% with a gyroid pattern. The gyroid pattern allows components to be printed with less material while maintaining robustness. However, it is more difficult for the computer to generate the proper slice profile.
Read more about the gyroid infill pattern here.
For supports, a infill density of 5% is used with the concentric pattern. The low density allows the support to be easily peeled off from the finished print while the concentric pattern is well fitted for most moving components in the project, most of which have a cylindrical shape. Larger, stationary components, such as the housing used a lower print infill (20%) and the cubic pattern.
Start the Print
When you finish slicing your STL file, save the file on a removable drive. Cura will automatically convert the sliced STL file into a gcode file for the printer to read. Simply load the removable drive onto the printer and start the print.
Review the following video (@18:30) by Teaching Tech for specific procedures:
References
Numbered in order of appearance
[1] Teaching Tech. “Complete beginner’s guide to 3D printing – Assembly, tour, slicing, levelling and first prints.” Online video clip, YouTube, [Jan 2, 2020], https://www.youtube.com/watch?v=T-Z3GmM20JM
[2] “3D Printing.” MEMS Capstone Projects, Duke University, https://sites.duke.edu/memscapstone/3d-printing/
[3] “Cura Gyroid Infill: All You Need to Know.” All3DP, https://all3dp.com/2/cura-gyroid-infill/