
Multi-tenant-style VLAN support is now enabled in Switchboard, so in addition to dynamically configuring un-tagged routes, users can also request that Switchboard setup routes over specific VLANs. After the user request has been approved by the appropriate subnet/ip owners, the route is configured. This wraps up phase I of our VLAN support strategy.
How it works
A controller running the Ryu REST Router code can support VLAN tagged traffic, and on the surface this looks simple to support – just add the VLAN tag parameter to the end of the REST URL.
An example of a Ryu-REST command without a VLAN:
curl -X POST -d '{"gateway": "172.16.47.1", "destination": "172.16.8.2/32"}' http://ryu.oit.duke.edu:8080/router/0000000000000001
A similar command for VLAN 667 has 667 is appended to the end of the URL:
curl -X POST -d '{"gateway": "172.17.47.1", "destination": "172.17.8.2/32"}' http://ryu.oit.duke.edu:8080/router/0000000000000001/667
Clearly, the Ryu REST commands Switchboard issues to the controller don’t change much for VLANs.
But this is only the beginning. Switchboard allows users to request links and collect appropriate approvals for the request before configuring the SDN network. How does a users specify the VLAN they want? Who should approve the VLAN?
For now, Switchboard presents the user with a list of VLANs and text descriptions so users have something more to go on that the numeric VLAN id. For approvals, we assume that individuals authorized to approve links into a subnet or IP address are also capable of authorizing VLAN traffic into the subnet.
The net result is that if a user selects a VLAN for a link, this information will be carried with their request and displayed as appropriate – which means that essentially all Switchboard pages had to become VLAN aware.
In phase II of the VLAN support project, we will look at supporting VLAN tag flipping, so that users can ask the SDN switches to map VLAN tags, but for now, we presume that all VLAN traffic stays on the requests VLAN.
Creating a dev/test environment
For dev/test, I built a mininet config that has 3 switches, and two hosts connected to each switch. One of the two hosts on each switch is configured to be on the untagged network, and the other host is configured to be on VLAN 667.
There are some tricks to setting up mininet for VLAN support. Since the default mininet config does not include a VLAN tagged interface, we have to define new interfaces on the hosts we want on the VLAN, then assign IP addresses to the new interfaces, and mark the interfaces as UP. You can see this on hosts h1, h3, and h5 below:
py "Configuring network hosts"

py "remove mn auto-assigned network addresses"

h1 ip addr del 10.0.0.1/8 dev h1-eth0

h2 ip addr del 10.0.0.2/8 dev h2-eth0

h3 ip addr del 10.0.0.3/8 dev h3-eth0

h4 ip addr del 10.0.0.4/8 dev h4-eth0

h5 ip addr del 10.0.0.5/8 dev h5-eth0

h6 ip addr del 10.0.0.6/8 dev h6-eth0

py "add our official network addresses"

h2 ip addr add 172.16.96.16/25 dev h2-eth0

h4 ip addr add 172.16.8.67/26 dev h4-eth0

h6 ip addr add 172.16.8.3/26 dev h6-eth0

py "add VLAN links"

h1 ip link add link h1-eth0 name h1-eth0.667 type vlan id 667

h3 ip link add link h3-eth0 name h3-eth0.667 type vlan id 667

h5 ip link add link h5-eth0 name h5-eth0.667 type vlan id 667

py "add our official network addresses for VLAN"

h1 ip addr add 172.17.96.18/25 dev h1-eth0.667

h3 ip addr add 172.17.8.66/26 dev h3-eth0.667

h5 ip addr add 172.17.8.2/26 dev h5-eth0.667

py "mark the VLAN links as up"

h1 ip link set dev h1-eth0.667 up

h3 ip link set dev h3-eth0.667 up

h5 ip link set dev h5-eth0.667 up

py "add default routes to hosts"

h1 ip route add default via 172.17.96.120

h2 ip route add default via 172.16.96.120

h3 ip route add default via 172.17.8.75

h4 ip route add default via 172.16.8.75

h5 ip route add default via 172.17.8.15

h6 ip route add default via 172.16.8.15
The Switchboard initialization code for the three switches also changes a bit since we want to add VLAN capable links between the switches. The Switchboard code to initialize the switches now setup both a VLAN tagged and untagged interconnect network for the switches and for their host networks like this:
# host networks on switch 1 and 3

add_route_to_switch( "172.16.96.120/25", '0000000000000001', nil )

add_route_to_switch( "172.16.8.15/26", '0000000000000003', nil )

#

# VLAN host networks on switch 1 and 3

add_route_to_switch( "172.17.96.120/25", '0000000000000001', 667 )

add_route_to_switch( "172.17.8.15/26", '0000000000000003', 667 )

#

# routes that interconnect the switches

add_route_to_switch( "172.16.47.1/24", '0000000000000001', nil )

add_route_to_switch( "172.16.47.2/24", '0000000000000002', nil )

add_route_to_switch( "172.16.47.3/24", '0000000000000003', nil )

#

# VLAN routes that interconnect the switches

add_route_to_switch( "172.17.47.1/24", '0000000000000001', 667 )

add_route_to_switch( "172.17.47.2/24", '0000000000000002', 667 )

add_route_to_switch( "172.17.47.3/24", '0000000000000003', 667 )
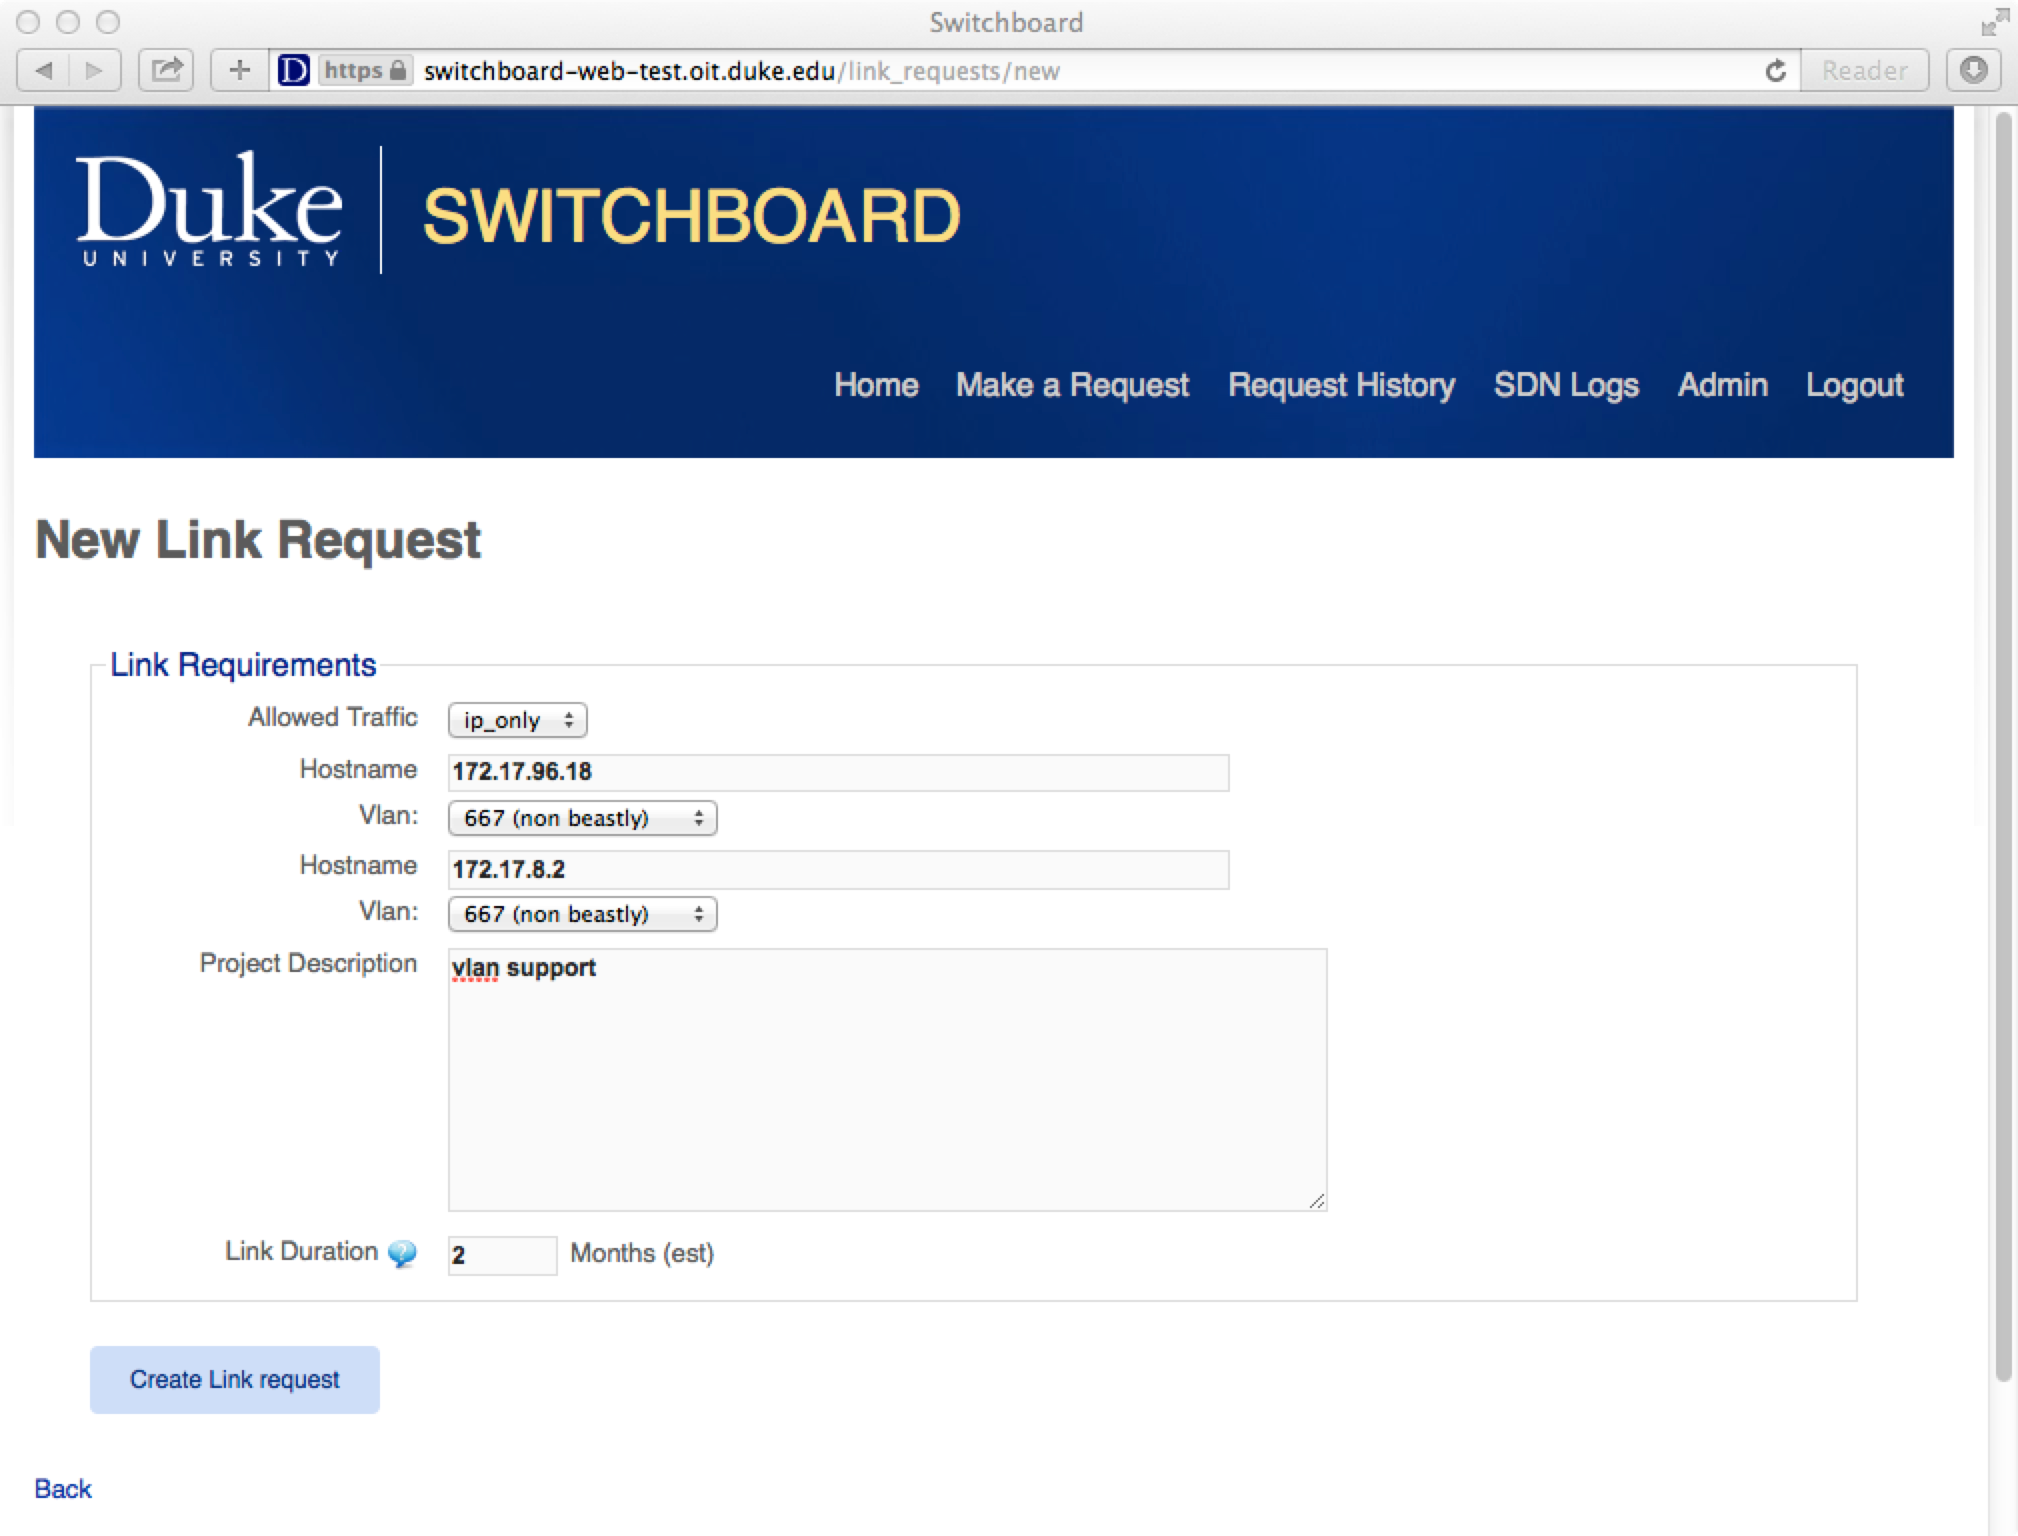
What does the user see?
The Switchboard link request form now include an option for selecting a VLAN. Note that the option has both the numeric tag and some descriptive text.
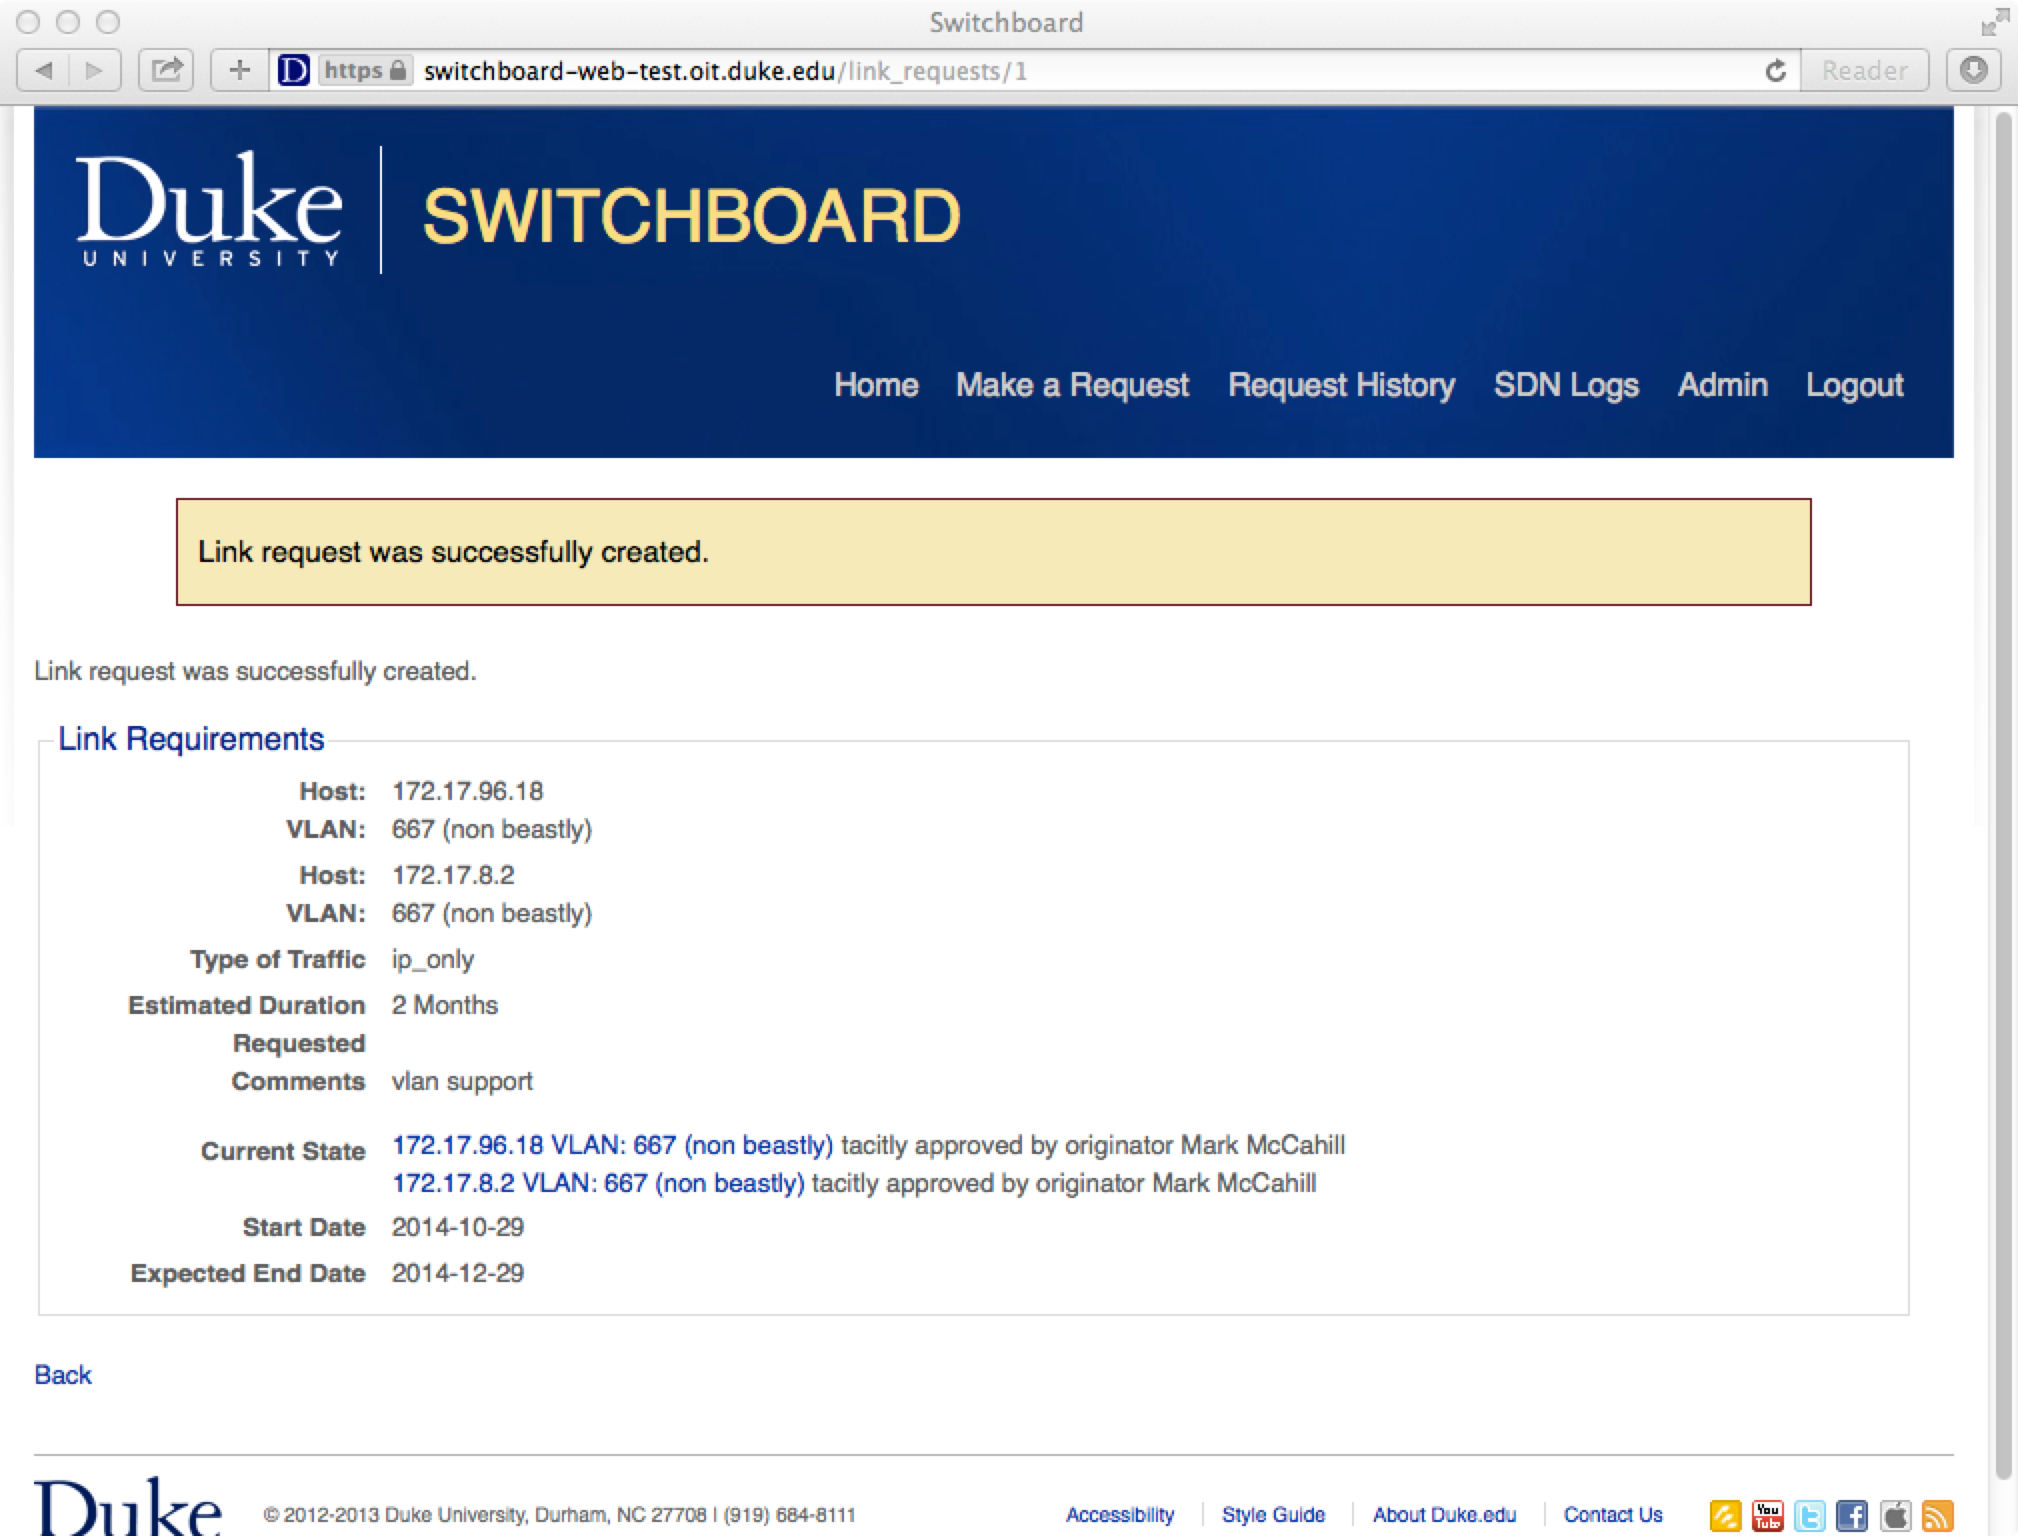
After a request is approved, an updated screen displays that request and VLAN.
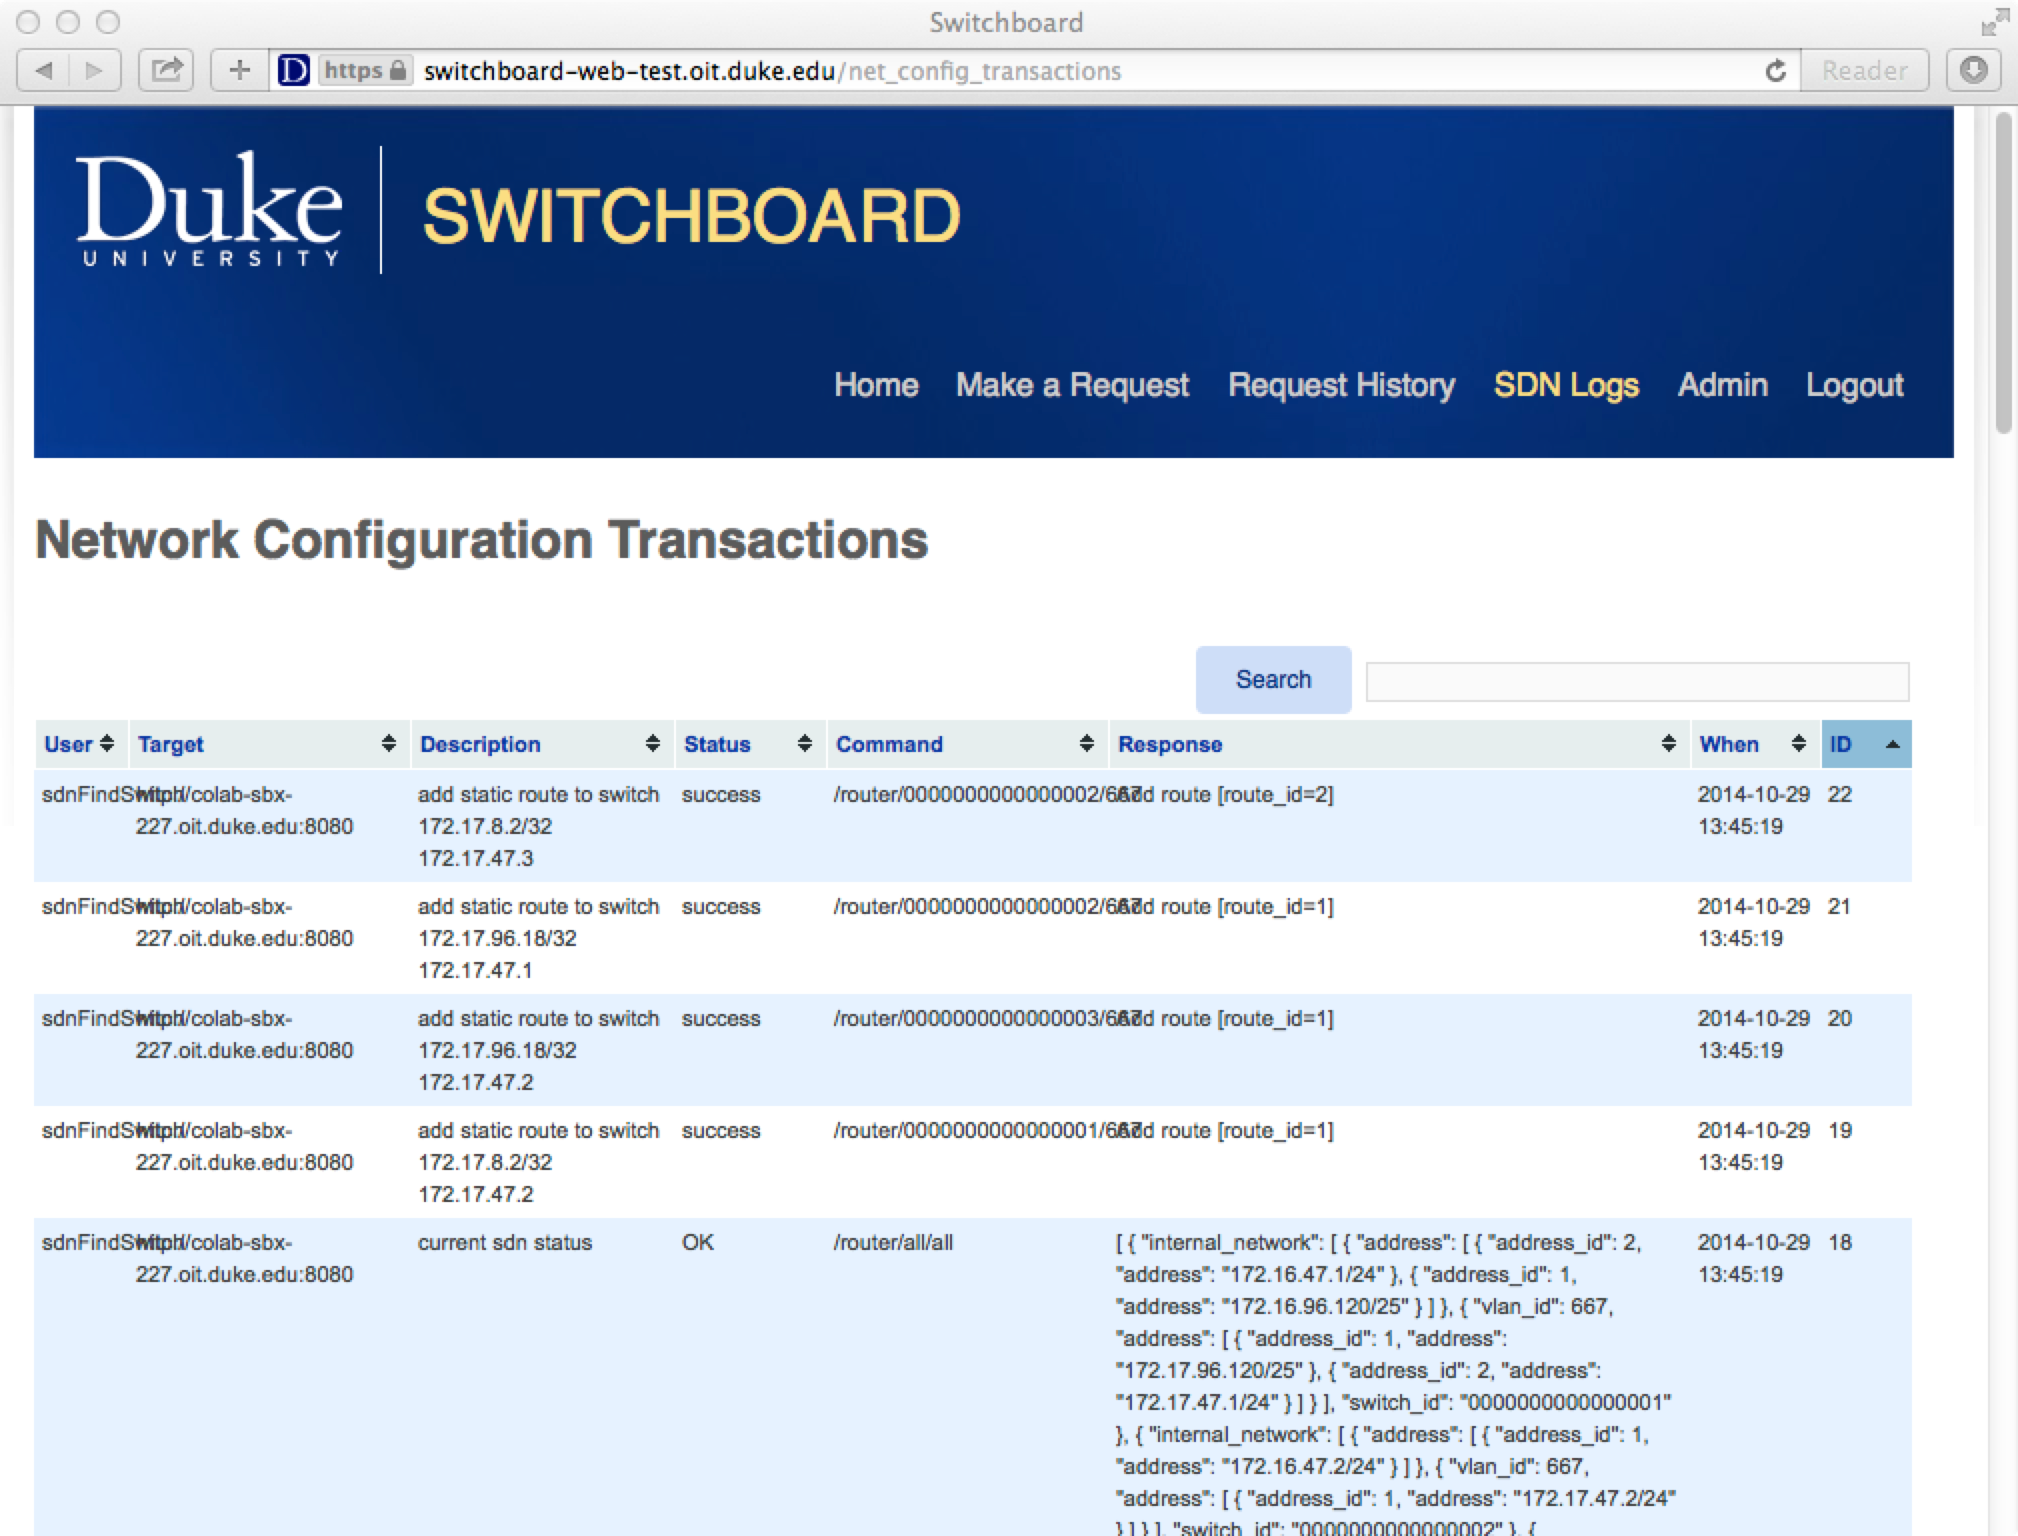
If we look at the SDN logs page in Switchboard, we can see the static routes that were configured to enable the VLAN link.
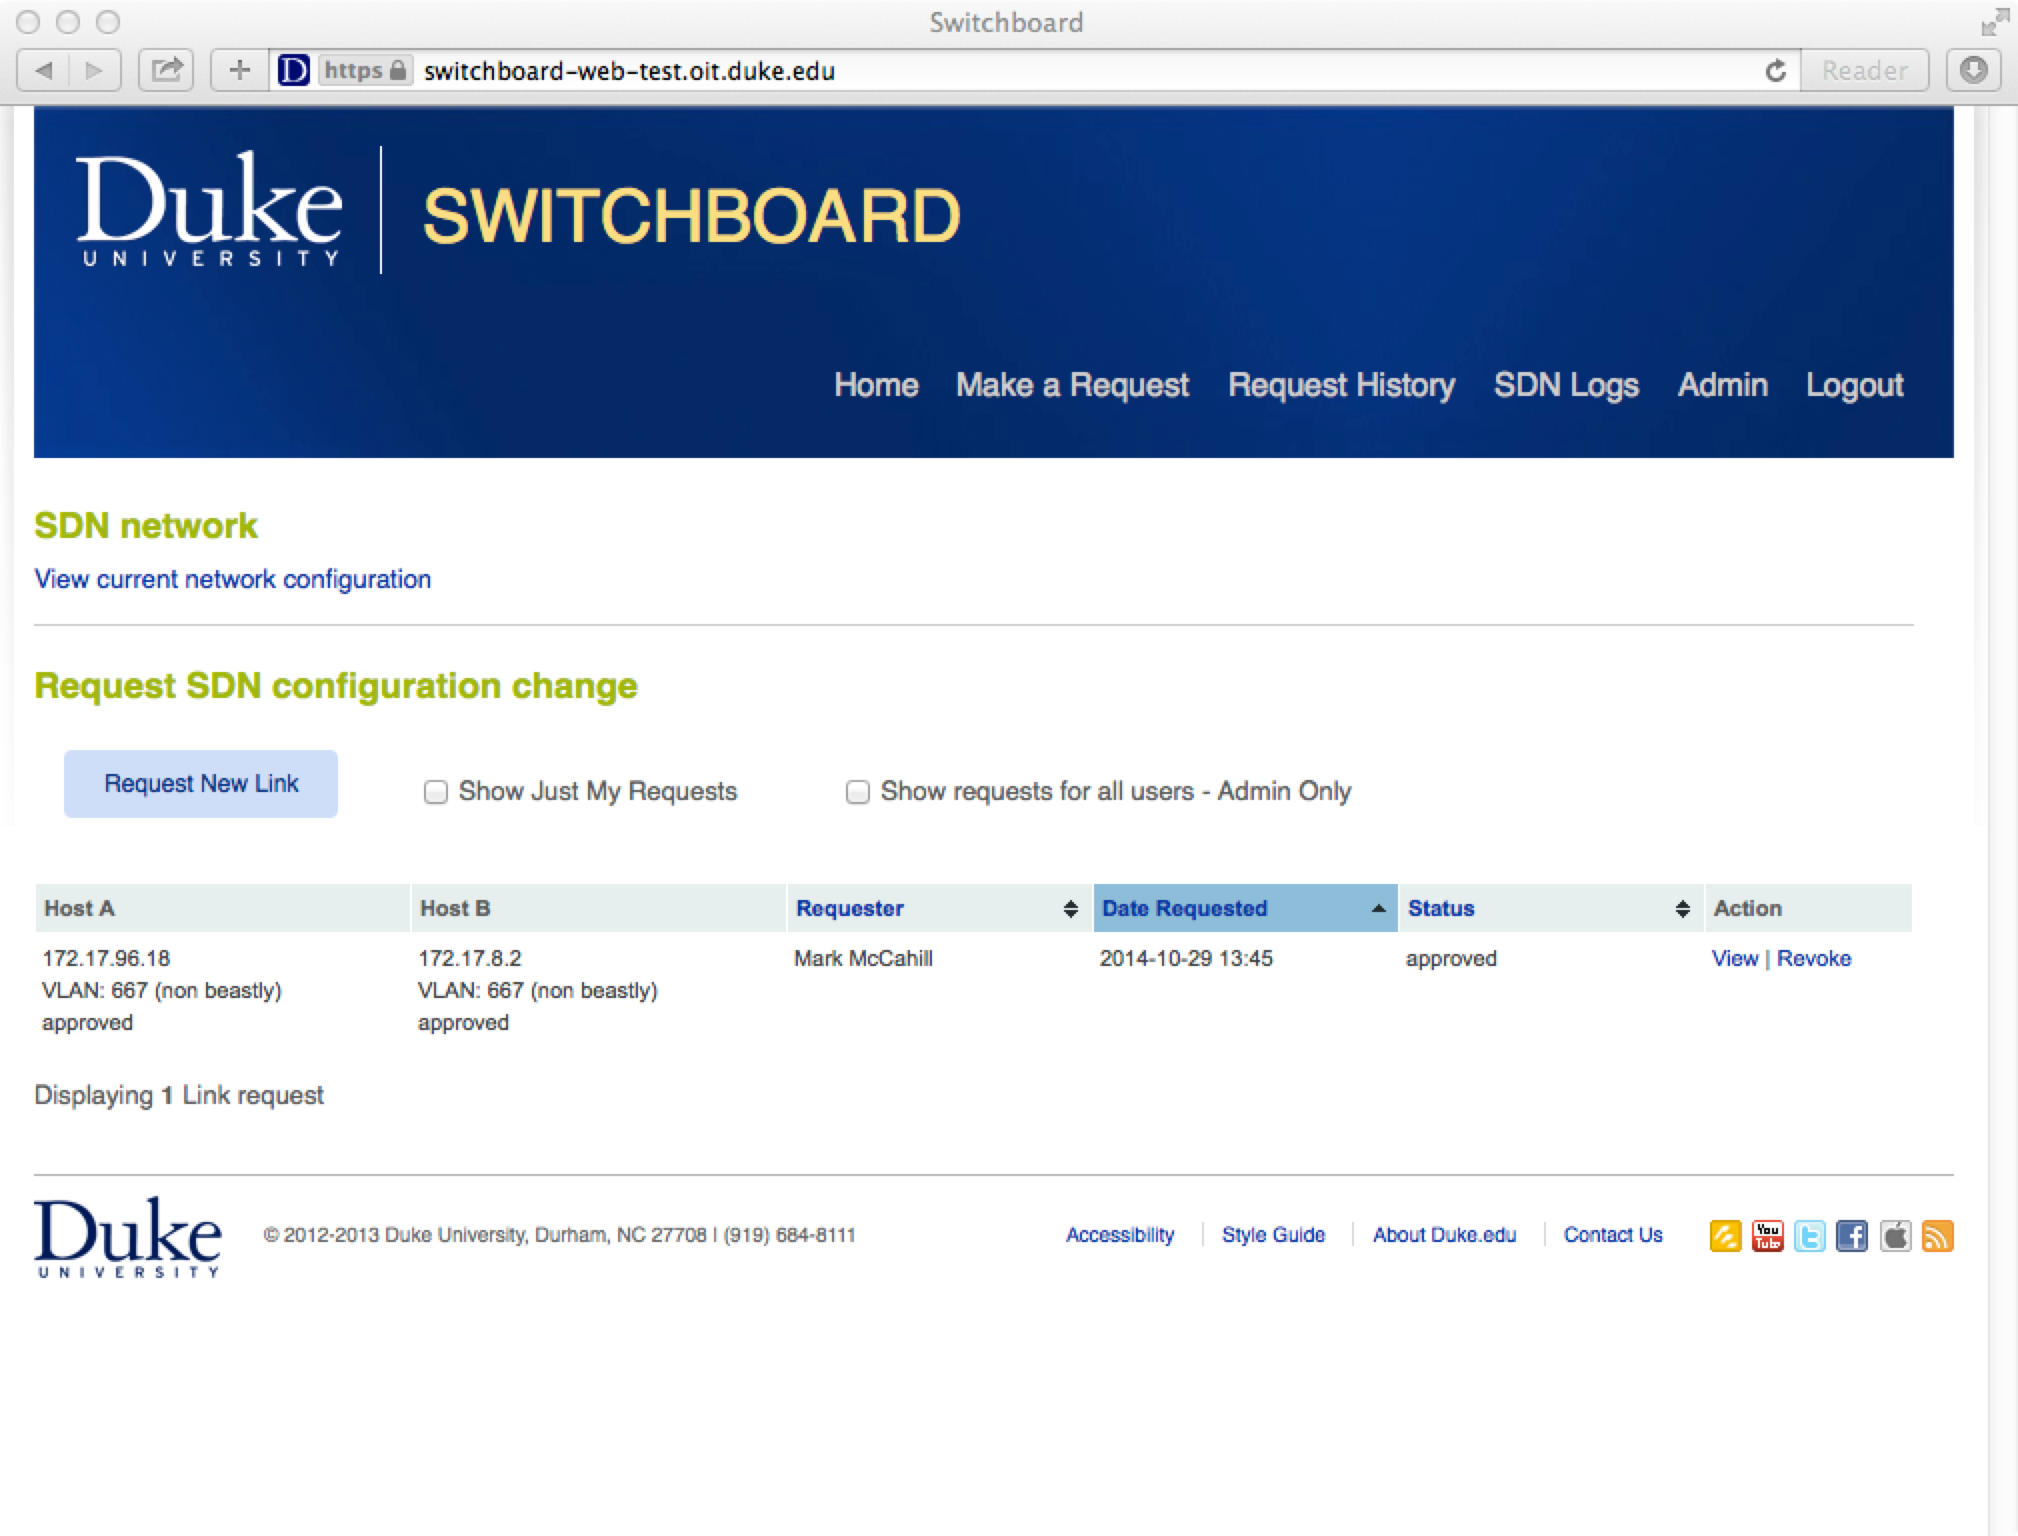
The user’s home page shows the active link they just requested.
Proving that the new link works
In mininet, issue the command
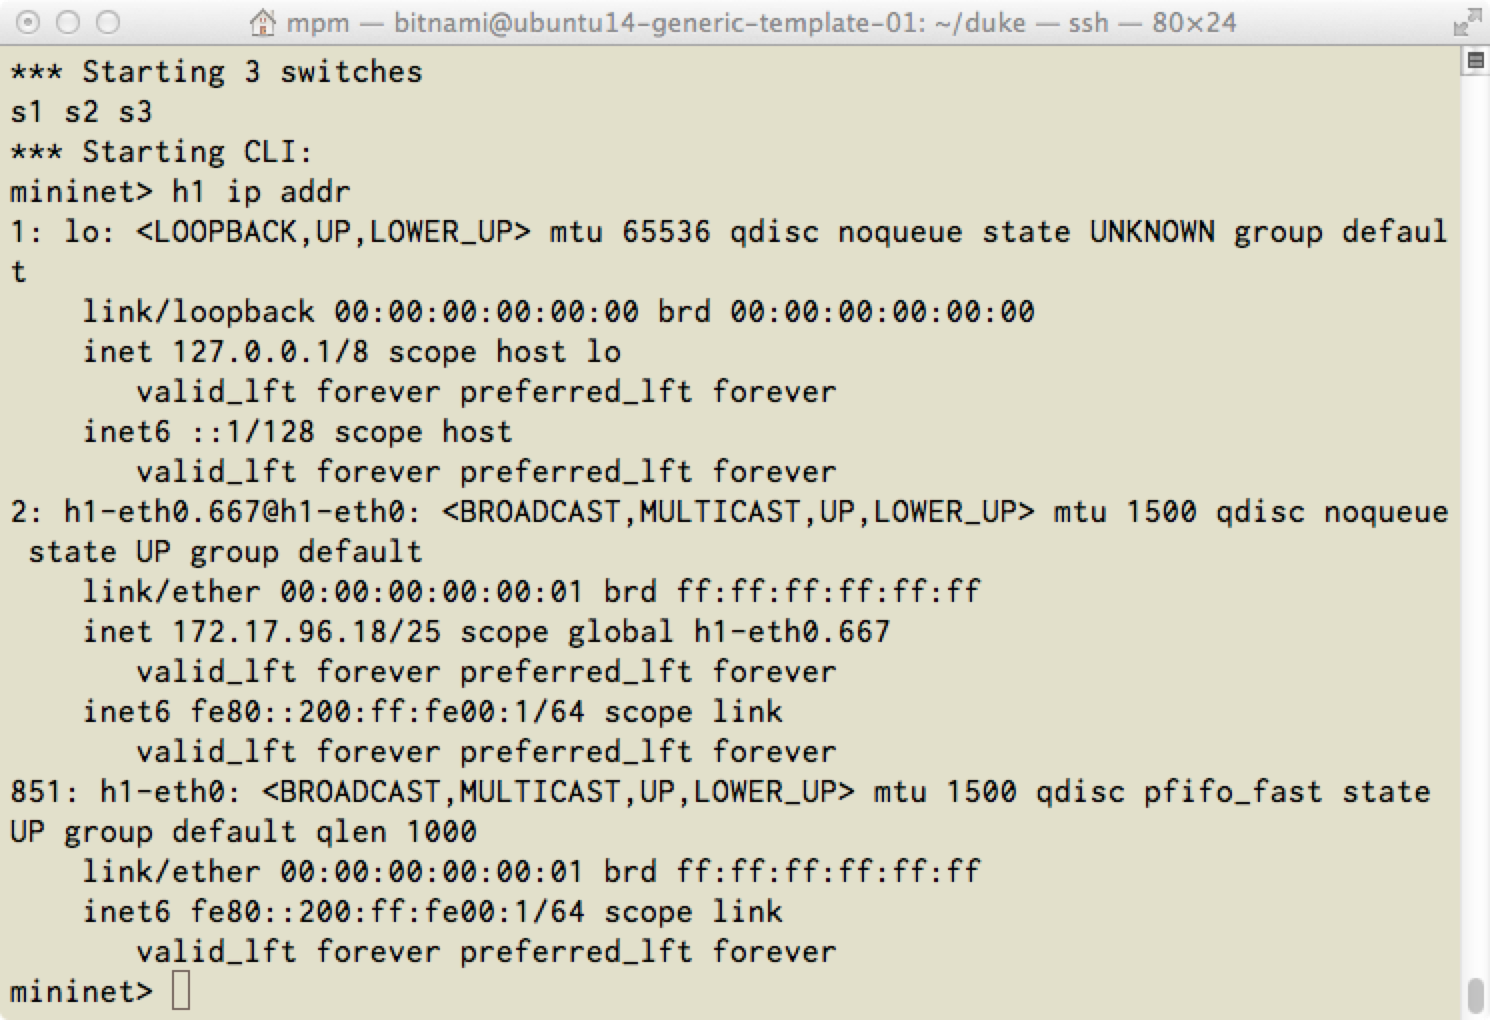
h1 ip addr
and see that the on h1 device h1-eth0.667 has IP address 172.17.96.18. This is the VLAN 667 network we configured in the mininet setup.
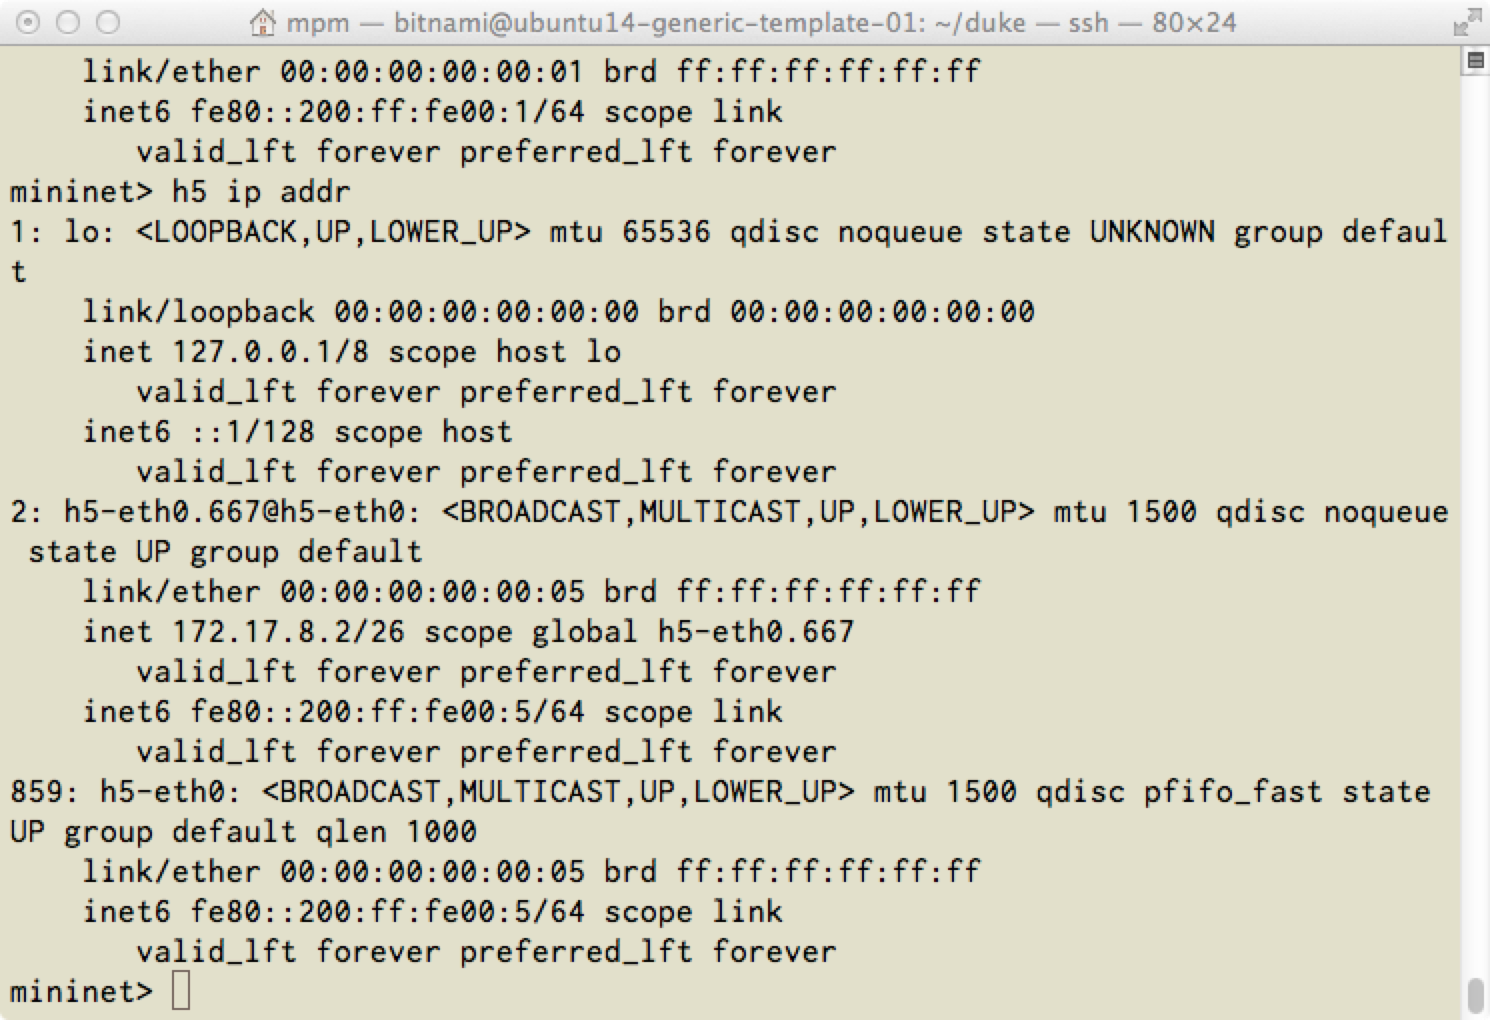
Similarly on host h5, we see that h5-eth0.667 has IP 172.17.8.2
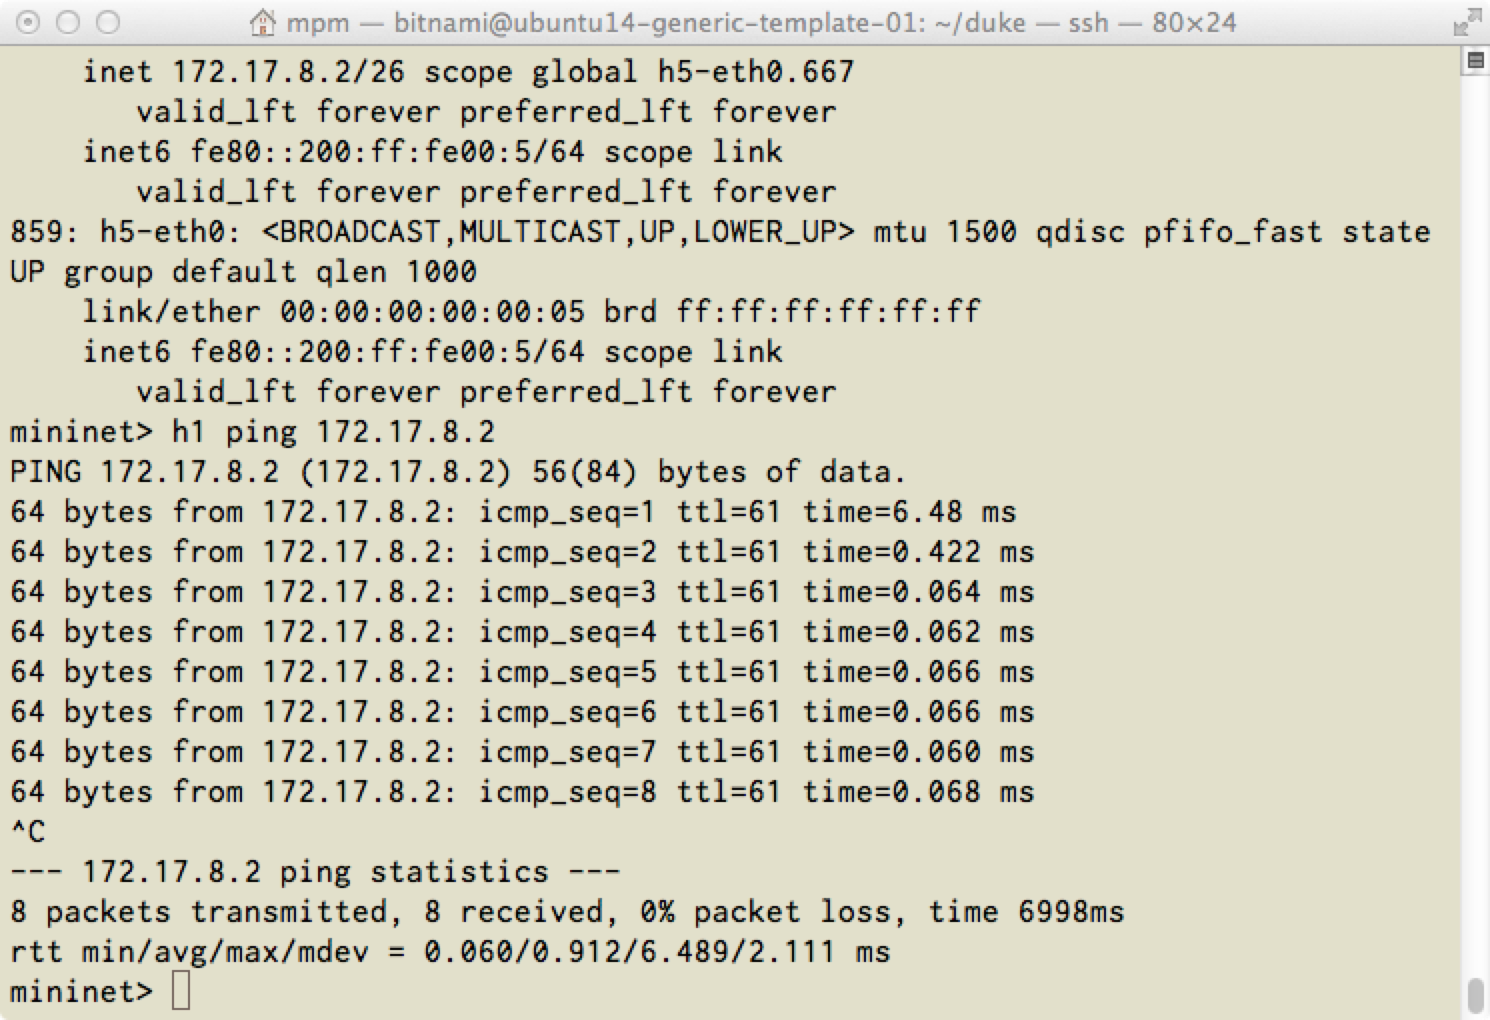
After we have Switchboard configure the link between h1 and h5 over VLAN 667, pings work.
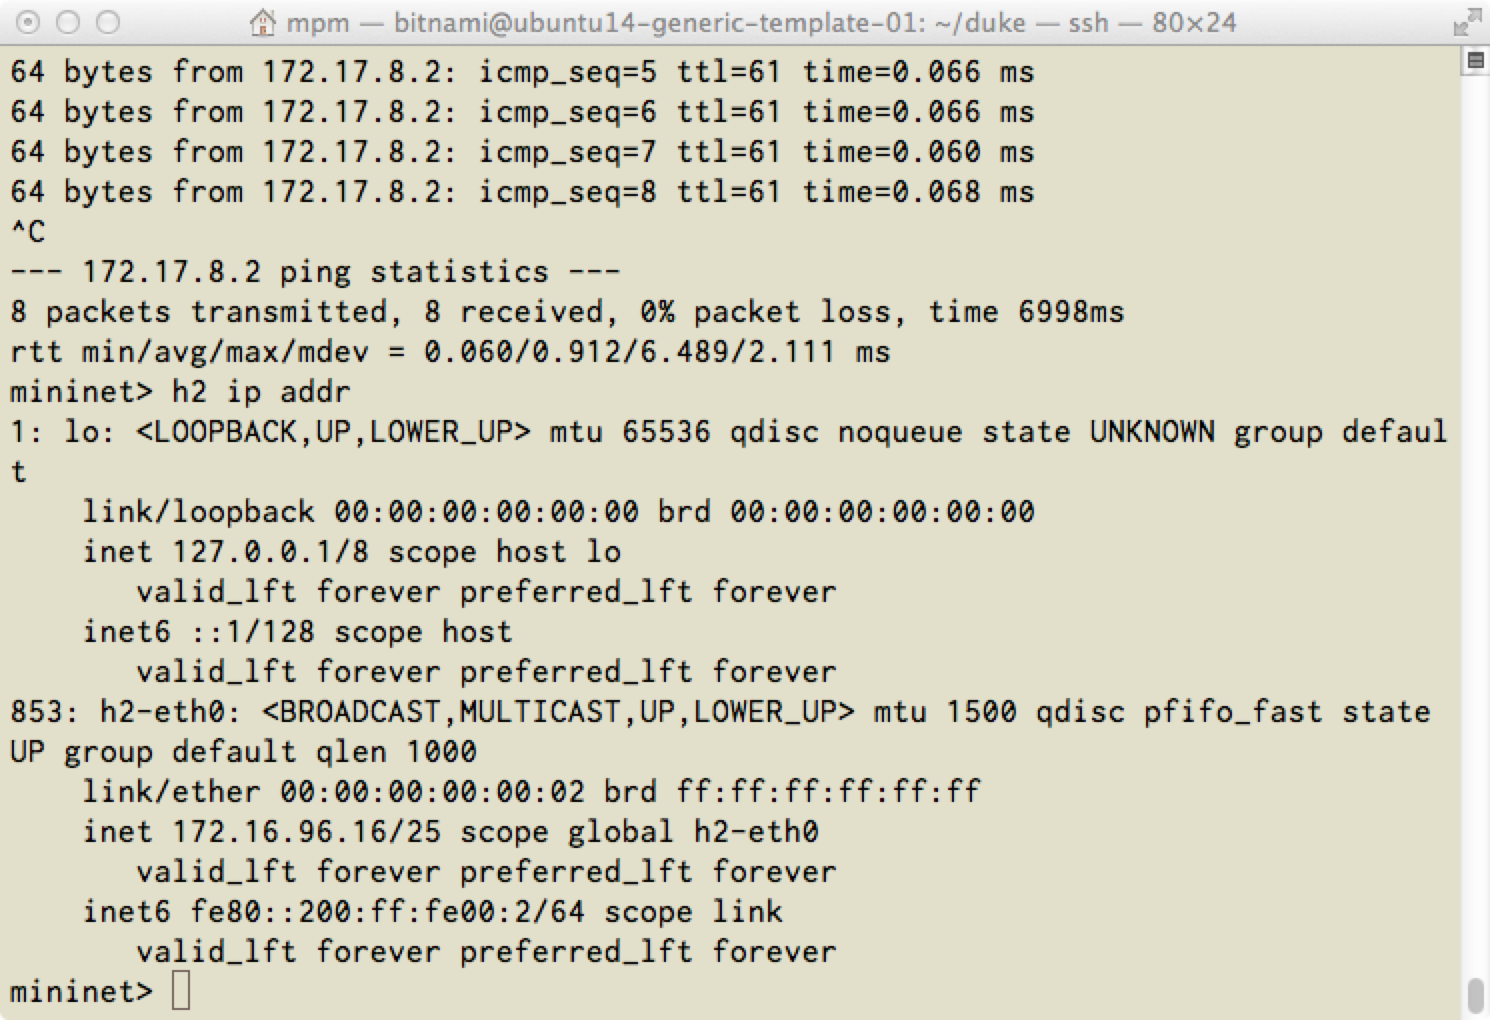
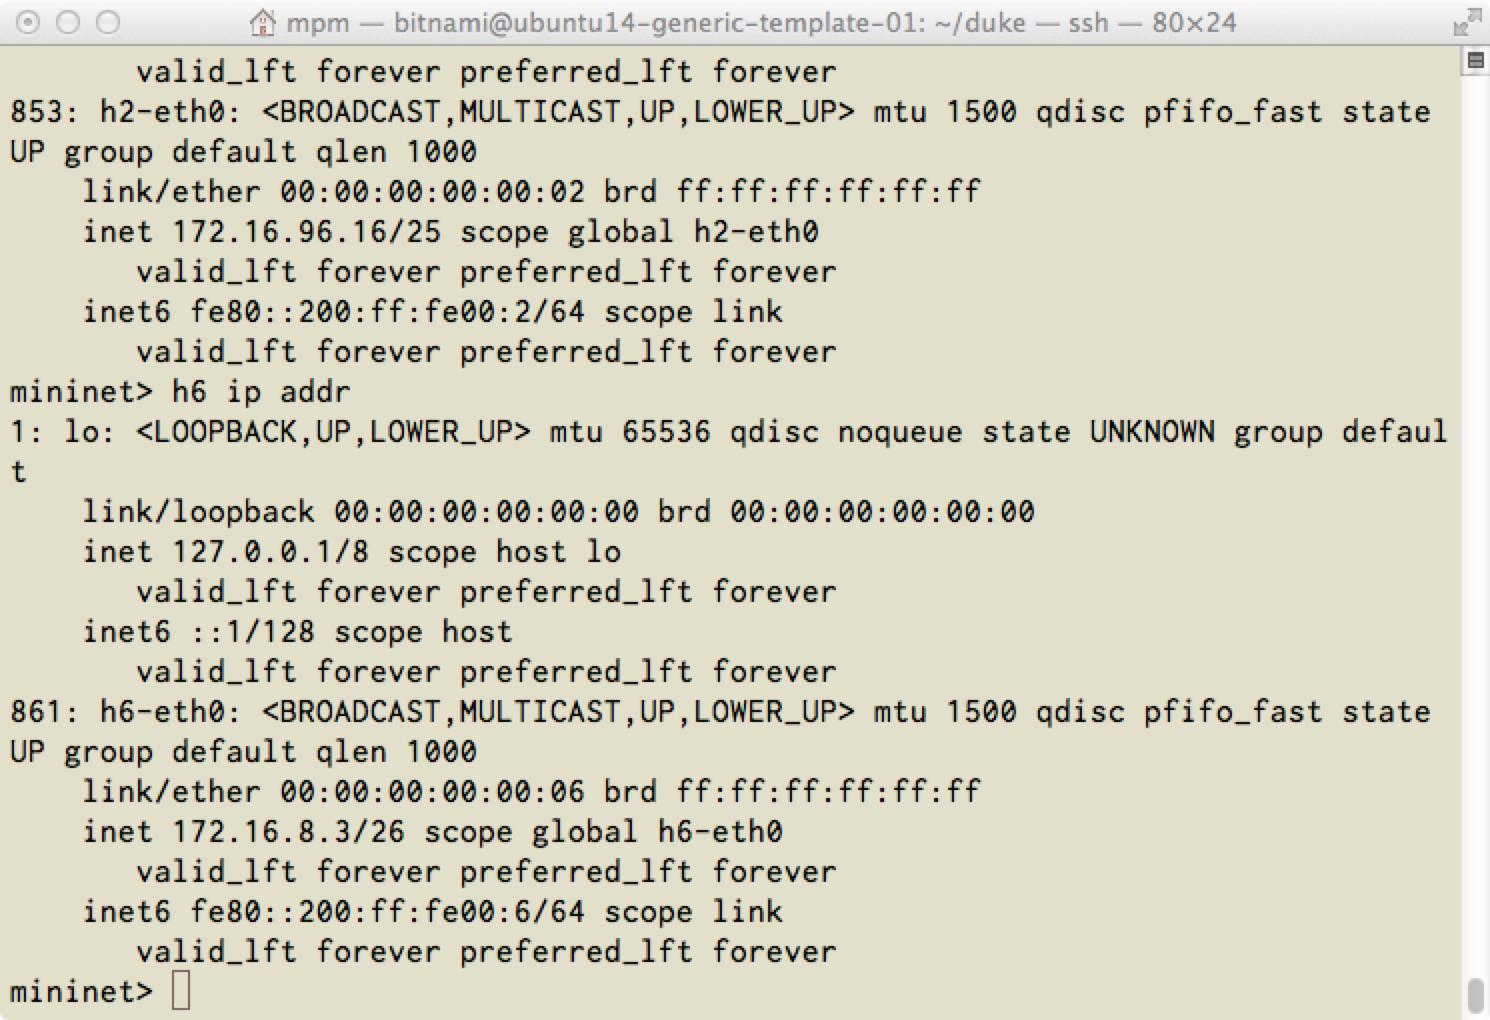
Traffic without VLAN tags is also supported. Here we get the IP address for host h2 (172.16.96.16). Both h1 and h2 are connected to switch 1, but host h1 is on VLAN 667, host h2 is not on a VLAN tagged network.
Host h6 (172.16.8.3) is connected to switch 3, and like host h2 is not on VLAN tagged network.
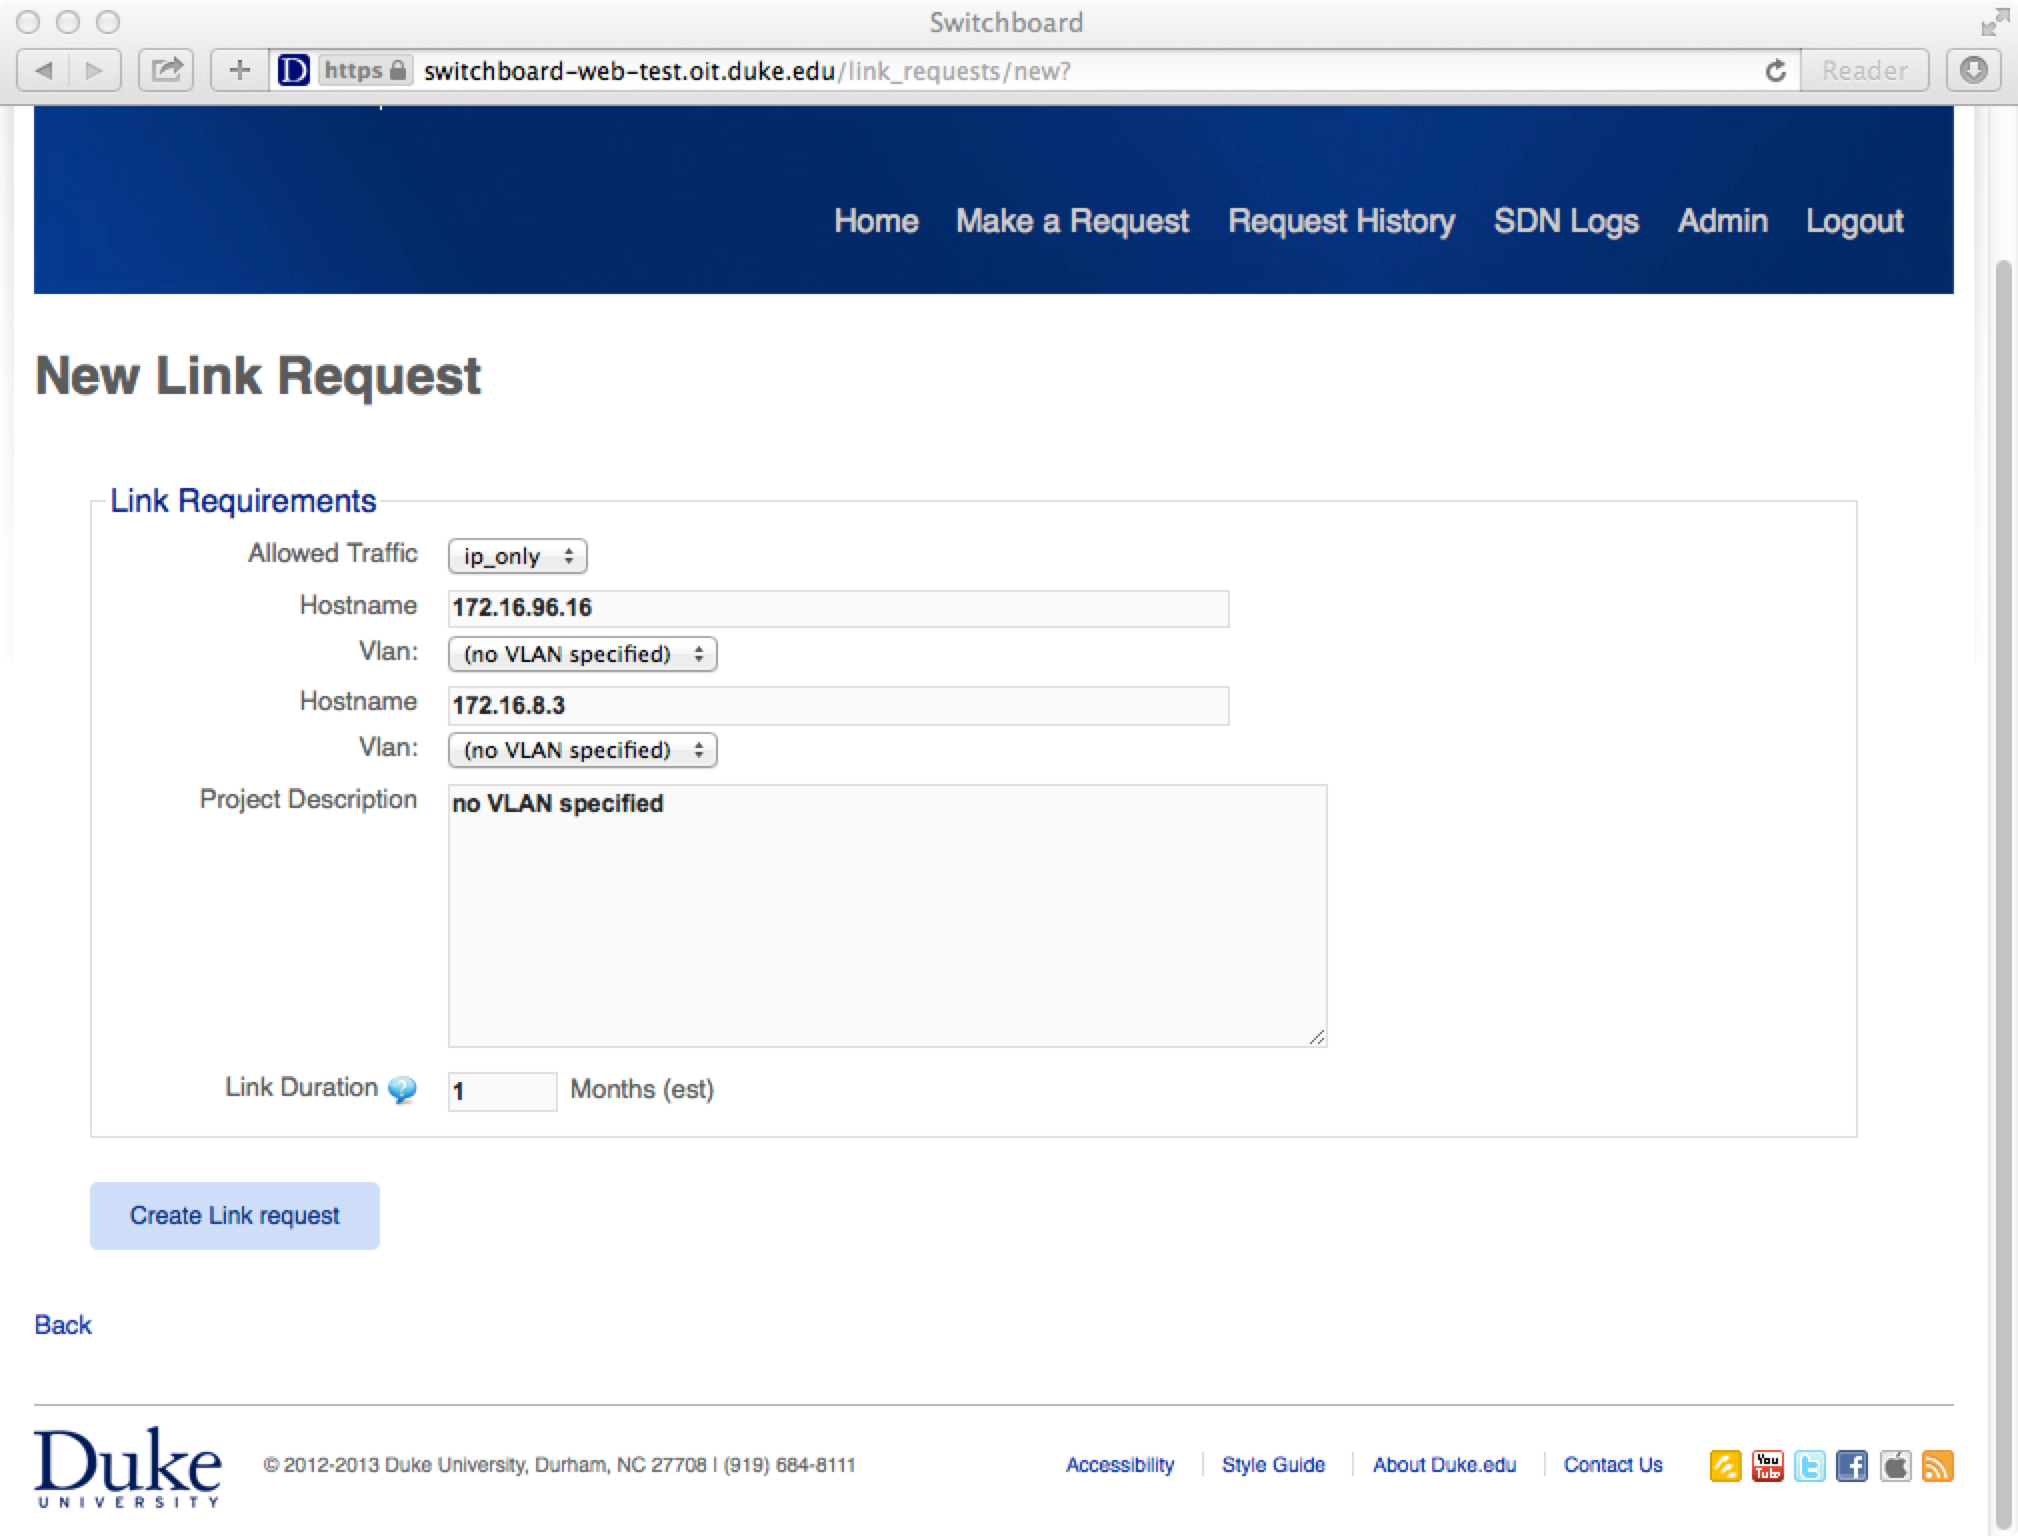
We want traffic to flow between host h2 and h6, so we make a Switchboard request and leave the VLAN unspecified (which is the Switchboard default).
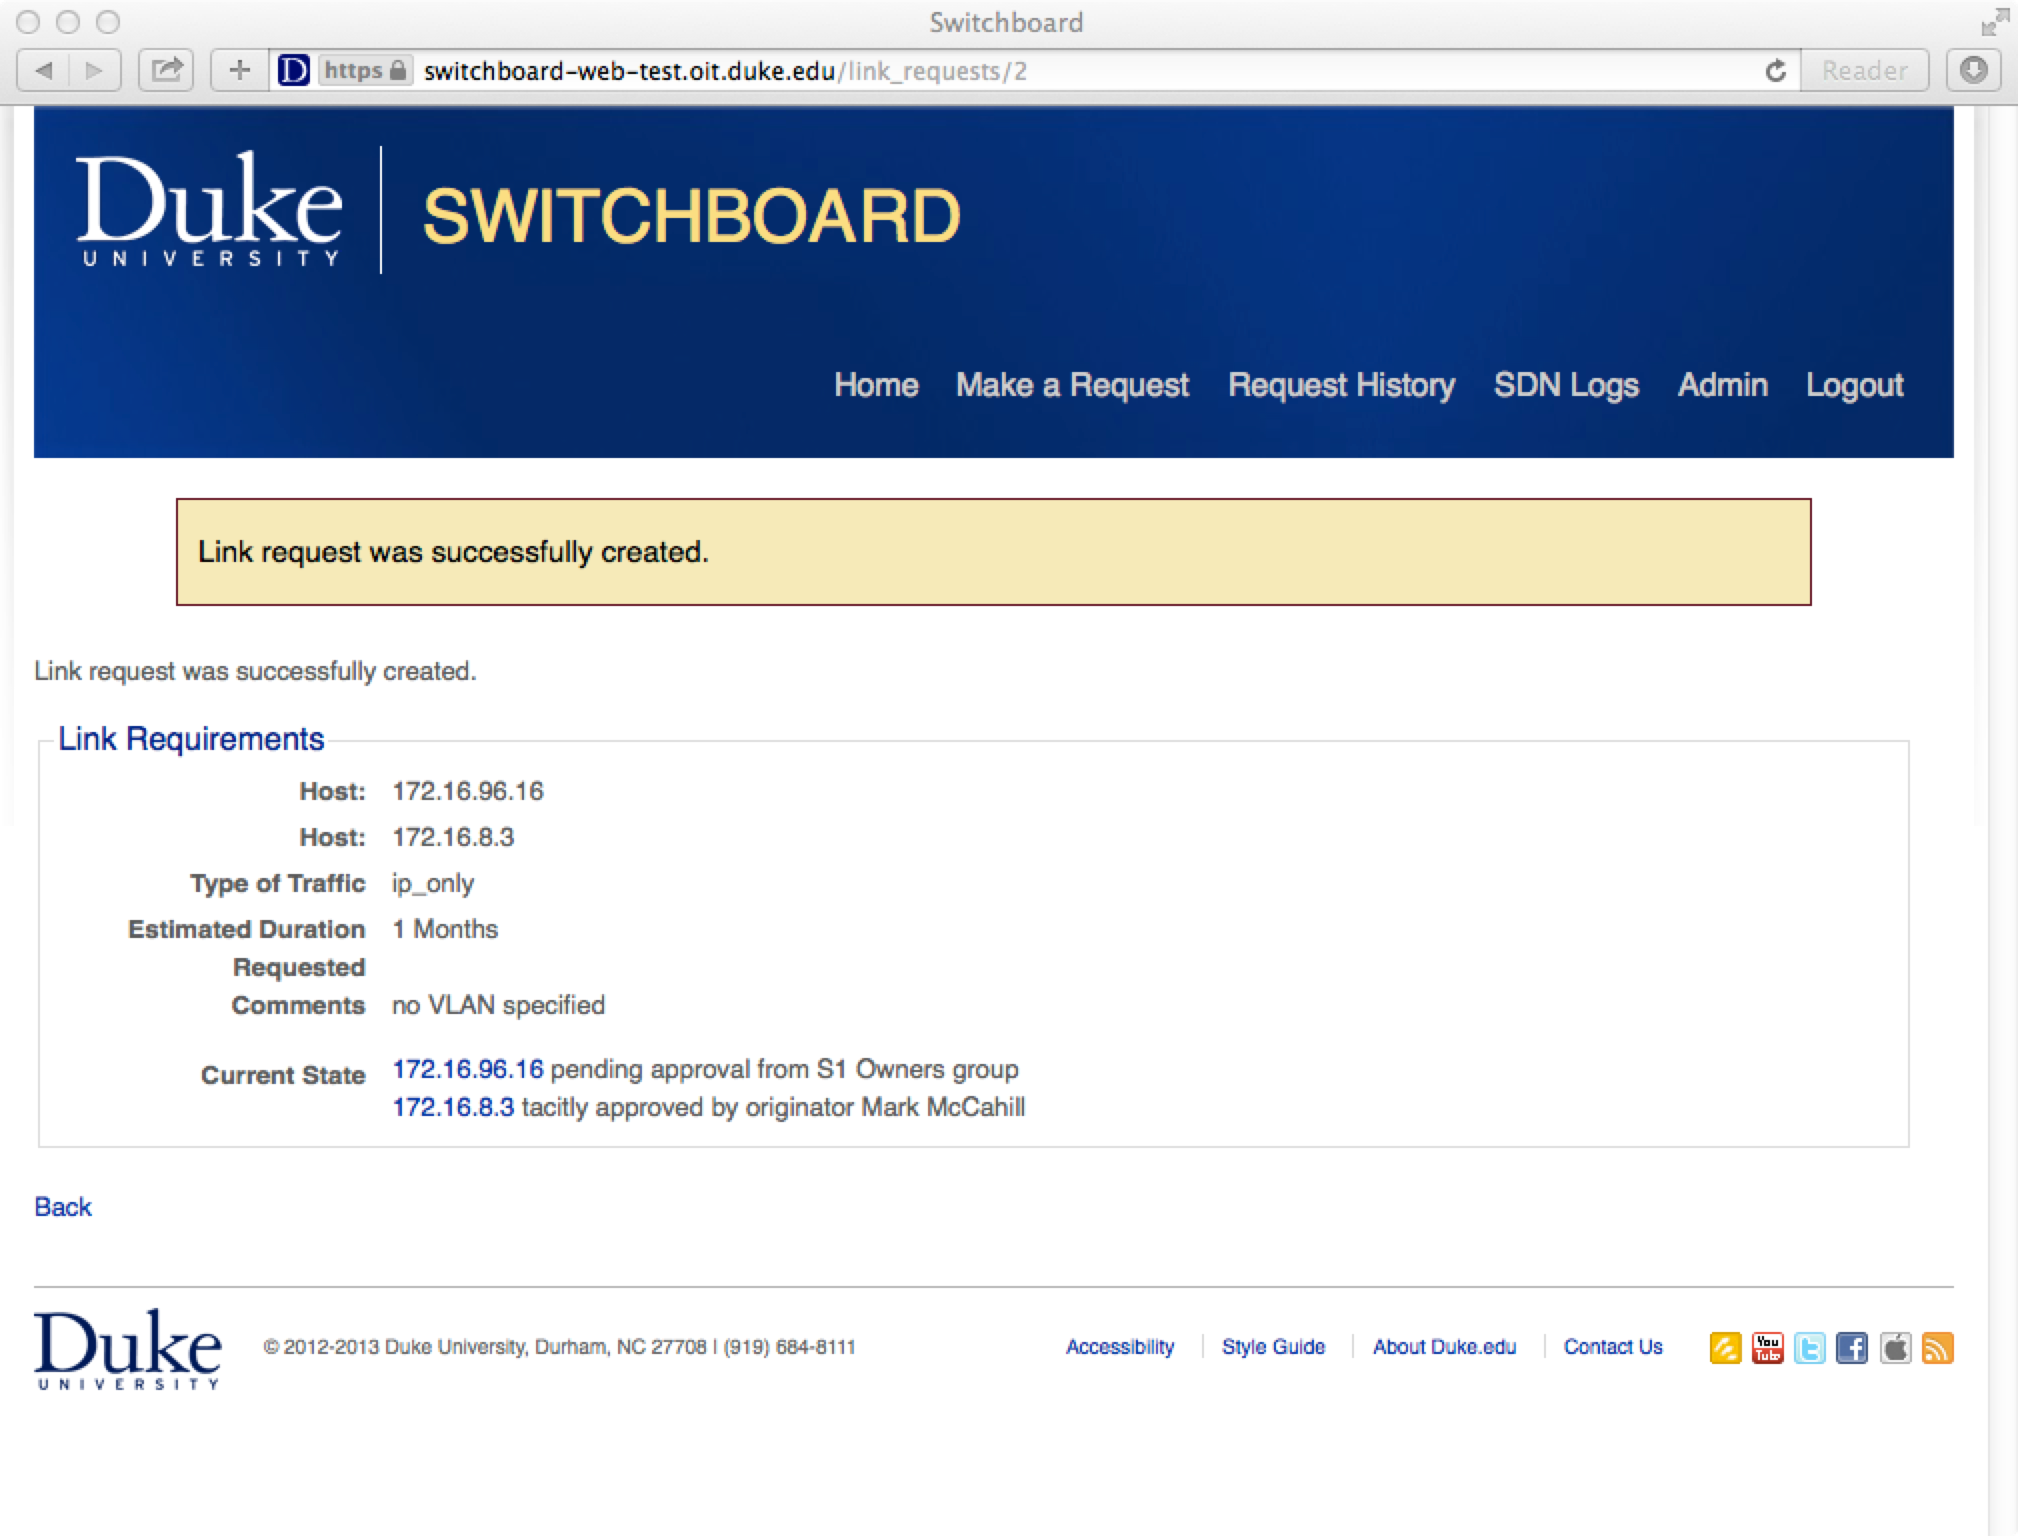
The request is partially approved automatically, because I am an owner for one of the subnets. But I am not currently an approver for the 172.16.96.0/25 subnet because I am not in the “S1 Owner” group.
An admin can manage group memberships by visiting the Groups page from the Admin tab.
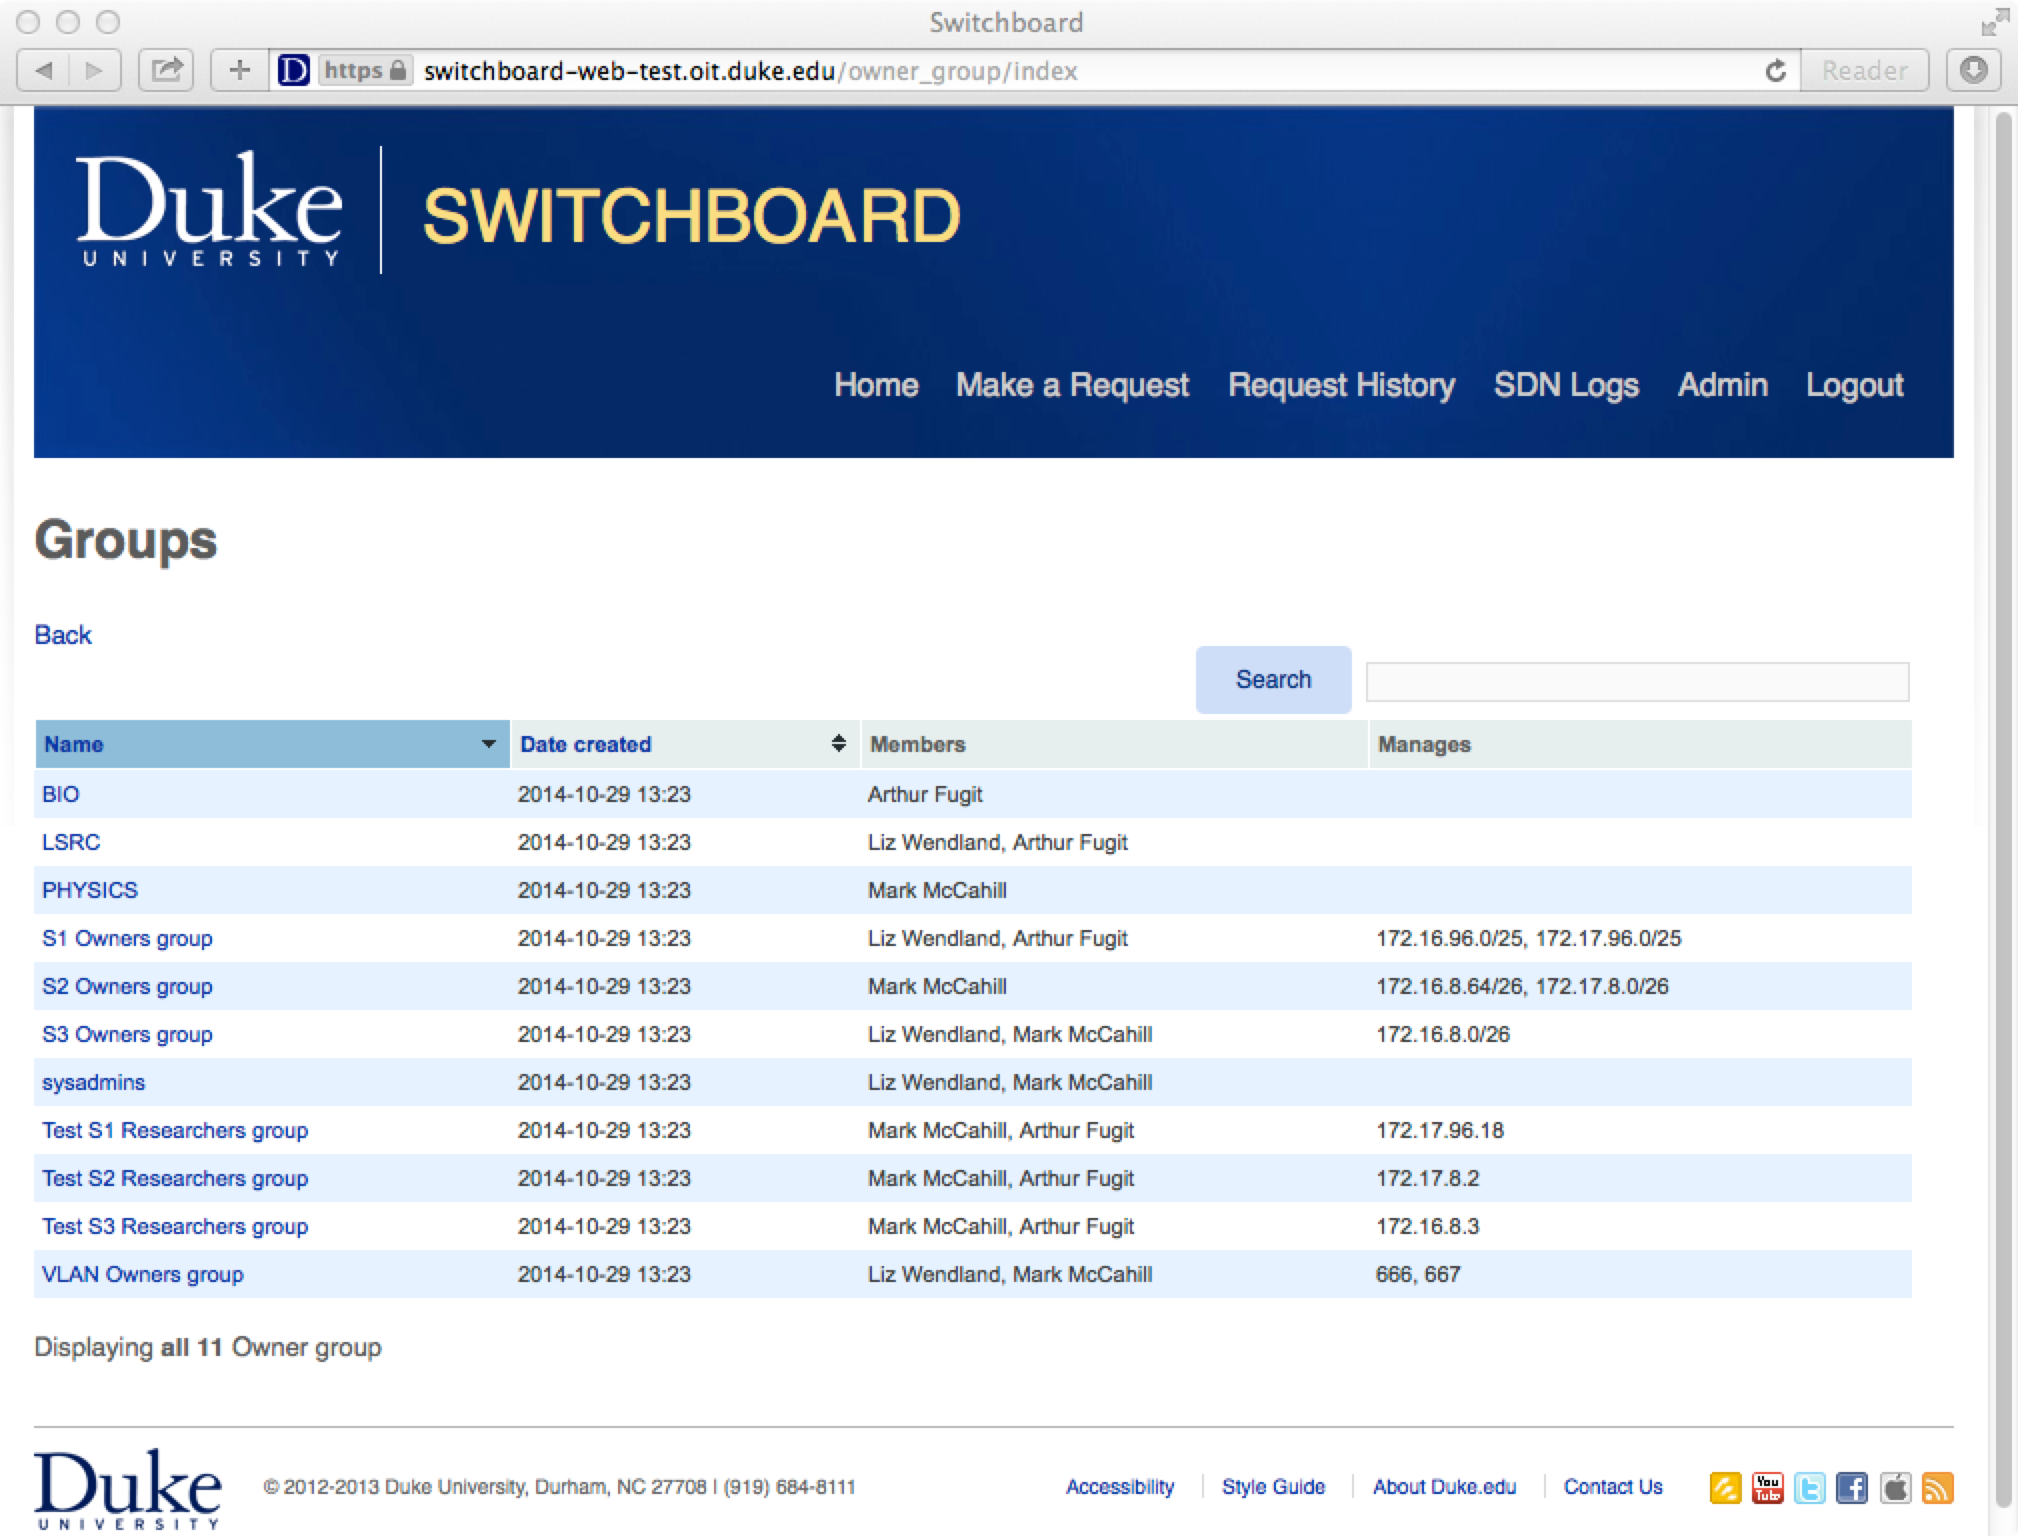
After clicking on “S1 Owners group”, the admin can update the group membership. Enter a netid into the “Add a member” field and the user is added to the group. Now that the admin has added “mccahill” to the S1 Owners group, I will be able to approve the pending request.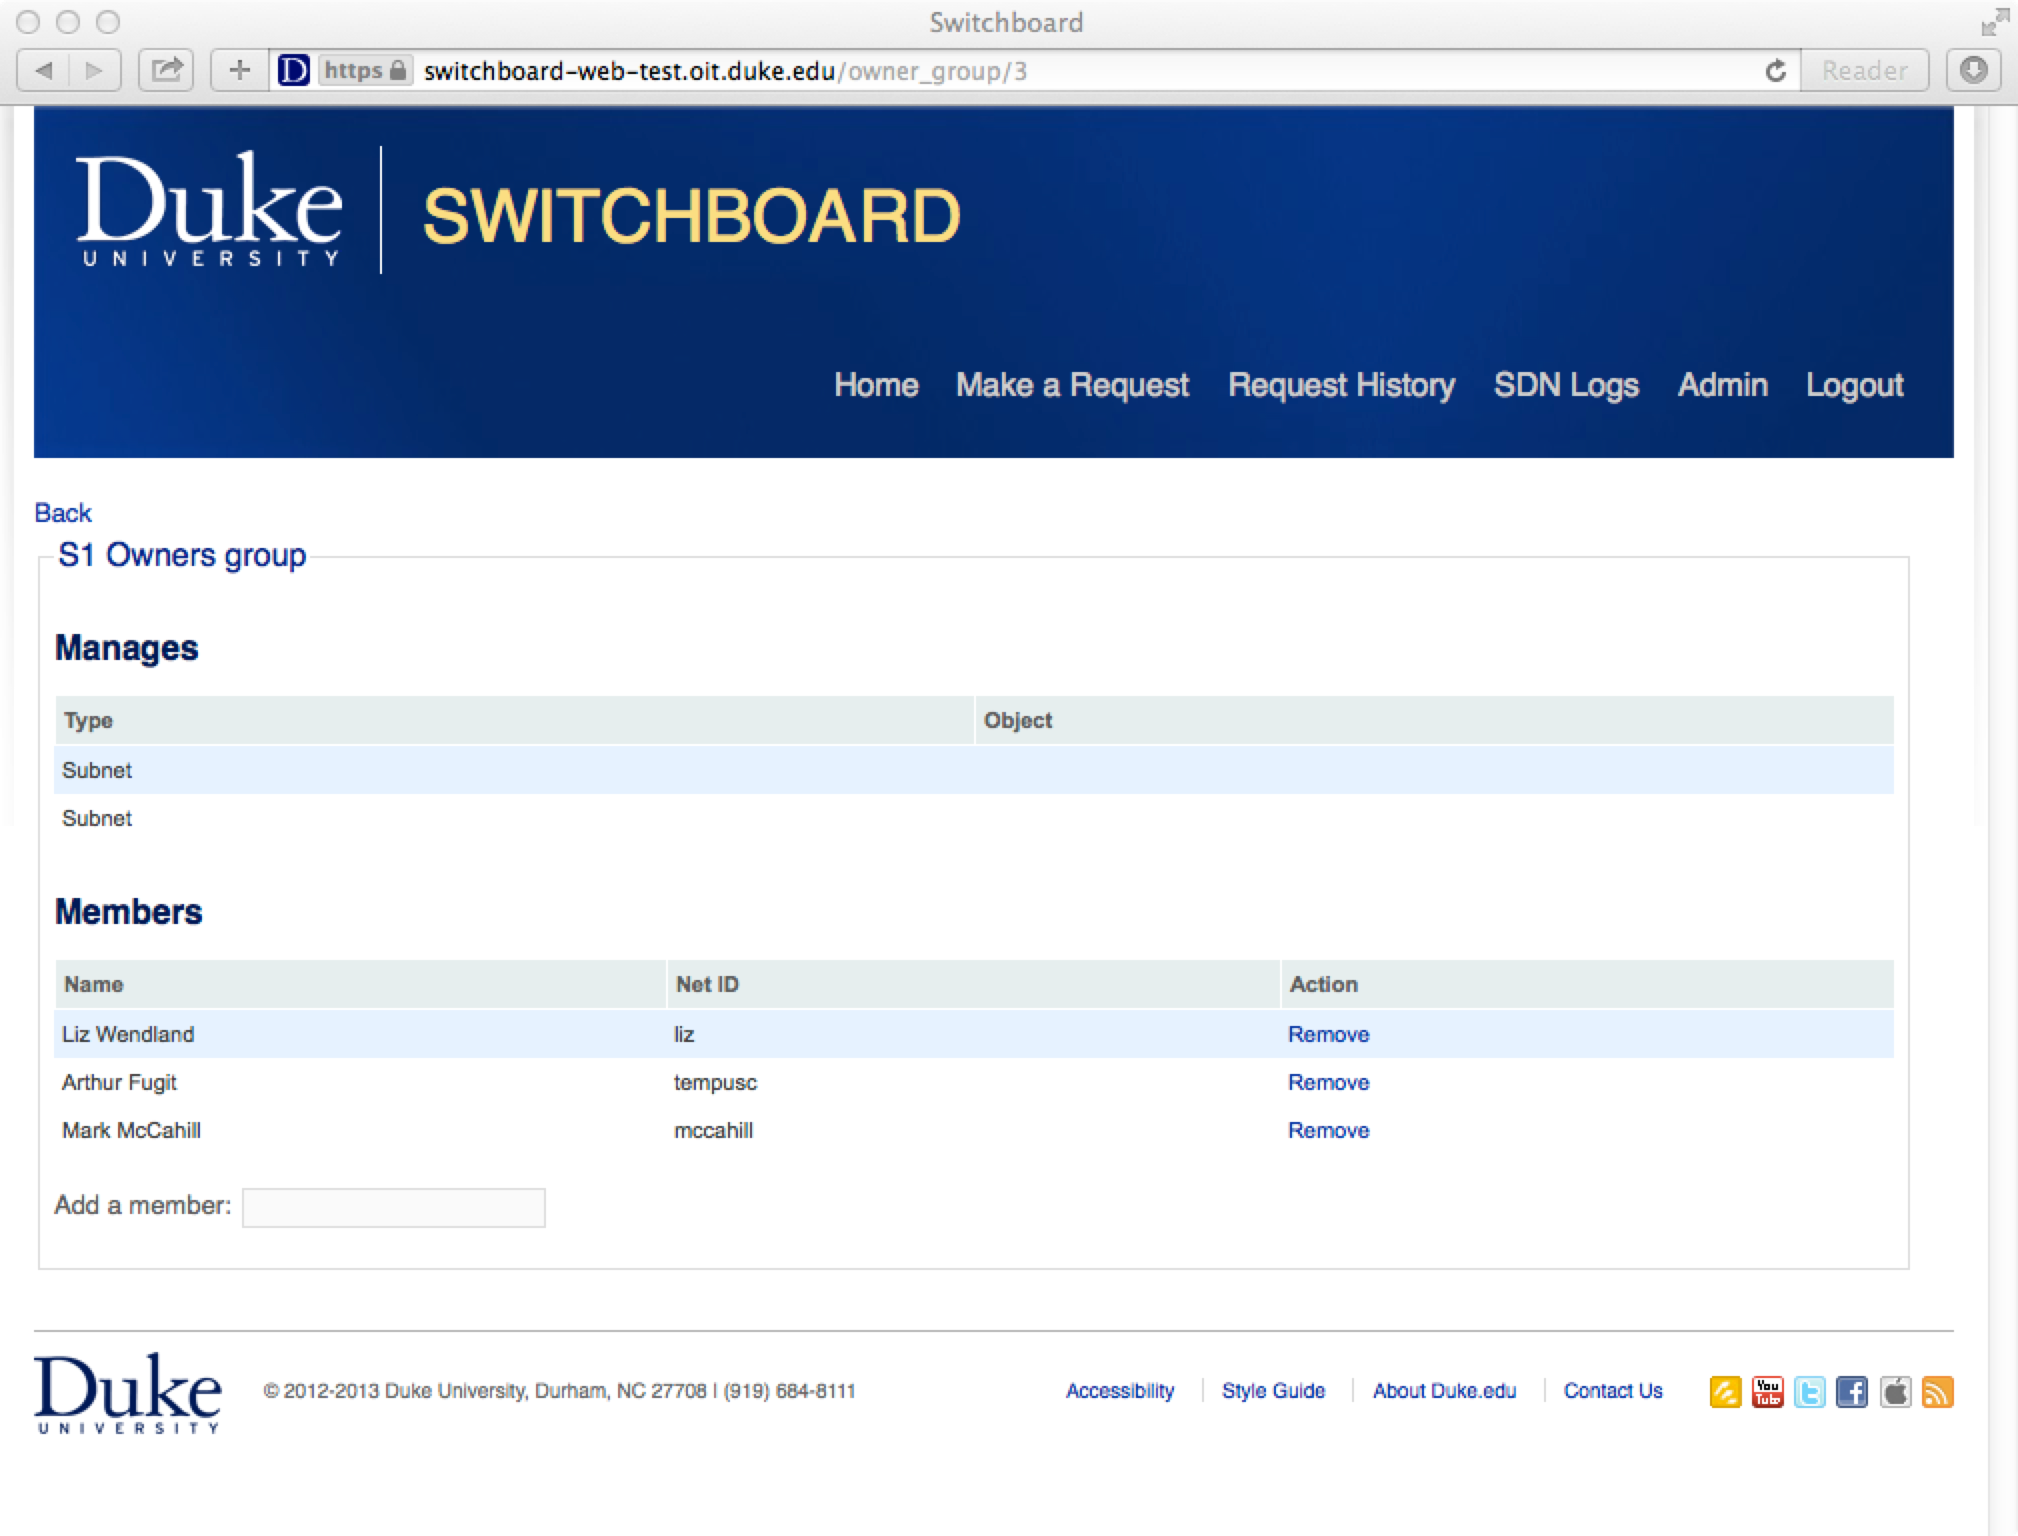
Requests awaiting my approval appear on the home page highlighted in yellow. Click on the approve link for the request to see more detail.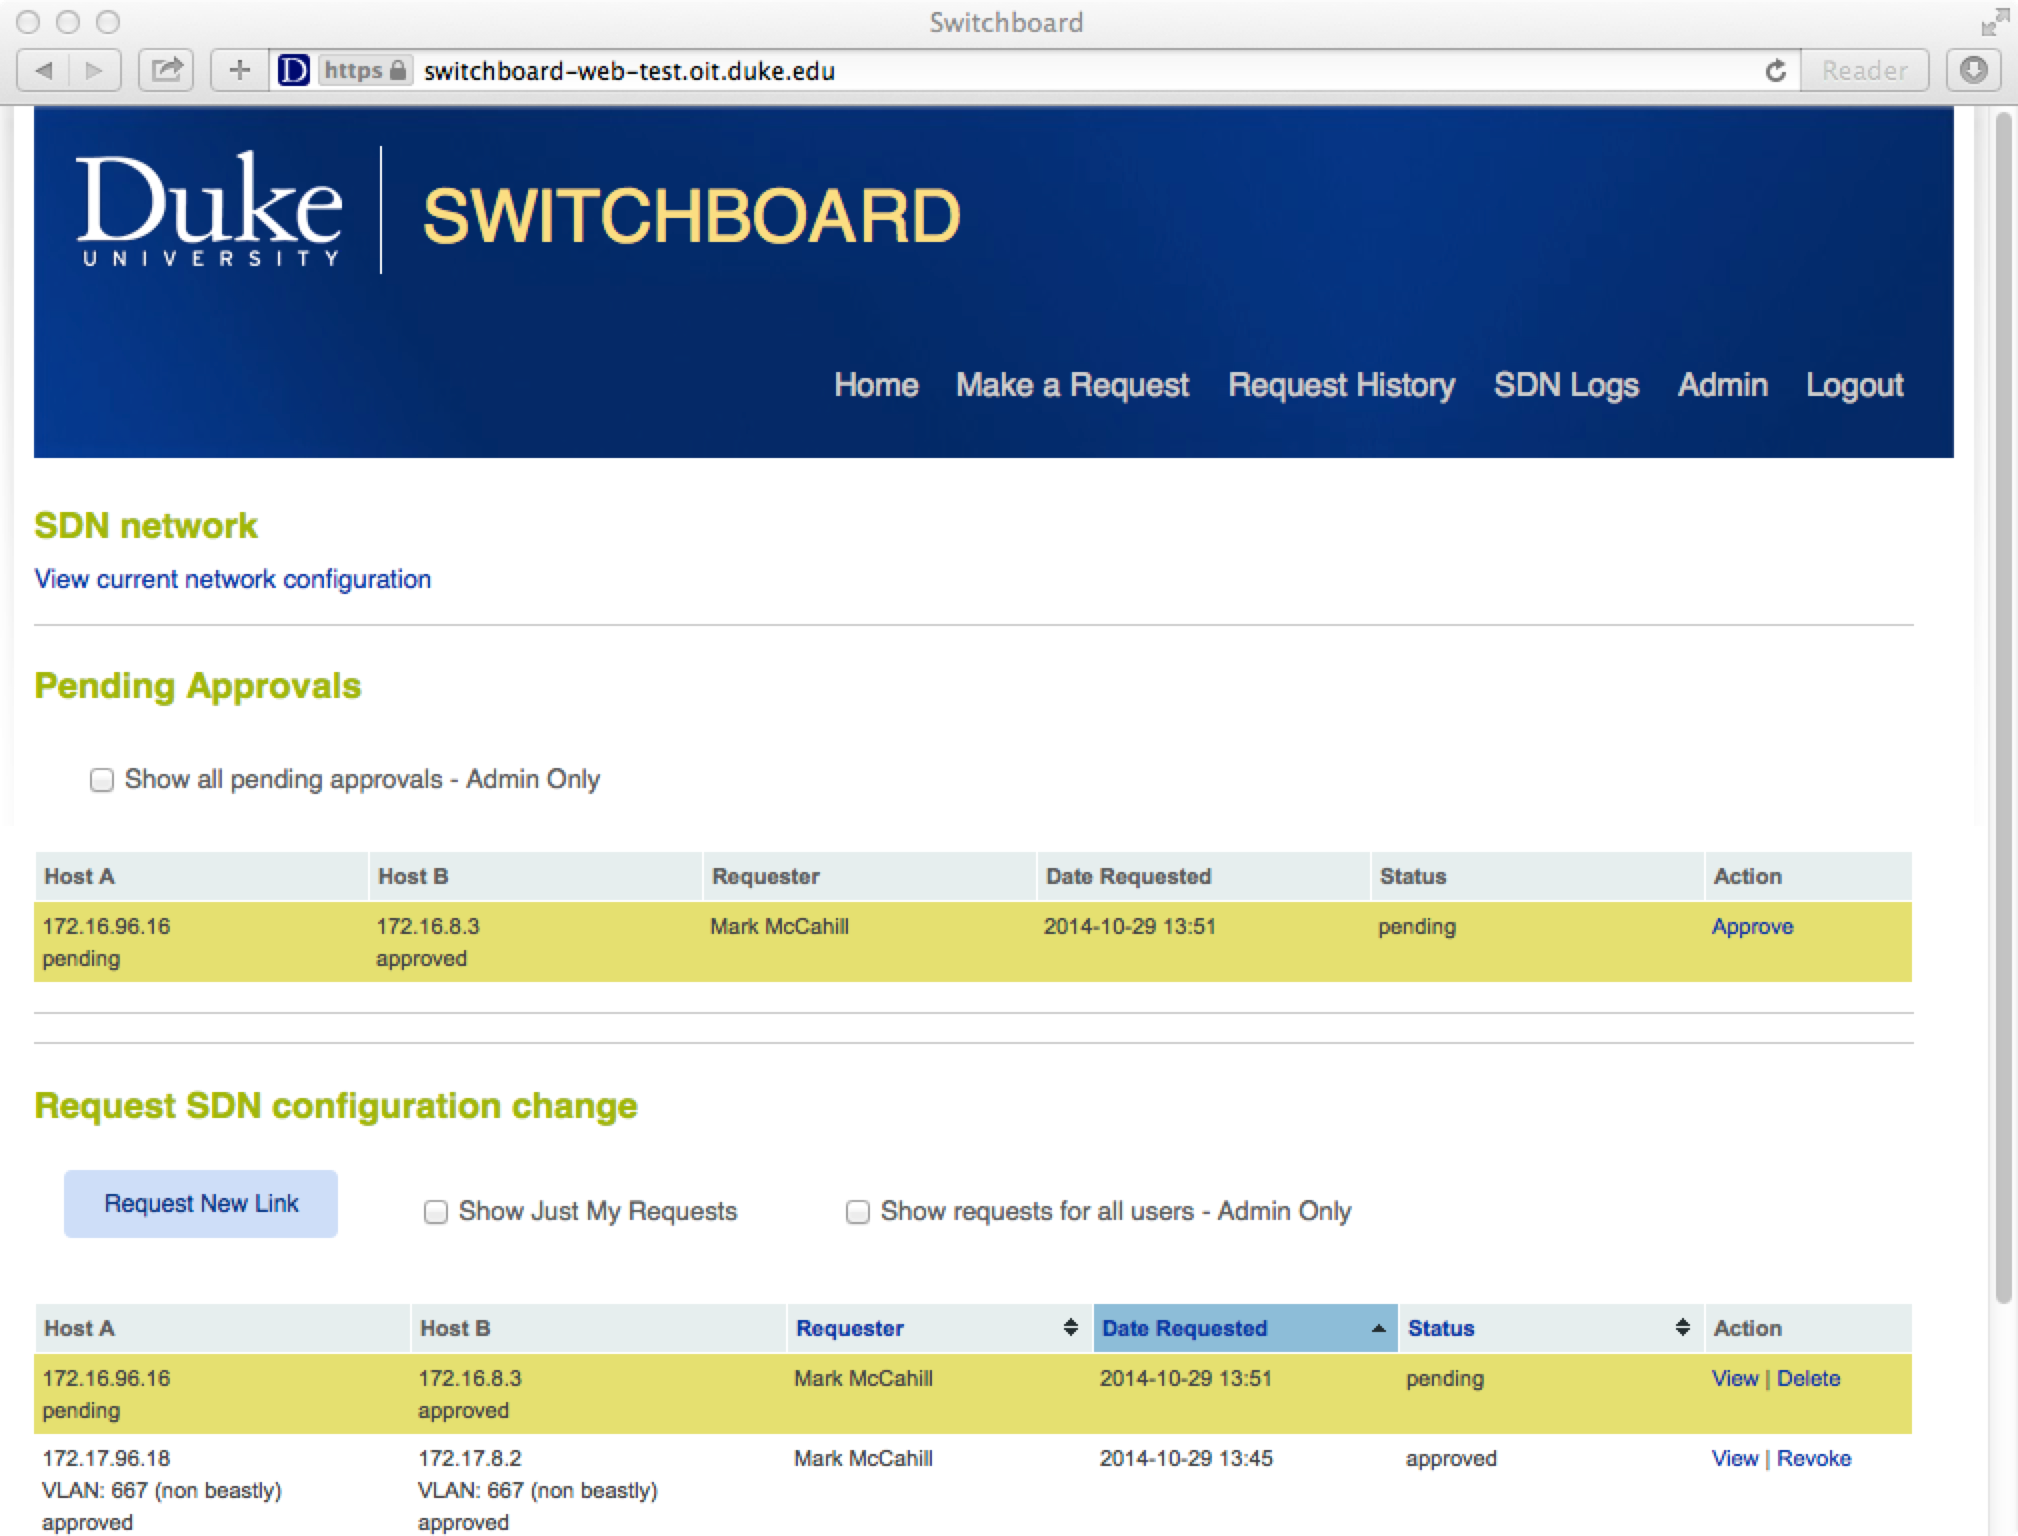
The detail for the request. The approver either clicks the approve or deny button.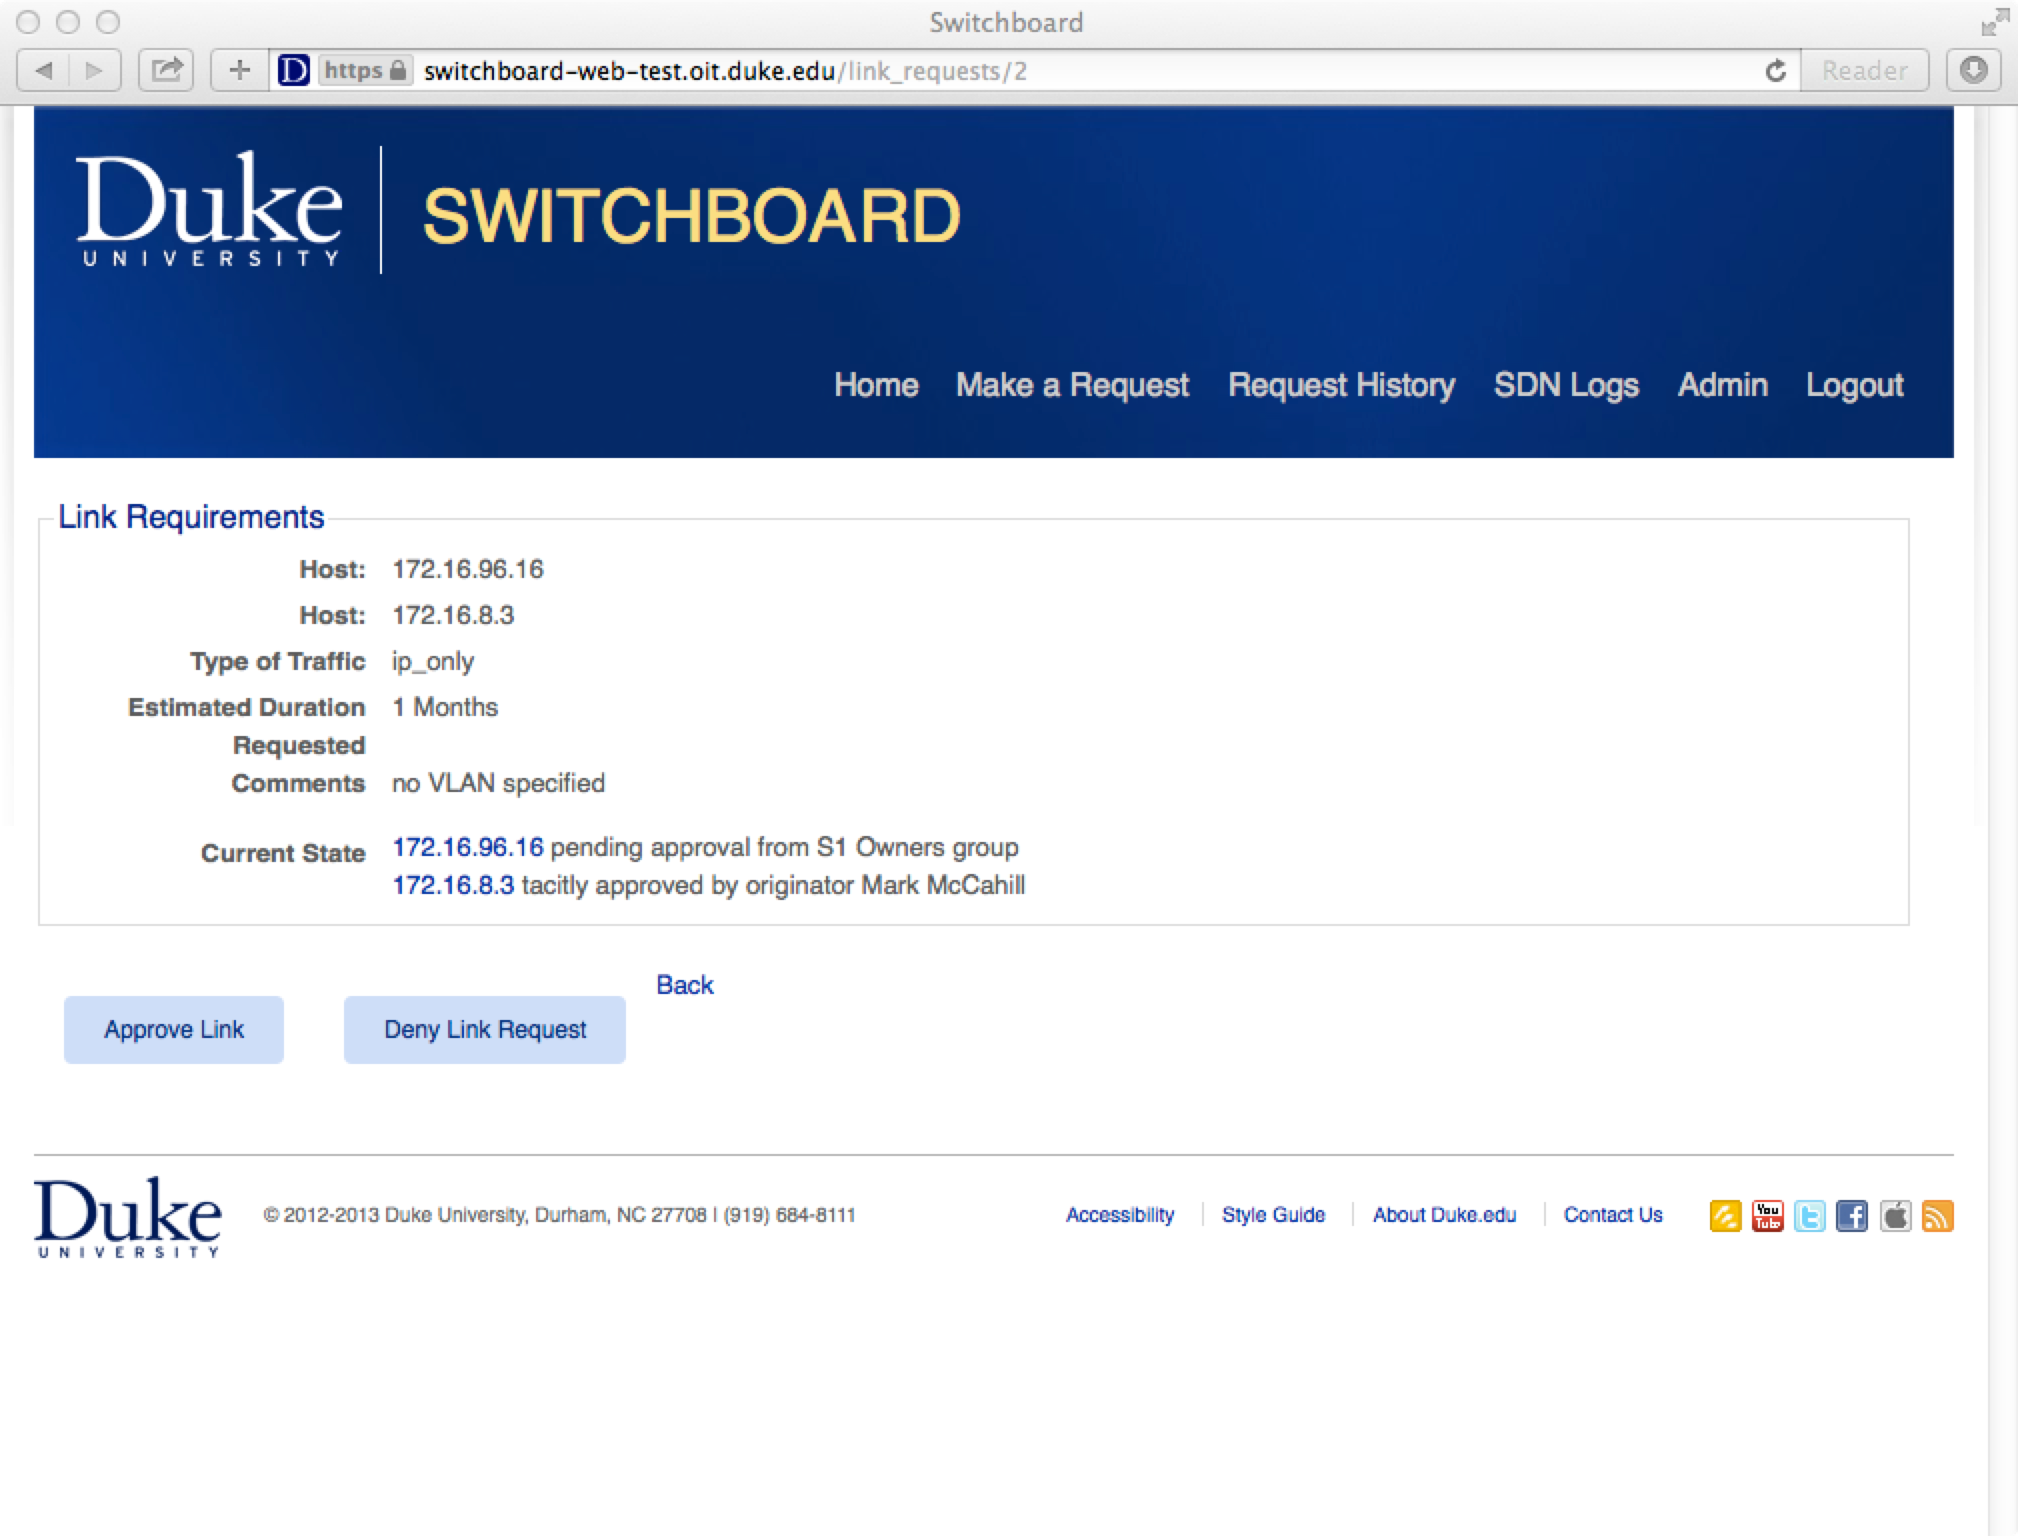
After clicking the approve button, the request has been OK’ed and Switchboard configures the SDN link.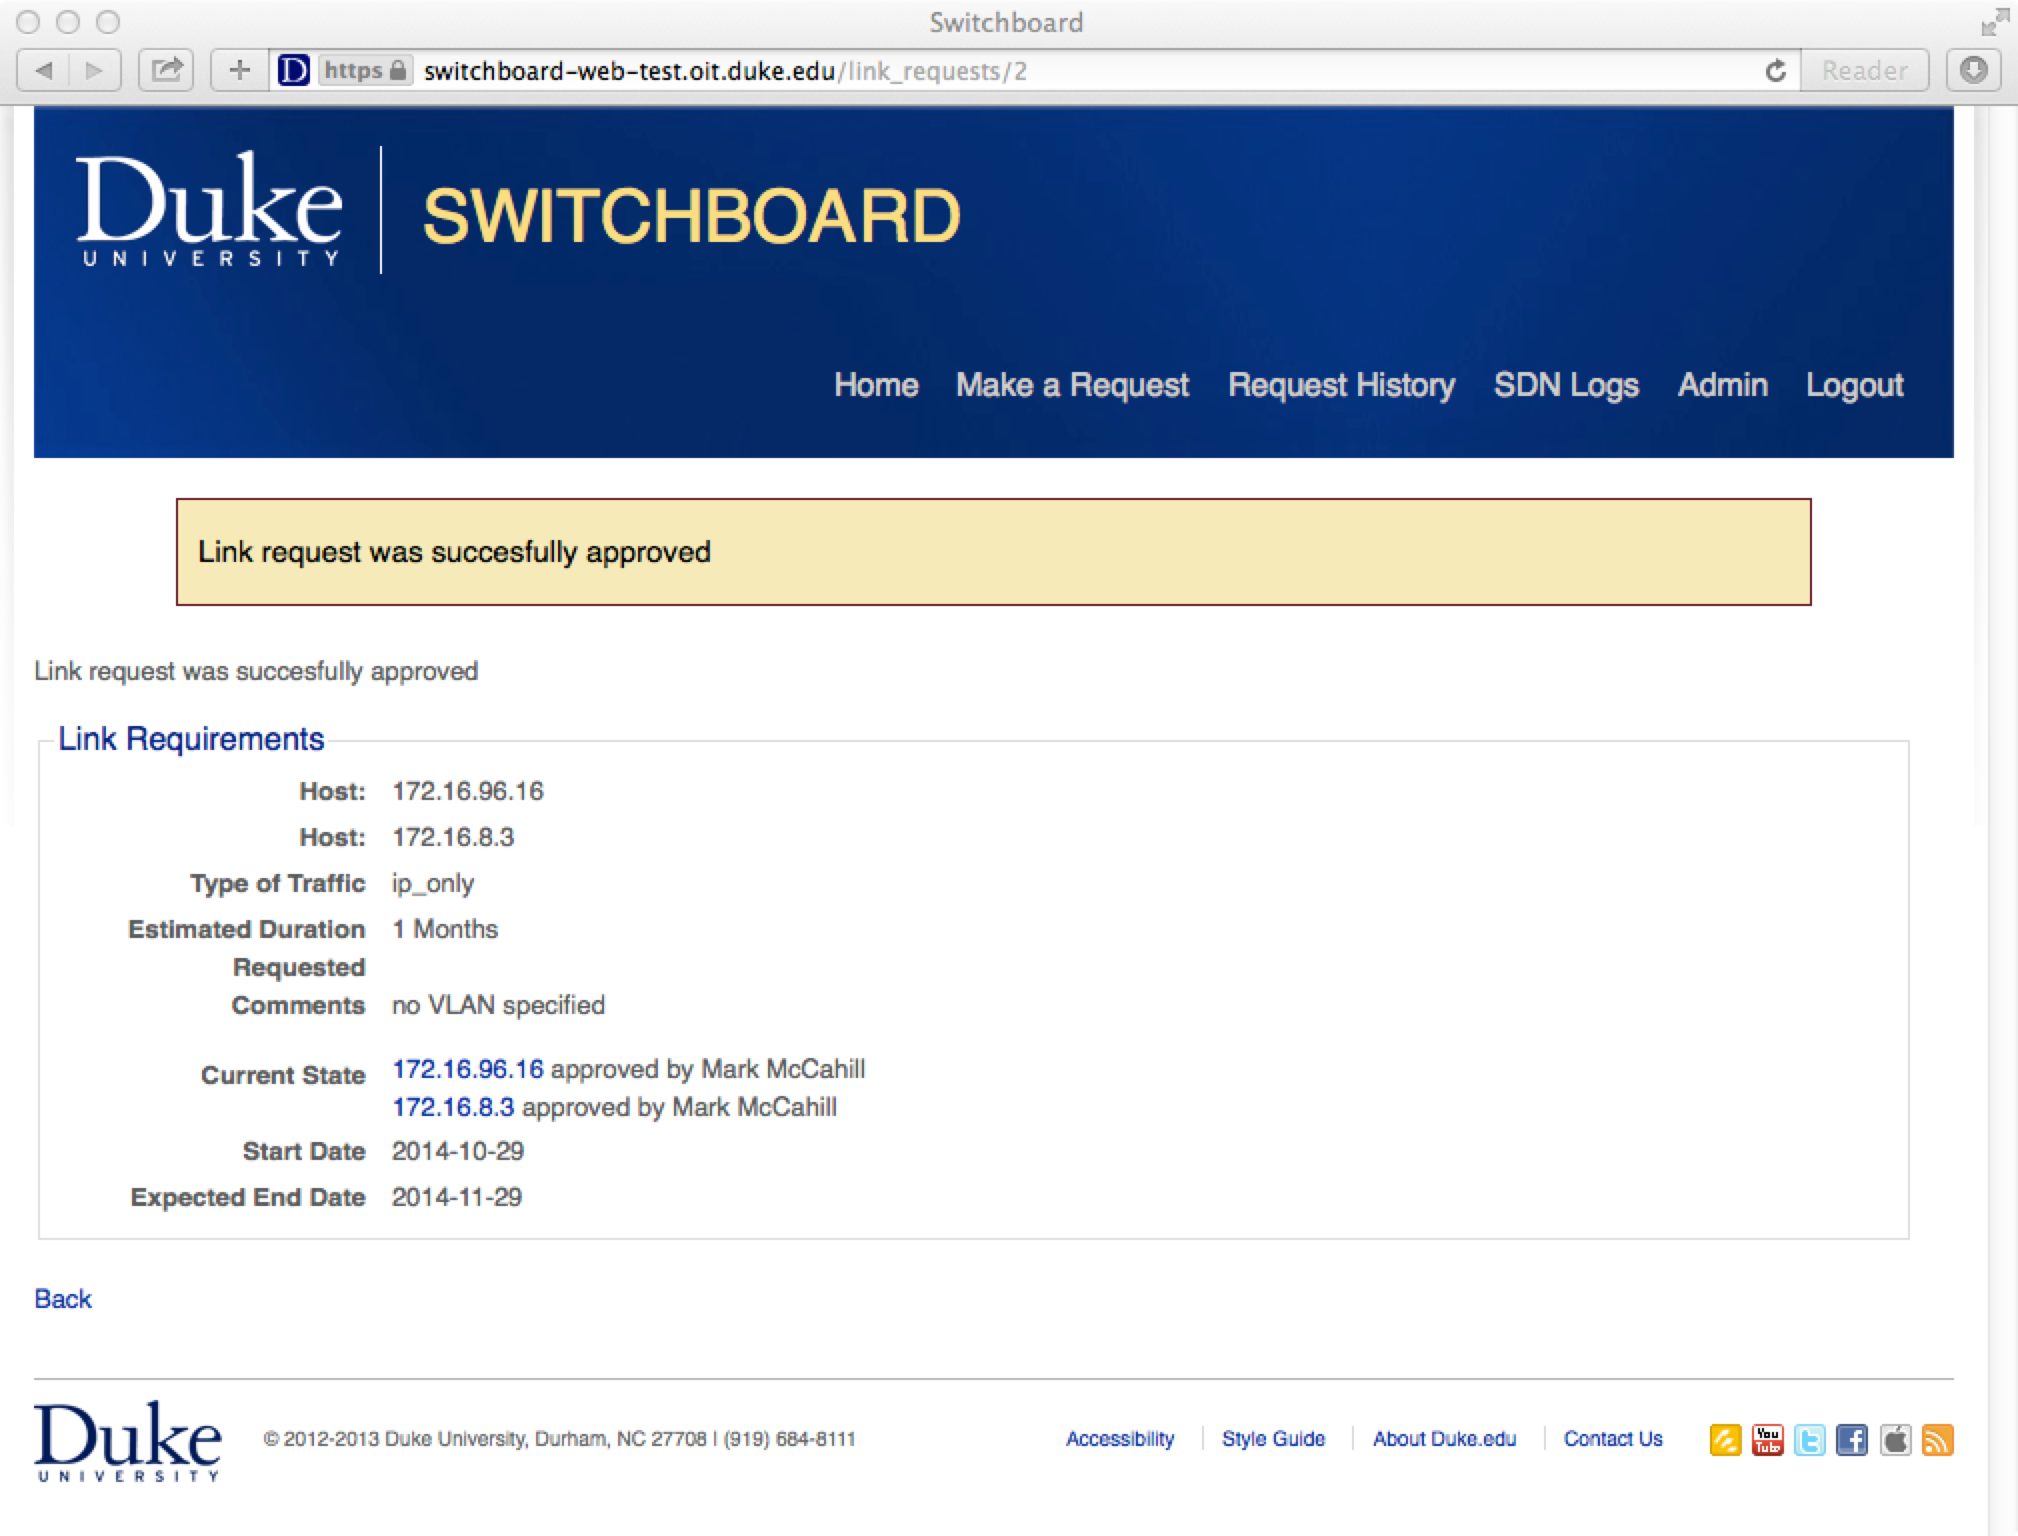
Pings now work between host h2 and h6.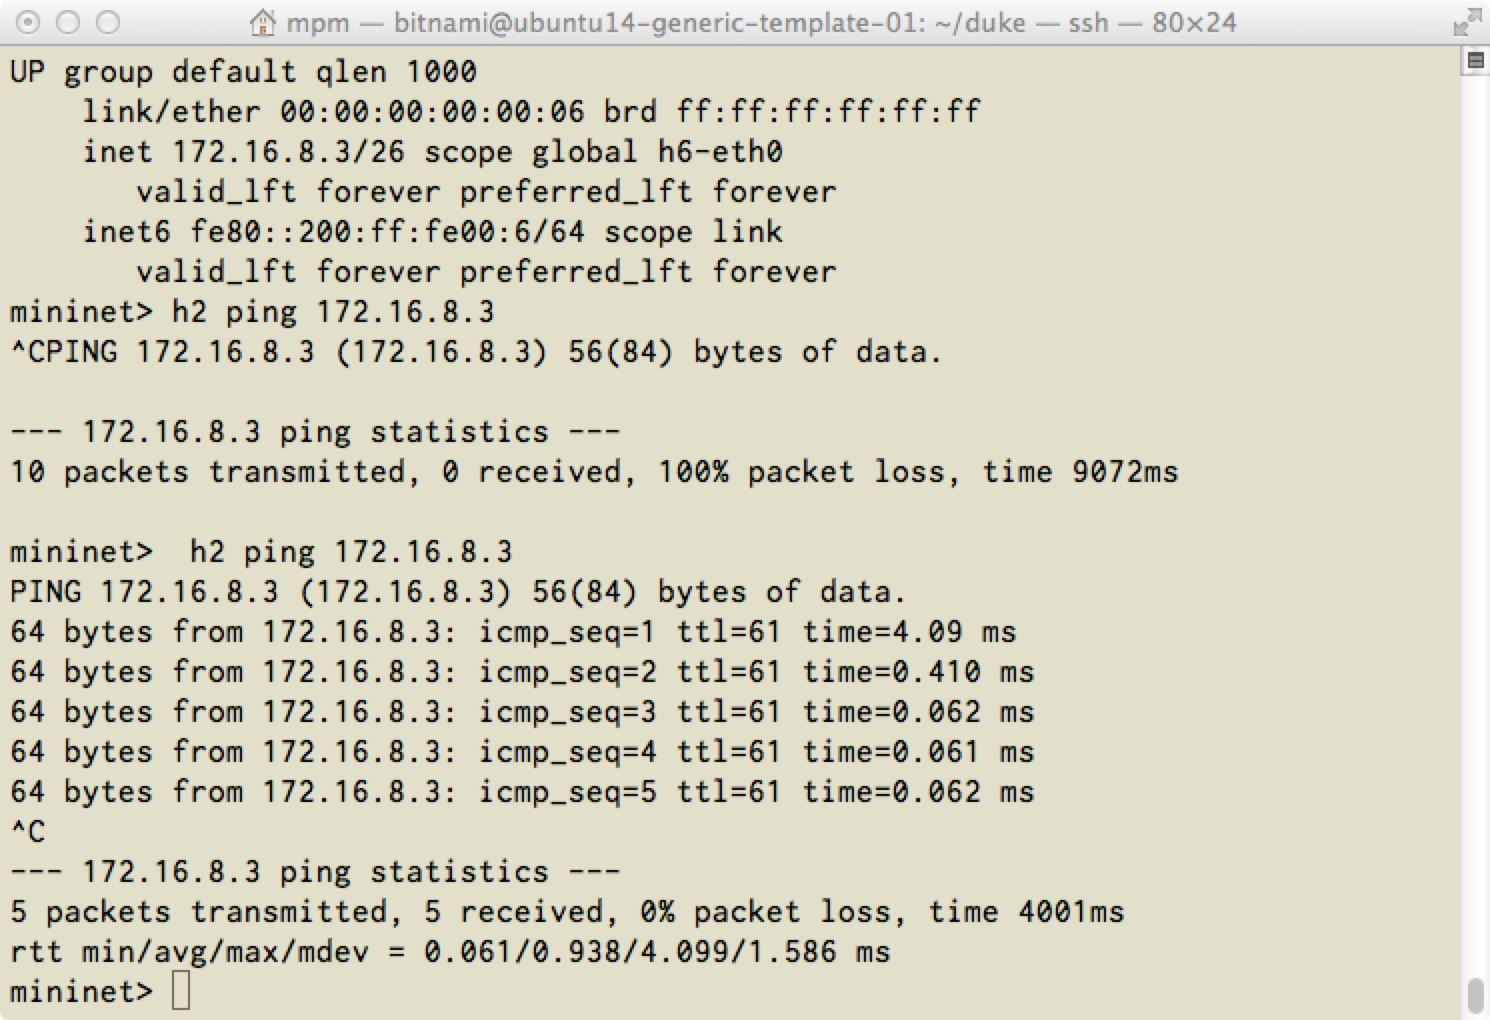
The network visualization shows the two links I have had switchboard configure for h1->h5 and h2->h6.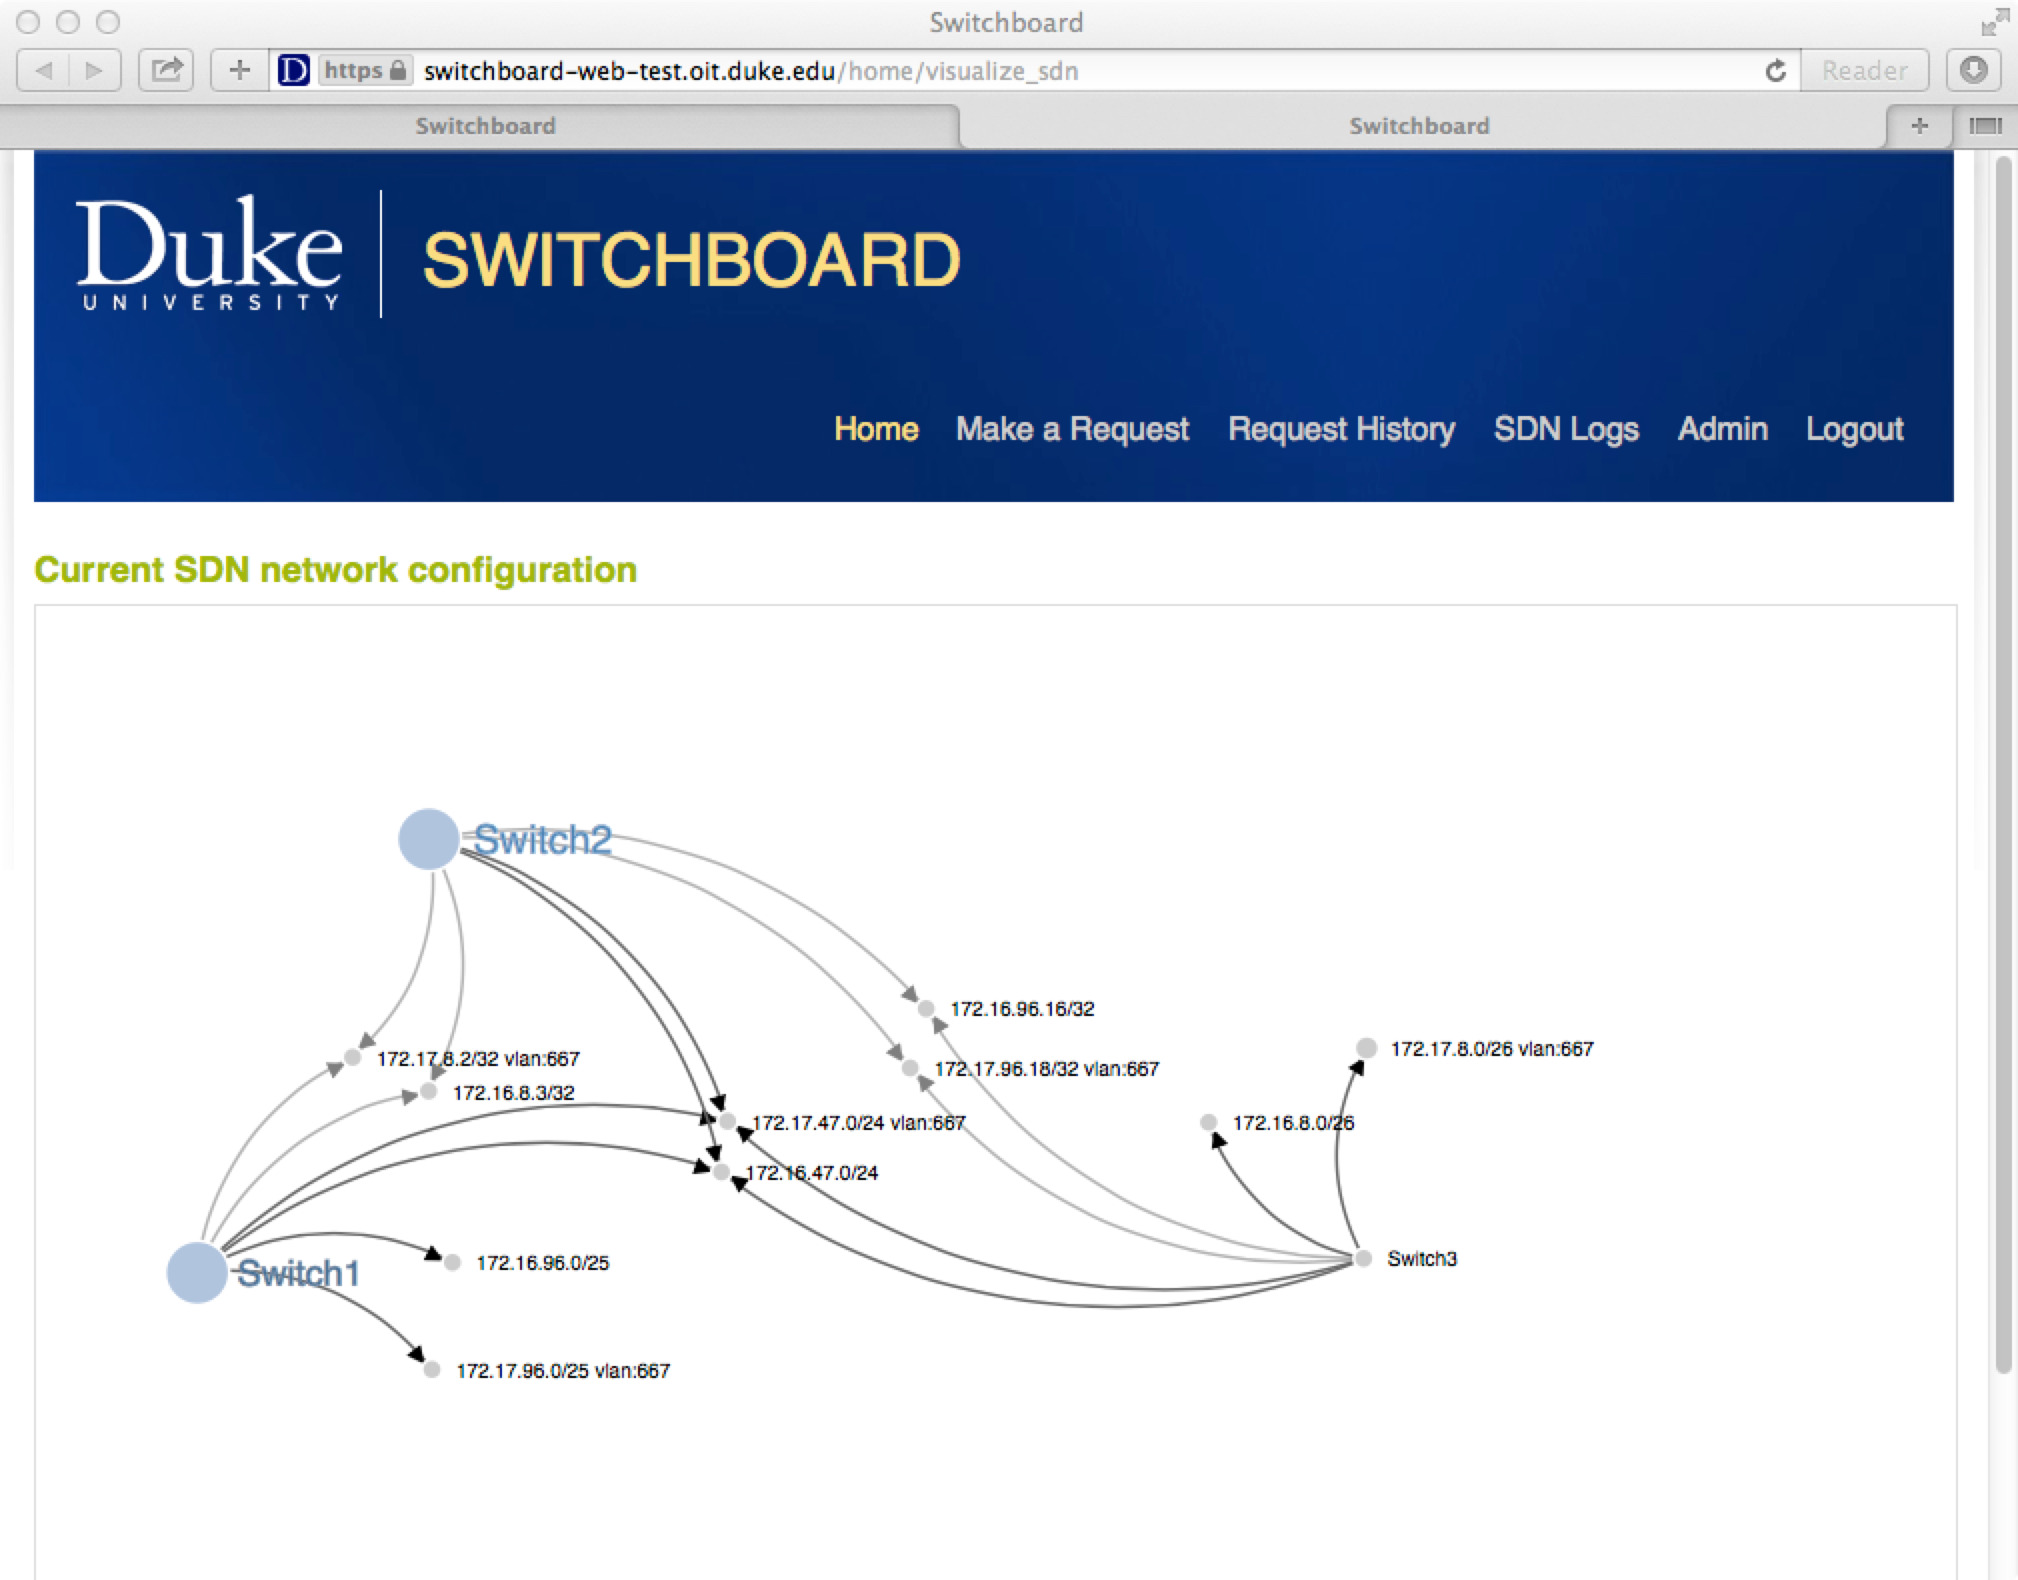
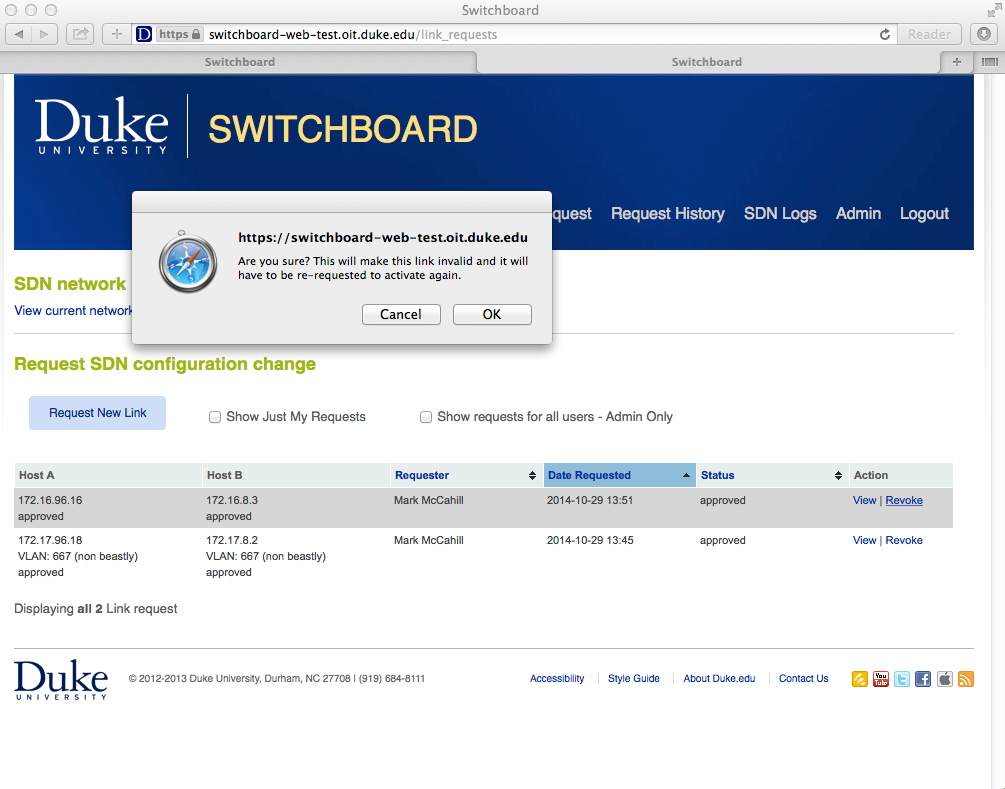
The user who requested a link can revoke dynamically created network paths by clicking on the “revoke” link next to the link description.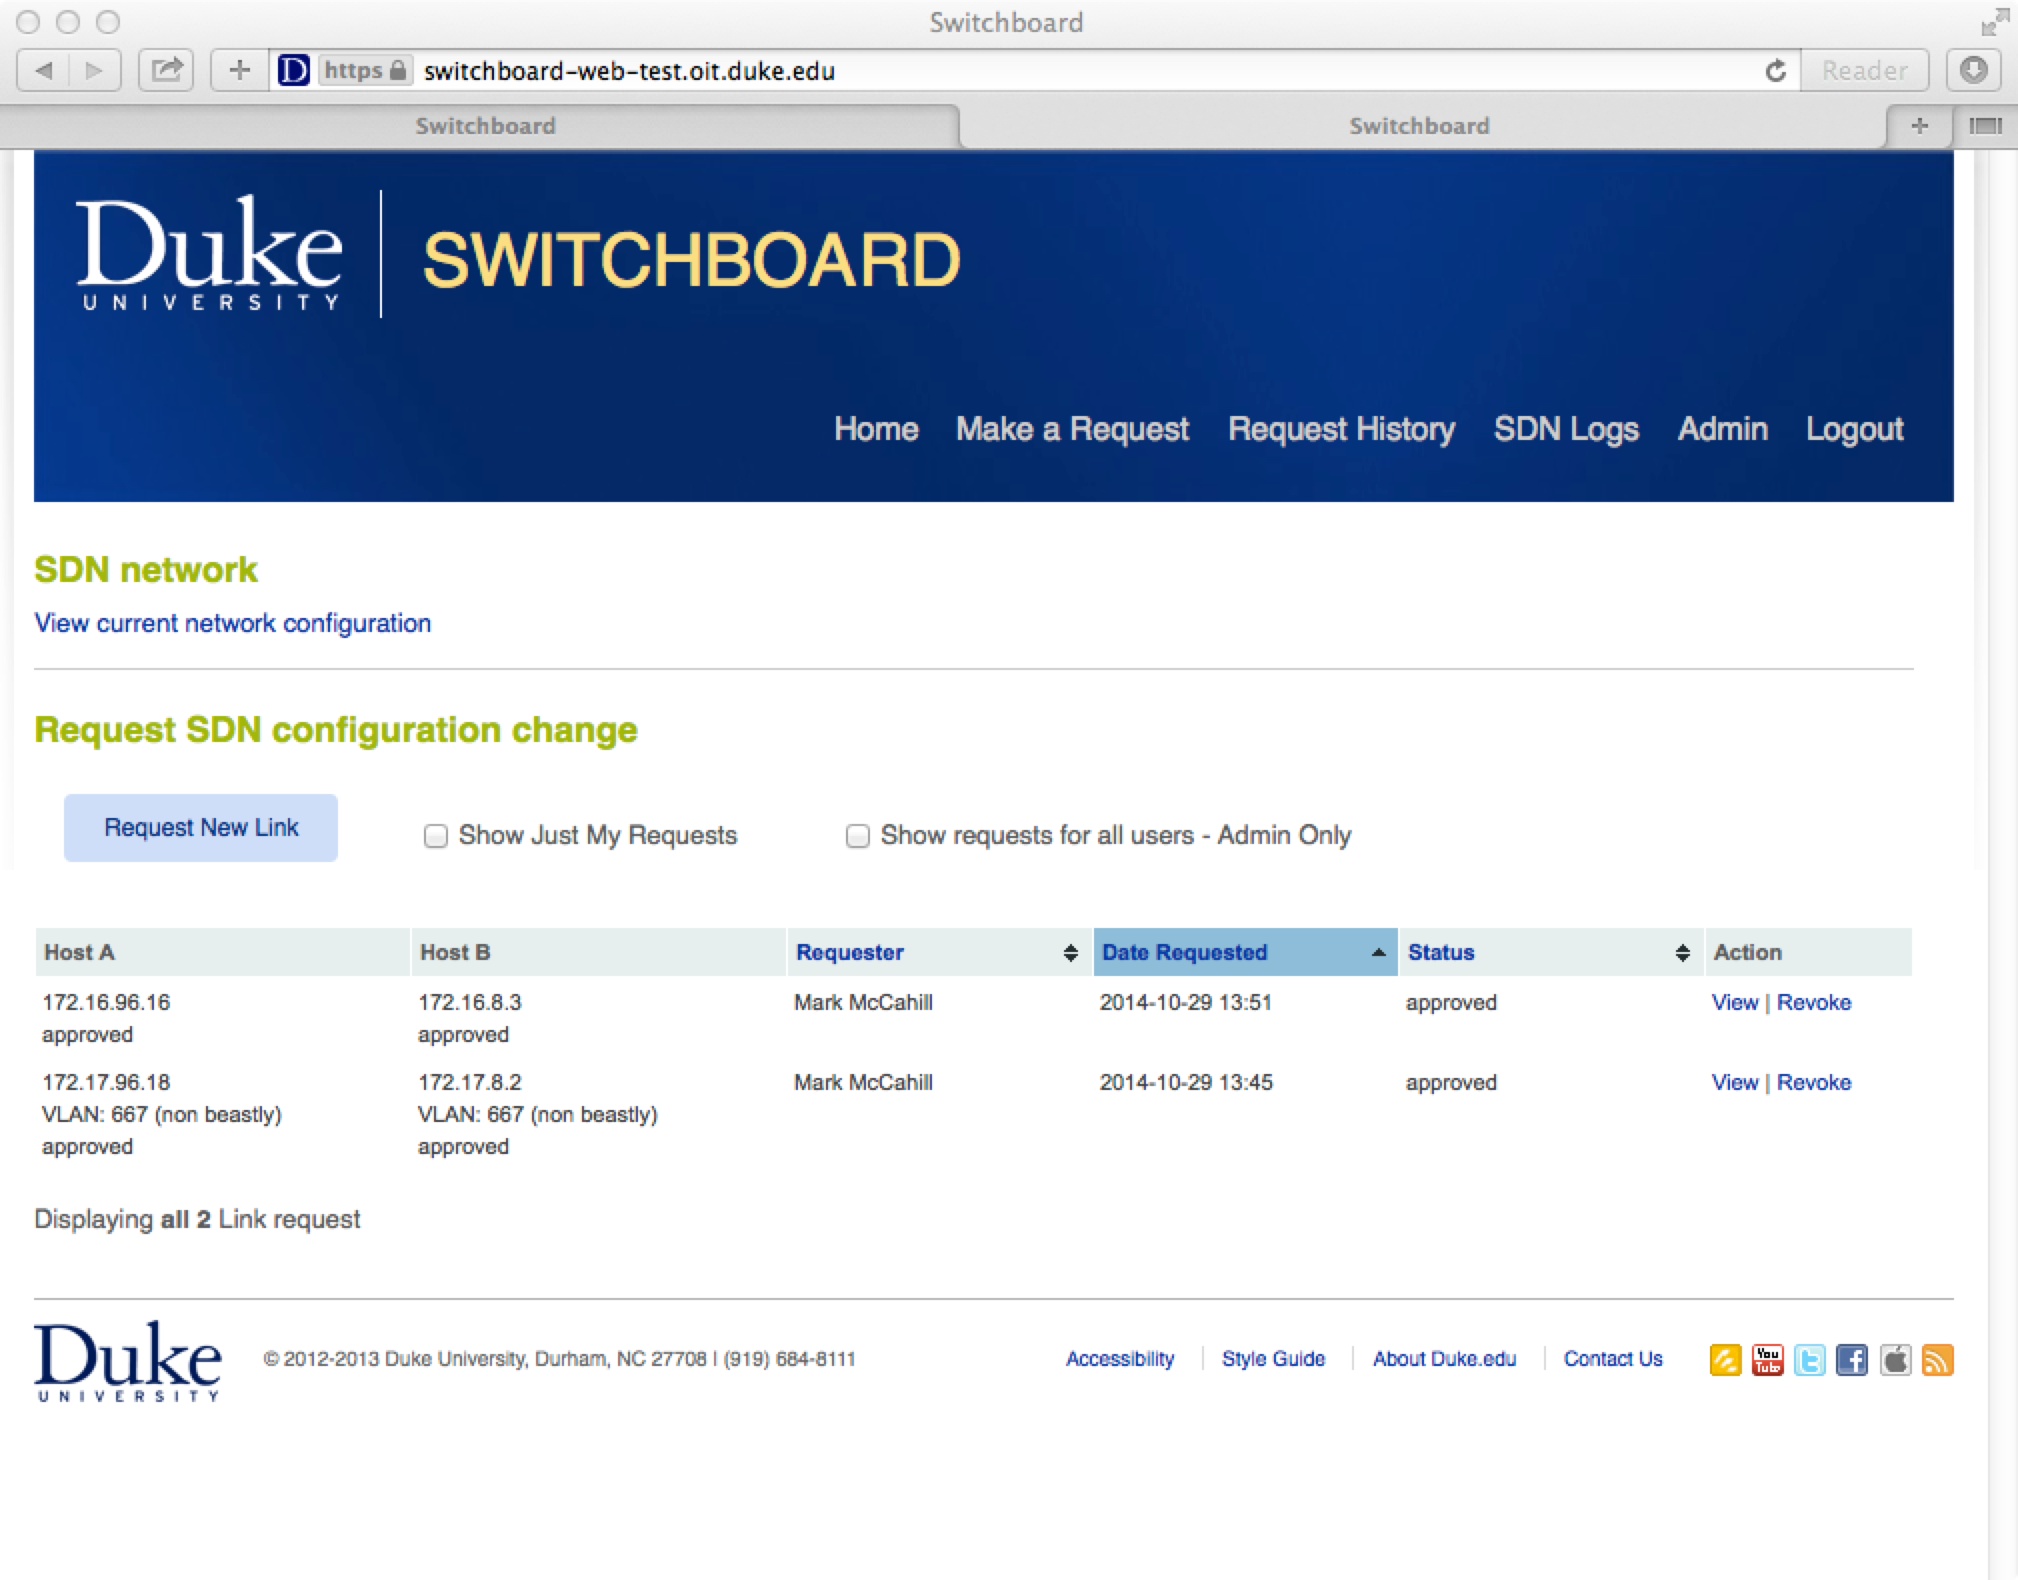
As is traditional, the application asks if you are really sure
Recovering from SDN controller crashes or restarts
Switchboard’s VLAN support would not be complete without support for recover from the loss of the SDN controller. In the event of a crash or reboot, the controller’s state needs to be restored and this includes links that users have requested to be added (or have added and then deleted).
If we restart mininet and the Ryu REST router, our SDN network knows nothing.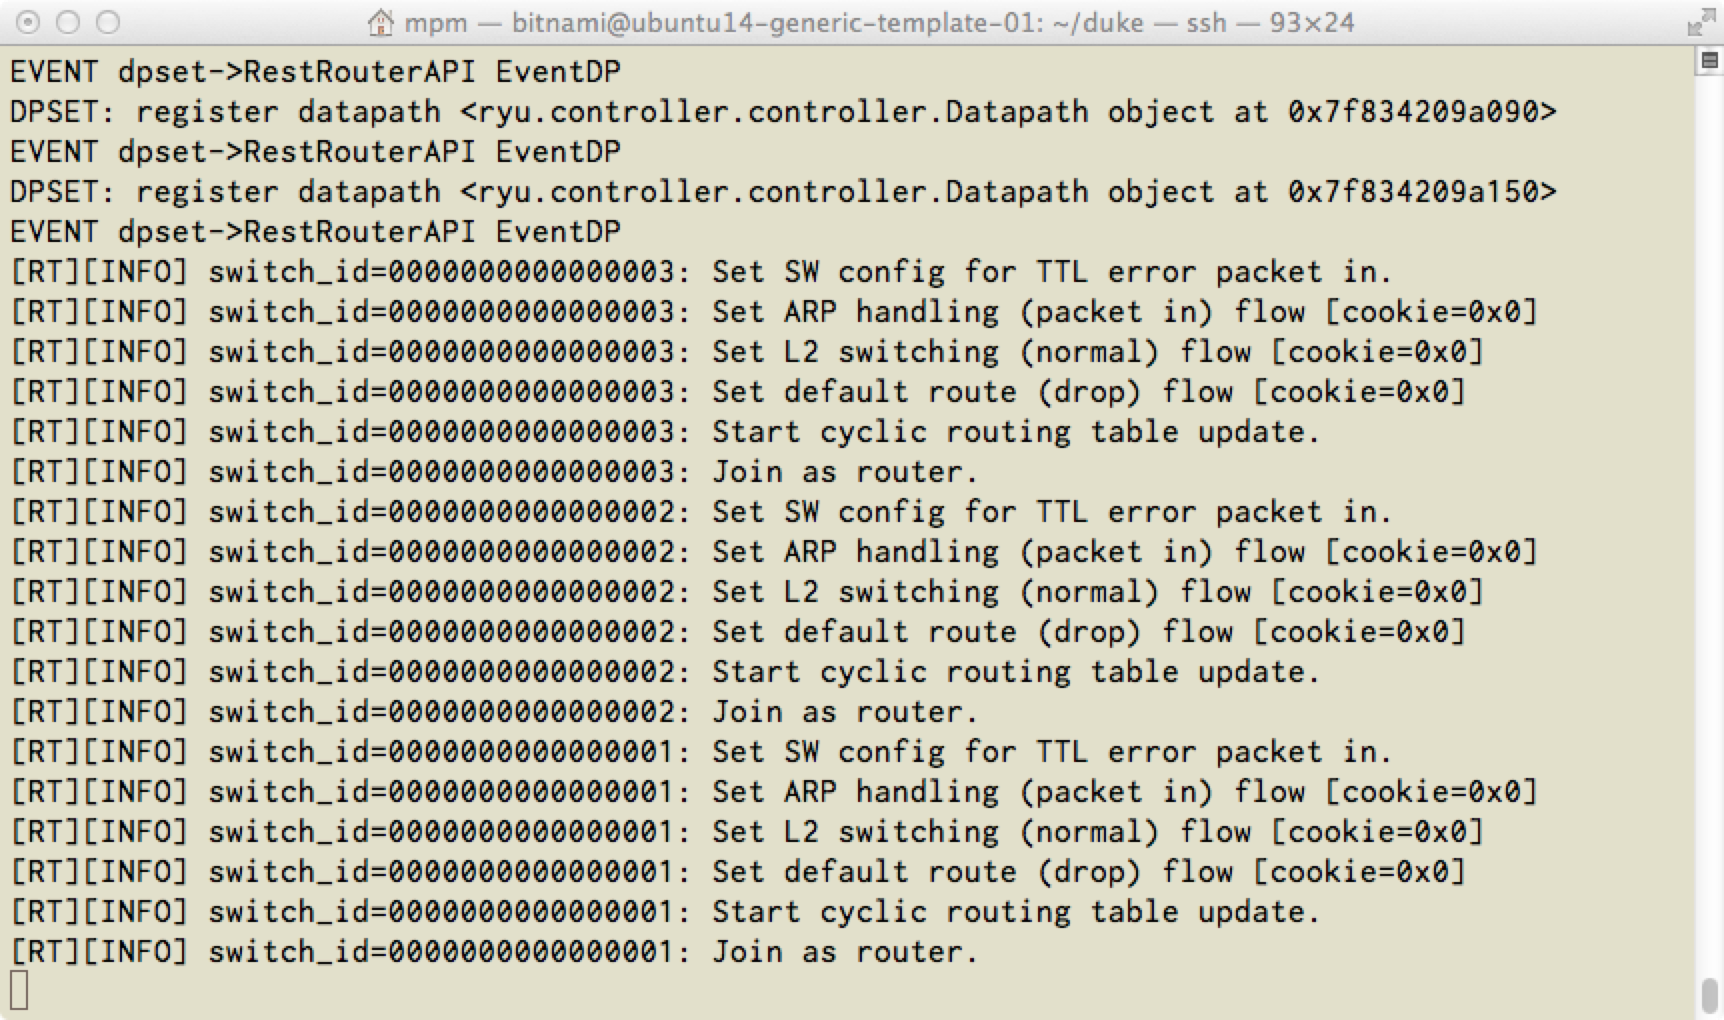
On the Admin page there is a link that will restore the SDN networks state by playing back the commands that have been issued. In production, the script that restarts the SDN controller would call the Switch REST command to invoke this restore state function.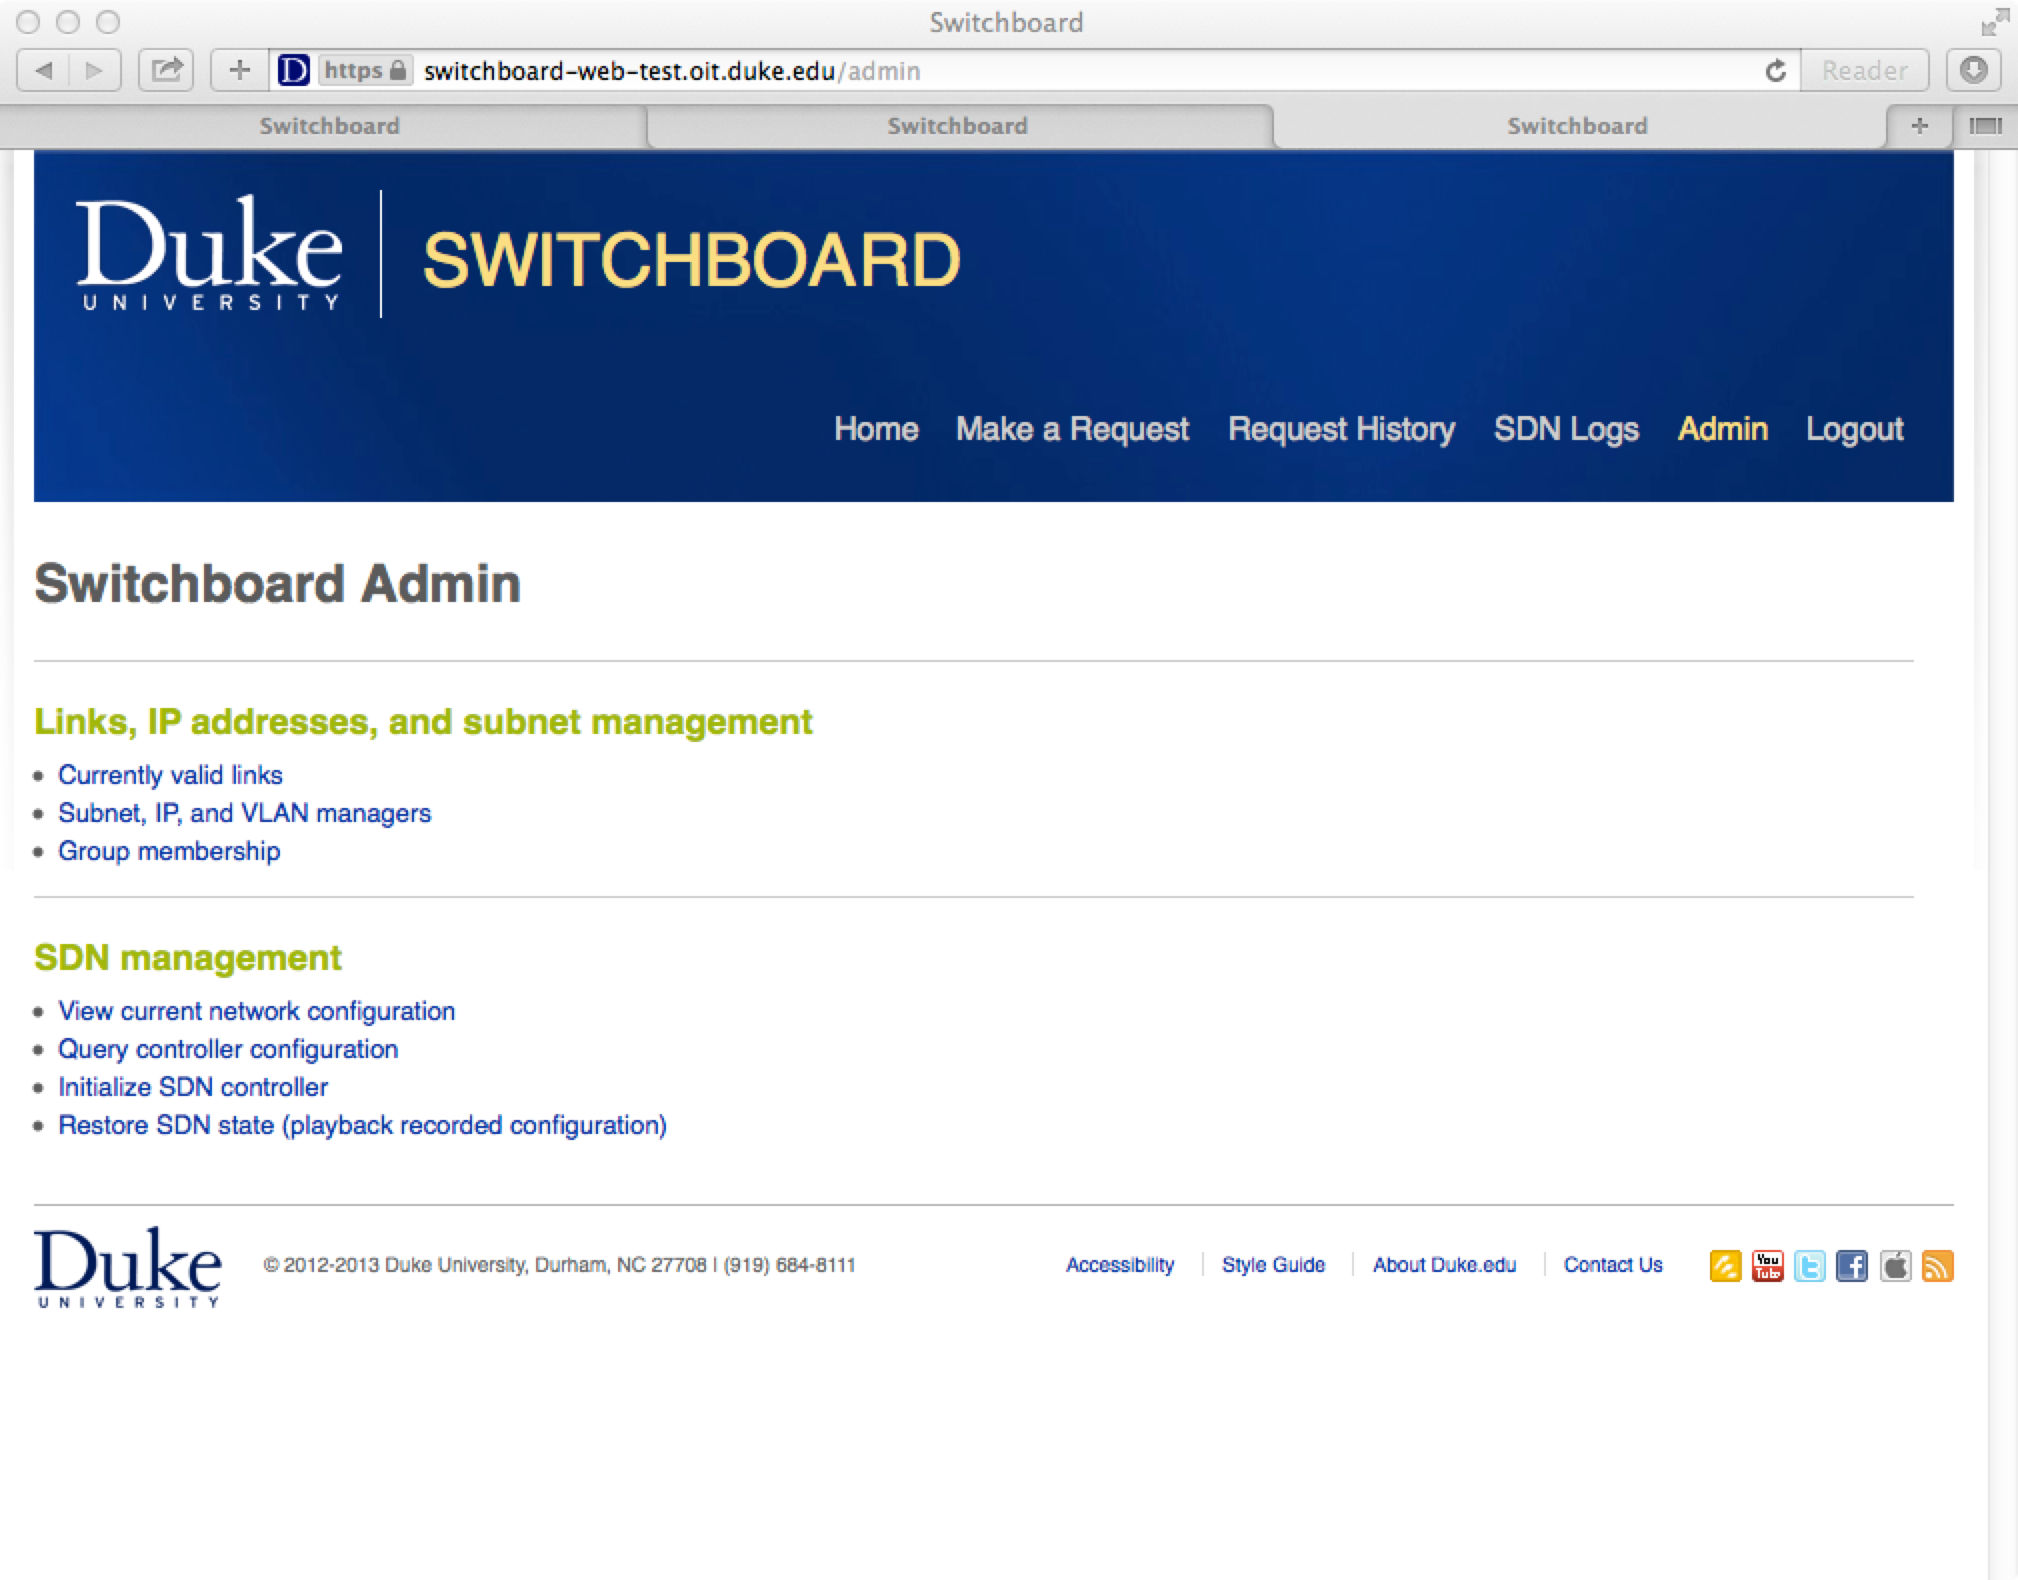
During a state restore, the results for the commands are written to the SDN log. In this screen shot you can see the last few commands that were issued before we restarted the controller — recall that a user revoked a previously active link. The commands that built the link and then deleted are replayed in order to restore state and you can see that they have been replayed here.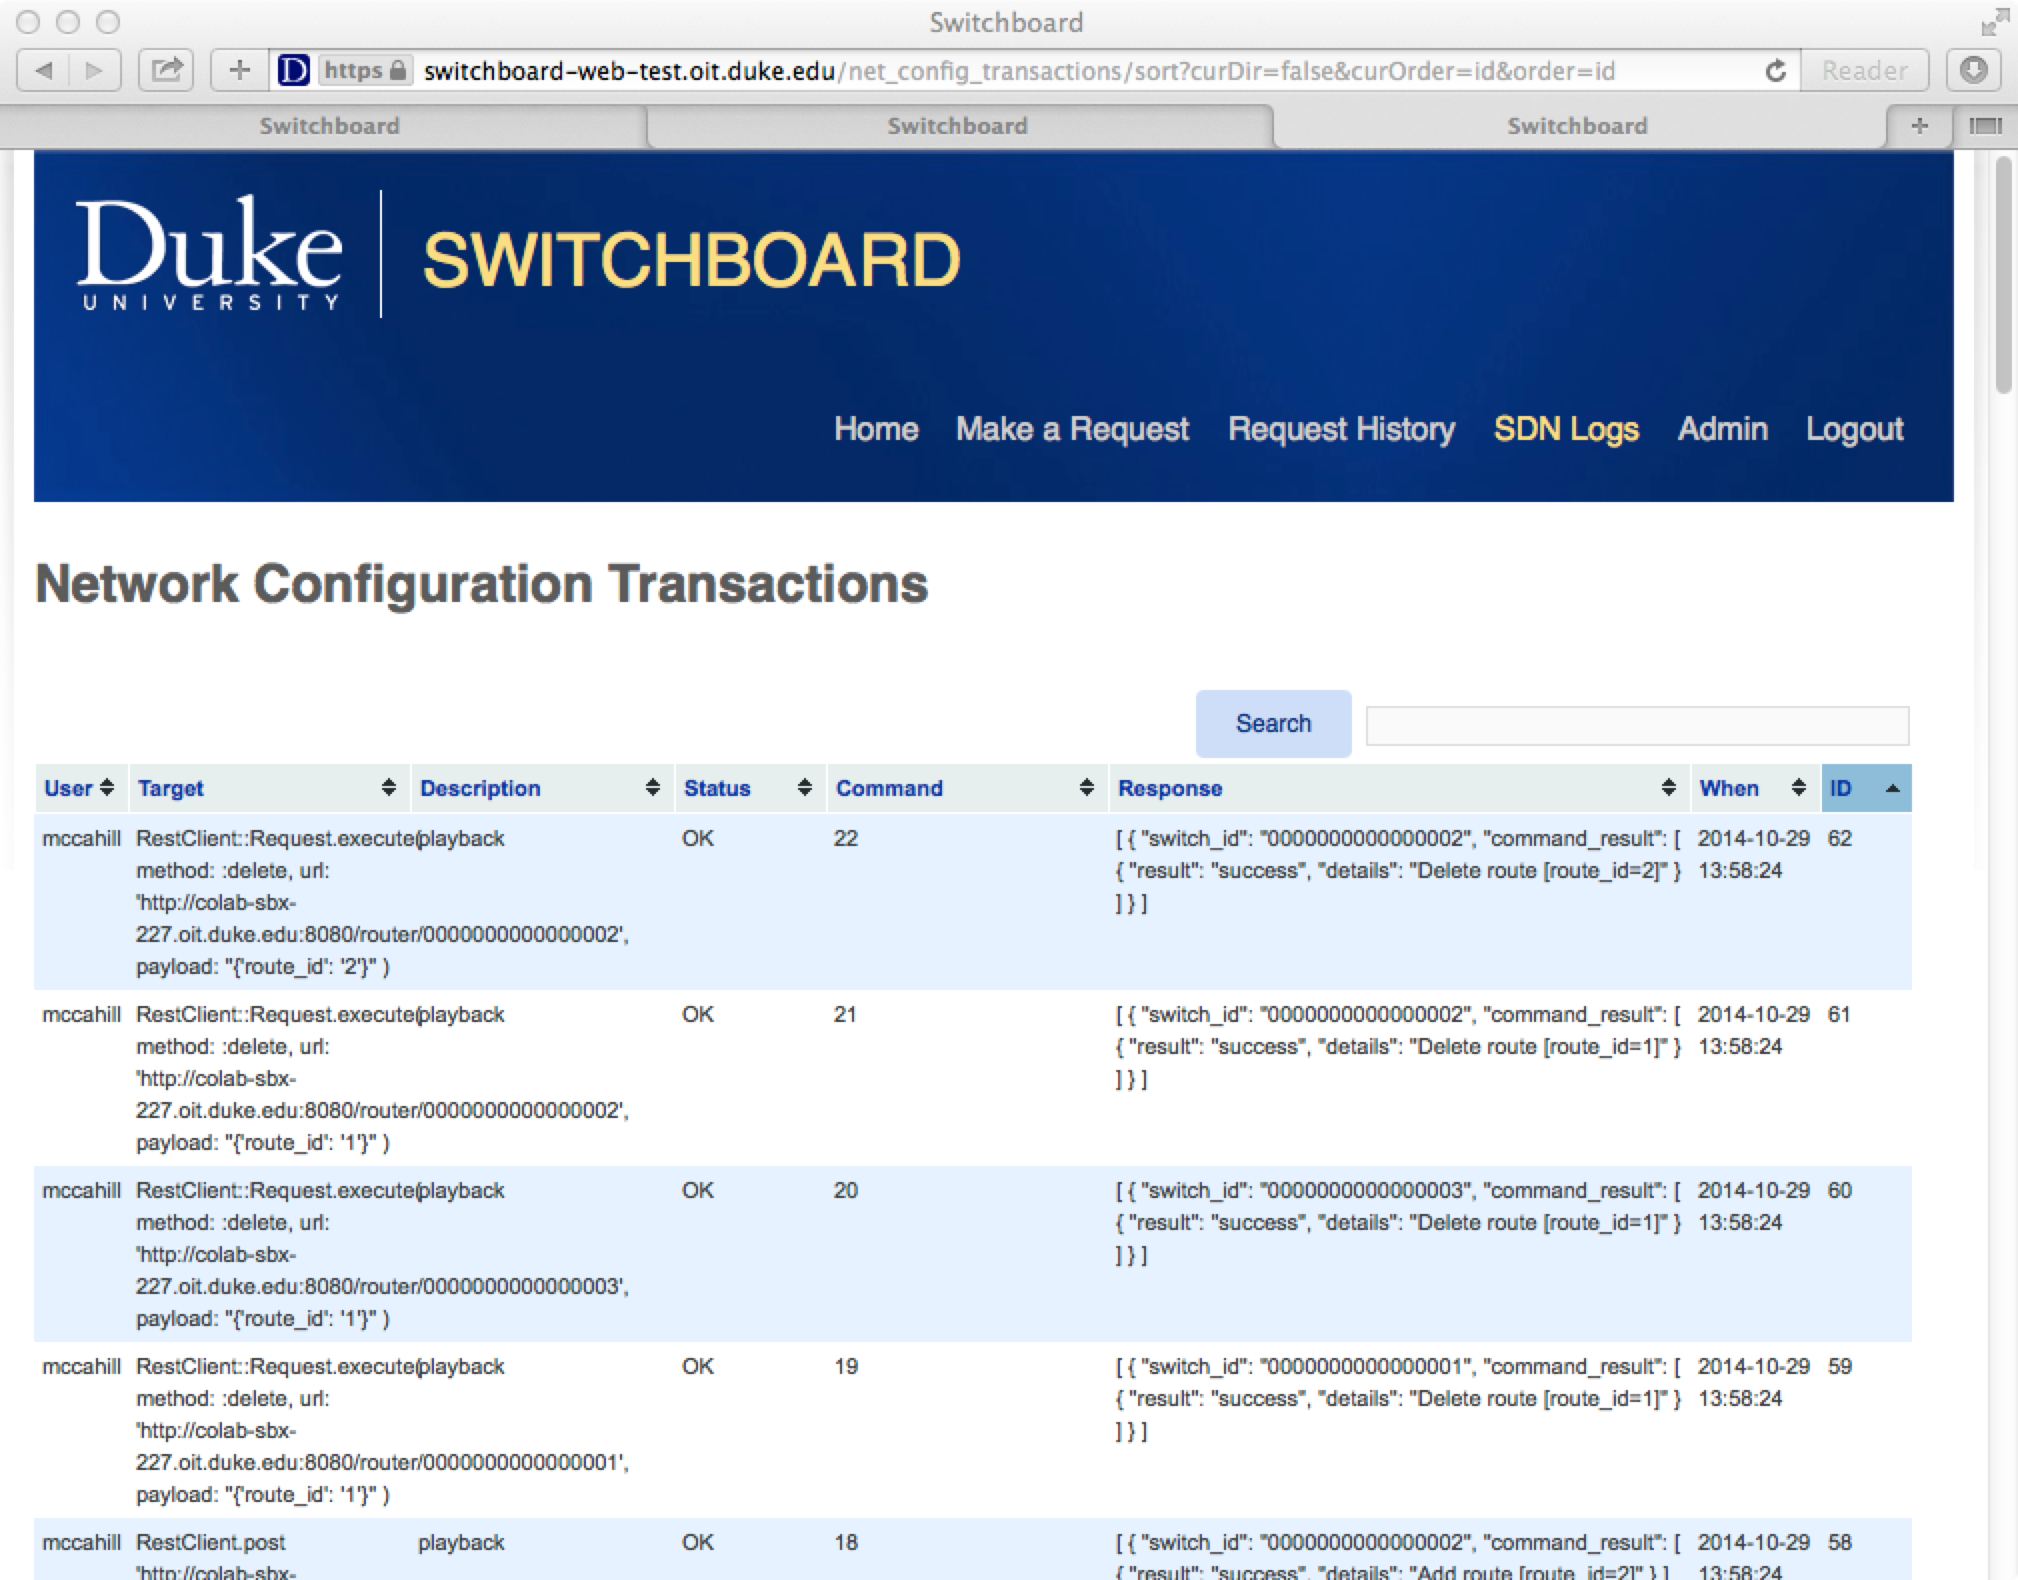
The network is now back to the state it was in before the controller restart – one user-defined link is active for the 667 VLAN.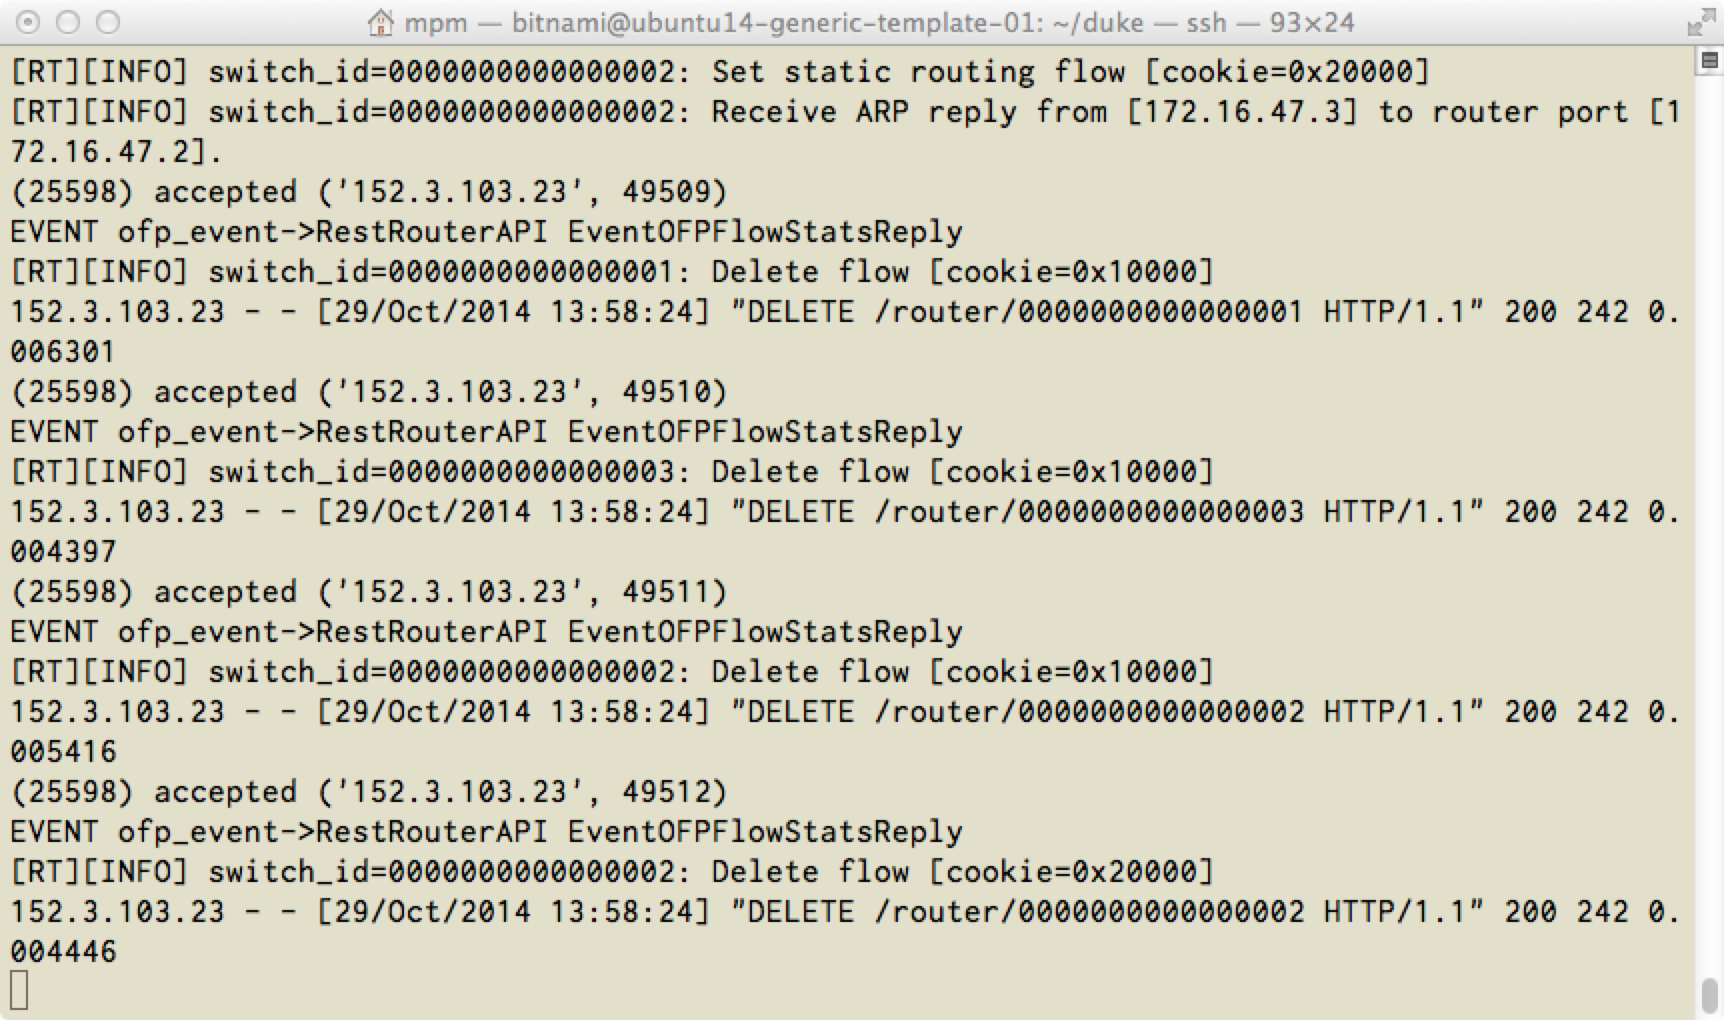
appendix: an EZ-to-build a VM for SDN dev/test
Setup a RYU, mininet, and Openvswitch
To simulate an SDN network, I previously ran the SDNHub.org’s SDNHub tutorial virtual appliance, (found here: http://sdnhub.org/tutorials/sdn-tutorial-vm/) and configured a simulated SDN network using mininet.
However, after I managed to mess up the SDNHub appliance several times,
I decided to build a minimal VM to run only the things I care about. Here is how to build a minimal test environment:
0.) Grab a copy of Ubuntu 14.04
1.) update your Ubuntu 14.04 VM
  % sudo apt-get update

  % sudo apt-get upgrade
2.) install openvswitch
% sudo apt-get install openvswitch-switch
3.) install mininet
% sudo apt-get install mininet
4.) get the python utils you will need to install ryu
  % sudo apt-get install python-pbr  python-py python-six \

     python-oslo.config python-eventlet python-lxml \

     python-netaddr python-paramiko \

     python-routes python-webob python-sphinx python-pip
5.) install ryu from source
  % sudo apt-get install git

  % git clone https://github.com/osrg/ryu.git

  % cd ryu

  % sudo python ./setup.py install
6.) party down – you can now run mininet and Ryu
Hello
Thanks for this project, that is very Good
i need to this project via Ryu Controller and python lang.
you can help me?
Thank you